
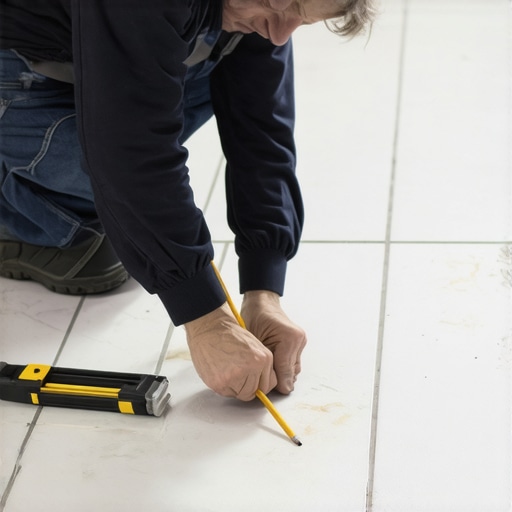
I remember the exact moment I realized I’d been doing it wrong all along—standing in my messy bathroom, tiling the wall, and staring at what should have been a clean, professional finish. Instead, I was faced with crooked lines, uneven grout lines, and a sinking feeling that I would never get this right. That lightbulb moment came when I finally discovered the Pencil Mark Trick—a simple yet game-changing method that transformed my tiling projects from frustrating chaos to satisfying perfection.
Why Small Details Make a Big Difference in Tile Installation
Every professional tile installer knows that the devil is in the details. Seamless lines and uniform rows aren’t just aesthetic choices—they’re practical necessities that affect your entire project’s durability and overall look. But these details often seem daunting to DIY enthusiasts, especially when trying to keep tiles perfectly aligned across large areas. I’ve been there, and I know the struggle. The key is mastering a straightforward technique that keeps everything in check without fancy tools or complicated measurements.
This is where the Pencil Mark Trick shines. It’s an incredibly effective way to mark your starting points and guide your tiles line-by-line, ensuring everything stays straight and level as you go. Honestly, I wish I had learned about this method at the beginning of my tiling journey. It would’ve saved me hours of rework, scrapped tiles, and that nagging self-doubt every time I looked at my crooked rows.
If you’re tired of staring at uneven grout lines or battling with inconsistent tile placement, you’re in luck. Today, I’m going to walk you through how this trick works and share my best tips for applying it to your own projects. Trust me—once you get the hang of it, your tile work will look like a pro’s, even if you’re just starting out.
Question: Is the Pencil Mark Trick Really That Effective? Or Is it Just Another Fad?
Early in my career, I made the mistake of assuming that measuring tapes and straight edges were enough to keep my tiles aligned. But I quickly learned that patience and small guides make all the difference. According to the pros at TileTrendShop, many common installation mistakes come from neglecting simple alignment aids, which can lead to costly rework.
So, yes—this trick is less about fancy gadgets and more about smart planning and attention to detail. Ready to see how it can work for you? Let’s dive into the step-by-step process that will elevate your tile installation game and help you achieve results that stand the test of time and scrutiny.
Establish Your Starting Line with Precise Pencil Marks
Start by choosing a clearly visible wall or floor edge as your reference point. Use a chalk line or straightedge to draw a light guide across the surface—this is your baseline. When I first tried this, I realized that eyeballing the line often led to misaligned tiles. To prevent this, I employed a carpenter’s level along with a pencil to mark a consistent level line, ensuring my tiles would be perfectly aligned across the wall. This initial step is crucial because it sets the tone for your entire layout. {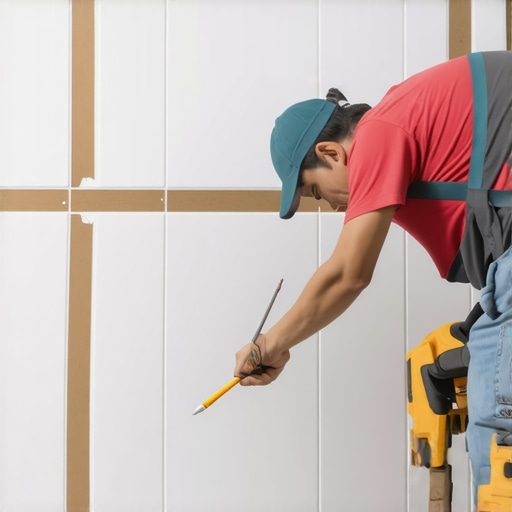 }
}
Transferring the Marks to Your Tiles
Next, place your tiles near the start point without adhesive to determine the best fit. Lightly mark the back of each tile at the points where they meet your baseline line. I recommend using a soft pencil or a washable marker that won’t leave permanent stains. When I did this during my DIY project, I made small, unobtrusive marks that guided me as I laid out the tiles. These marks serve as visual cues to keep subsequent rows in check as you proceed, especially valuable when working with large formats or intricate patterns. For added accuracy, consider snapping chalk lines across the tiles themselves as you progress, which reinforces your initial markings. For detailed guidance, check out how to “installing tiles like a pro” and the importance of careful planning.
Nailing Down the First Row
Carefully set your first row of tiles along the guided marks. Pay particular attention to your spacer gaps and ensure each tile is perfectly flush with your baseline line. I remember adjusting a tile multiple times, using my pencil marks as a reference, to get the tightest fit possible. This makes subsequent rows much easier to align, reducing the risk of crooked or uneven tiles. Use a level to double-check the straightness after placing each tile. This ensures your foundation is solid and prevents cumulative errors from snowballing as you progress. Once the first row is truly set, your markings act as reliable guides for the entire layout. For perfect leveling, it’s wise to refer to “precise floor leveling techniques” that can help you avoid dips and high spots.
Sustaining Accuracy Throughout the Project
As you continue with the rest of the tile work, regularly verify your lines against the initial pencil marks. Use a straightedge or level to check that each new row stays aligned with the baseline. If you notice a deviation, gently tap the tiles into place and adjust your marks accordingly. During my last project, I found that re-marking after every few rows prevented small errors from accumulating into major misalignments. This simple discipline ensures your final surface looks professional and visually cohesive. Keep your pencil marks visible but not distracting, and erase them after grouting to reveal your flawless results. Remember, this trick is about creating a reliable visual guide—don’t rely solely on your memory or eye. Slight adjustments, guided by your initial markings, make all the difference in achieving a seamless appearance. For more tips on perfect tile installation, explore “step-by-step strategies for 2025” and discover how expert installers keep their lines straight from start to finish.Many homeowners and even some DIY enthusiasts assume that following basic guidelines guarantees a perfect finish in tile and flooring projects. However, there are critical nuances that often go unnoticed, leading to costly mistakes and subpar results. One common misconception is that all leveling methods are equally effective. While many believe that a simple self-leveling compound will solve uneven subfloors, in reality, the success depends on precise application and understanding of material behavior, as outlined in expert sources like Mastering Floor Leveling Secrets. Overlooking these details can result in cracks, uneven surfaces, or tiles that pop loose over time.
Another underappreciated aspect is the myth that hardwood and tile installations are interchangeable when it comes to preparation. In truth, each flooring type demands tailored subflooring and moisture barriers to prevent warping or buckling. For example, installing hardwood over concrete without a proper vapor barrier can lead to voids and premature damage, as emphasized in Flooring Longevity Tips.
Advanced installers recognize that the devil is in the details of progress, such as the importance of small adjustments and understanding material limitations. Neglecting these nuances often results in the infamous ‘oops’ moments, like misaligned grout lines or cracked tiles, which can seem minor but compromise the entire project’s durability and aesthetic. Don’t fall for the trap of thinking that quick fixes or shortcuts will provide lasting quality; instead, invest time in understanding the subtle complexities that distinguish a professional job from a hurried DIY.
So, what about the more sophisticated questions? For those looking to refine their craft, understanding how to properly assess and prep a subfloor before tile installation can make or break your project. This requires recognizing signs of moisture infiltration, surface contamination, or structural weaknesses that could cause future problems. A study by industry experts highlights that proper subfloor evaluation and preparation can reduce failure rates significantly, saving both time and money in the long run. Dive into the ultimate guide to floor leveling for advanced strategies.
In sum, mastering tile and flooring installation involves more than just following step-by-step procedures. It demands keen attention to the nuances, myths to dismiss, and common pitfalls to avoid. Have you ever fallen into this trap? Let me know in the comments and share your experiences or questions about elevating your flooring projects.
Keeping It Working: Tools and Techniques for Durability
Long-term success in tile, hardwood, or flooring installation hinges on using reliable tools and adopting precise methods. Personally, I rely on high-quality vibratory surface grinders for preparing uneven subfloors; these not only smooth out high spots but also remove old adhesives efficiently, ensuring a solid base that minimizes future cracking or shifting. As shown in the ultimate guide to floor leveling, proper surface prep is fundamental for durable results. Avoiding cheap tools and investing in a good grinder pays dividends over decades of maintenance-free flooring.
In addition to mechanical tools, I recommend digital moisture meters for monitoring subfloor and slab conditions before laying down adhesives. Persistent moisture problems often cause delamination or warping, especially in hardwood floors. I personally use pin-type moisture meters because of their accuracy, allowing me to tackle issues early—saving me from costly repairs later. Keeping these tools calibrated and understanding their readings is vital; a mistake here can undermine even the best installation.
For leveling, the self-leveling compounds you choose will make or break your project’s longevity. I always opt for a polymer-modified underlayment, which provides superior crack resistance and bond strength. Applying it with a gauge rake ensures consistent thickness, preventing dips or high spots—critical when dealing with large-format tiles or luxury vinyl planks. I learned this from industry experts highlighted in precise floor leveling techniques, emphasizing that proper mixing and application techniques extend the lifespan of your floor.
Thinking ahead, I see an increasing trend toward smart leveling systems integrated with digital sensors that monitor ongoing stress points or moisture levels over time. These innovations will help identify maintenance needs early, preventing large-scale failures. Currently, combining manual tools with digital devices offers the best results, and I encourage DIYers to consider upgrading their toolkit with these tech-savvy solutions.
Sustaining your installation involves regular inspections—checking grout lines, surface flatness, and material conditions. For hardwood floors, I recommend annual refinishing, but only after assessing wear patterns with a good flashlight and visual cues. Equipment such as a high-powered LED flashlight reveals scratches and dips invisible to the naked eye, guiding targeted touch-ups that preserve your investment.
Finally, developing a maintenance routine that includes cleaning with gentle products and avoiding excess water prolongs your floors’ beauty and function. For specific care tips, I turn to resources like hardwood floor care secrets, which detail tailored cleaning practices.
Want to get ahead? Try integrating a digital moisture meter into your next project planning phase. Accurate moisture readings can prevent many installation headaches and ensure your floors stay beautiful for years to come. Remember, investing in the right tools and techniques today saves you time, money, and effort in the future.
Lessons I Wish I Knew When I Started Tiling
- Patience beats speed every time—rushing leads to crooked lines and uneven grout. Taking the extra time to mark precisely and double-check often saved me countless reworks and frustrations.
- Small guides make all the difference—using pencil marks and chalk lines transformed my projects from amateur to professional-looking, proving that attention to detail is everything.
- Don’t underestimate prep—the success of your tile or hardwood depends heavily on thorough subfloor evaluation and proper leveling, a step I learned the hard way after facing cracks and buckles.
- Invest in quality tools—things like a high-quality level, moisture meter, and a good self-leveling compound have consistently delivered better results and saved me money over time.
Tools and Resources That Elevated My Craft
- My digital moisture meter was a game-changer, helping me avoid dampness issues that could cause long-term damage—trust me, accurate moisture readings are worth every penny.
- The ultimate guide to floor leveling provided me with in-depth techniques that turned shaky foundations into solid bases, crucial for lasting results.
- High-quality vinyl pliers and a good tile cutter ensure clean cuts and safe handling, reducing errors and improving the overall finish.
- Books like “Mastering Floor Leveling Secrets” have expanded my understanding beyond the basics, introducing me to advanced tricks that save time and prevent mistakes.
Your Next Step: Make Your Floors Remarkable
With the right mindset and tools, you can turn your flooring projects into works of art that stand the test of time. Every time I completed a project using these insights and resources, I felt an immense sense of achievement—they really transform your space and boost confidence. Now, it’s your turn—don’t wait for perfection, start with clarity and care, and watch your skills grow. How has learning new techniques changed your approach to flooring installation? Share your story below and inspire others to elevate their craft.