
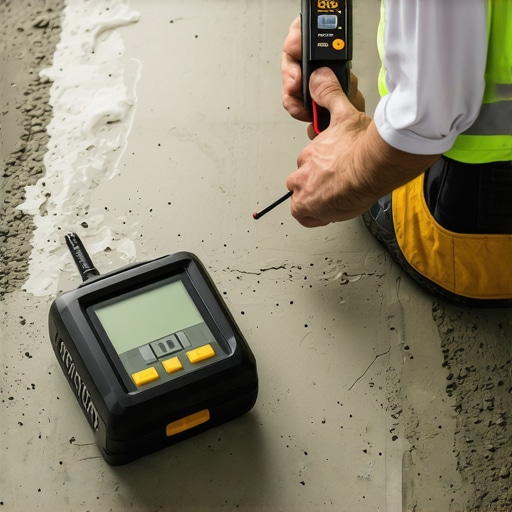
Imagine this: you’re in the middle of a flooring project, tiles nearly set, when you notice a slight wobble. That uneasy feeling creeps in because you know, deep down, that tiny imperfections now could spell disaster later. I remember my first attempt at leveling a concrete slab—thinking I had everything perfectly prepared, only to realize my mistake was overlooking the concrete’s porosity. Turns out, that small oversight could make or break the entire installation.
The Importance of a Simple Test I Wish I’d Known Sooner
We all want our floors to look smooth, seamless, and professional. But before starting any leveling process, there’s a step that often gets skipped—testing the concrete’s porosity. Ignoring this can lead to uneven settling, cracking, or even adhesion failure. I learned this the hard way when my first attempt at floor leveling ended with a lumpy, uneven surface that made me want to tear everything up. What changed? I discovered a straightforward test that reveals how absorbent your concrete is, guiding me to choose the right primer or sealant beforehand. Trust me, this tiny step saves a ton of headaches down the line.
Is the Simple Test for Porosity Worth the Fuss?
Here’s where many skeptics raise an eyebrow—”Is testing concrete porosity really that crucial?” Honestly, I used to think it was just one of those extra steps, not worth the fuss. But after making a costly mistake early in my DIY journey—registering a significant cracking issue that could have been avoided—I realized the value of testing. When I started paying attention to this detail, my projects became smoother, and the need for repairs diminished. Incorporating this simple test using a glass of water or a moisture meter—like the ones recommended for accurate readings—can be the difference between a flawless finish and a disastrous flop. Curious? You can learn more about common pitfalls in floor installation [here](https://tiletrendshop.com/flooring-installation-mistakes-to-avoid-for-lasting-results).
So, if you’ve ever been frustrated by uneven floors after leveling, or just want to get it right the first time, understanding your concrete’s porosity is a game-changer. Now, let’s dive into exactly how to perform this test and prepare your surface for success.
.
Perform the Moisture Test Effortlessly
Start by cleaning your concrete surface thoroughly to ensure accurate results. Pour a generous amount of water—about 10 square centimeters—onto the concrete and observe. A quick absorption indicates high porosity; water disappears within 5–10 minutes, suggesting you need a primer or sealer before proceeding. If the water beads up or remains for a long time, your concrete is less absorbent, and standard bonding agents may suffice.
Choose the Right Testing Method
For quick DIY checks, the water droplet test is effective; however, for precise readings, invest in a moisture meter—think of it as a blood pressure cuff but for concrete. These devices give you a numerical value indicating moisture levels, essential for planning your next step. Remember, ignoring this step can lead toFloors that crack or settle unevenly, similar to building a house on shifting sand.
Document Your Findings and Adjust Plans
Record the porosity level and adjust your preparation accordingly. High porosity concrete will require a penetrating primer that seals the surface—think of it as locking in moisture so your leveling compound can bond properly. For low porosity slabs, a surface-adhering primer or bond enhancer will create a firm foundation for the self-leveling underlayment. When I first tested my basement slab and found it was highly porous, I applied a bonding primer, and the subsequent leveling was smooth and even, eliminating those dreaded lippage issues.
Apply the Primer Correctly
Use a roller or brush to apply the primer evenly, covering all areas. Think of it as painting a wall—you want a thin, uniform coat that penetrates deeply. Allow it to dry completely—usually 1–2 hours or as per manufacturer instructions—before pouring your self-leveling compound. This step acts as a vital barrier, preventing moisture from sinking in and causing future cracks or dips. Remember, a well-sealed surface is the foundation of a flawless finish, much like building a sturdy table before adding the tabletop.
Verify the Surface Readiness
Before pouring your leveling compound, perform a quick water test again or use the moisture meter to ensure the concrete is dry enough. An excessively moist slab can cause your floor to develop bubbles or cracks over time. The last time I skipped this step, I ended up with a lopsided floor that took hours of grinding to fix—so don’t skip your testing phase.
Many homeowners and even DIY enthusiasts believe that selecting the right tile or hardwood is enough for a stunning, durable floor. However, one of the most overlooked aspects is understanding the nuances behind proper installation techniques and material choices. Contrary to popular belief, more expensive materials don’t always guarantee flawless results if the installation process is flawed. For example, a common myth is that self-leveling underlayment can correct all subfloor imperfections automatically. In reality, even the best leveling compounds require meticulous surface preparation and understanding of their limitations to avoid issues like cracking or uneven settling. This is why mastering techniques like precise floor leveling and substrate assessment is crucial for longevity and aesthetic appeal—it’s not just about the materials but how you use them. In fact, skipping these detailed steps can lead to costly repairs and dissatisfaction down the line, as highlighted in expert studies emphasizing the importance of proper subfloor evaluation before tile or hardwood installation. One trap to watch out for is relying solely on visual cues; always verify with moisture meters or other diagnostic tools to prevent future buckling or mold problems. Wondering how to identify subtle subfloor issues or how specific materials interact? Check out this advanced guide on floor leveling pitfalls and solutions. Remember, the devil is in the details—so investing time in understanding these hidden aspects can make the difference between a mediocre and a spectacular floor. Have you ever fallen into this trap? Let me know in the comments.
Maintaining your floors beyond initial installation requires the right tools and a proactive approach. One of my go-to pieces of equipment is a high-quality moisture meter, which I personally use to monitor subfloor stability over time. This device provides real-time data, ensuring your surface remains dry and stable, preventing issues like warping or cracking. Regular checks, especially in basements or areas prone to humidity, help catch problems early. For deep cleaning, I recommend a microfiber mop combined with pH-neutral cleaners, as harsh chemicals can damage finishes. A soft-bristled brush is essential for grout maintenance, preventing stains and mold buildup. Tip: Investing in a digital tracking app for maintenance logs keeps you organized, reminding you when to re-seal surfaces or check for wear. As trends evolve, so do the tools; advanced sensing devices are now integrating IoT features, allowing remote monitoring of floor conditions. Looking ahead, I predict smarter, connected tools will become standard, making floor upkeep more precise and less labor-intensive.
How do I maintain hardwood and tile floors over time?
Consistent inspection is key. For hardwoods, regular refinishing with 2025’s recommended low-VOC finishes preserves their luster. Tile floors benefit from periodic grout sealing—latest formulations last longer and resist stains better. Always avoid hurried repairs; instead, follow protocols like cleaning grout with specialized haze removers, referenced here, for best results. Remember, establishing a routine using these tools and techniques prolongs your flooring’s life, prevents costly repairs, and keeps your home looking its best. Learn more about avoiding common installation pitfalls and maximize your flooring investment. Don’t hesitate—try integrating a moisture meter check into your monthly maintenance plan to safeguard your floors against hidden moisture issues and secure long-term durability.
Lessons That Changed My Approach to Flooring
One of the most eye-opening lessons I encountered was realizing that every concrete slab has its own personality—some absorb moisture like a sponge, while others resist water entirely. Recognizing this early on prevented costly mistakes and led me to tailor my prep work for each project, saving hours of remedial work later. Additionally, I learned that diligently testing subfloor porosity isn’t just a technical step—it’s a game-changer that can determine whether your floor will stand the test of time or develop issues down the line. These