
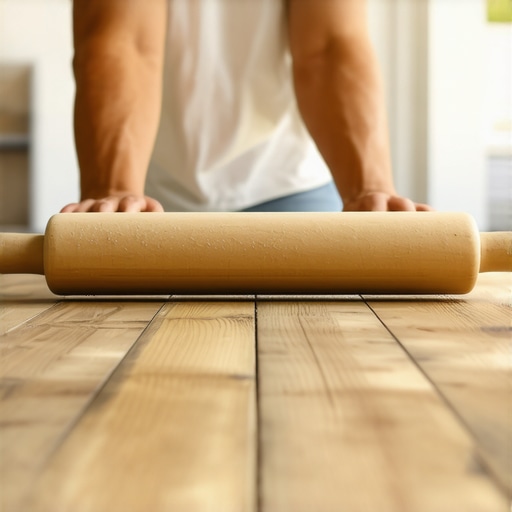
It was a morning like any other when I cracked open my vinyl plank box, eager to finally give my living room a fresh new look. But as I unboxed the planks and began laying them down, I noticed something odd—uneven seams and tiny bubbles forming almost immediately. Frustration set in as I realized I’d skipped a crucial step, and the project that was supposed to be a weekend refresh was turning into a headache. That lightbulb moment hit me hard: always, always use a rolling pin when installing vinyl planks. Since then, I’ve learned firsthand how essential this simple tool is for achieving a flawless finish. Today, I want to share why this tip can make or break your flooring install and how you can avoid common pitfalls.
The Hidden Power of a Rolling Pin in Flooring Installation
At first glance, a rolling pin might seem too basic or even unnecessary for flooring work. I used to think that way too, until I watched a professional walkthrough where they emphasized applying even, consistent pressure across each row of vinyl planks. That’s when I realized the importance of exerting controlled pressure to seat the planks properly and eliminate air pockets or gaps. Using a rolling pin isn’t just about applying pressure; it’s about ensuring every plank adheres securely, resulting in a sleek, uniform surface. This small addition to your installation routine can dramatically improve your results, saving you time, effort, and the need for costly fixes later on. If you’re tired of battling uneven surfaces or worried about lippage, then keep reading—I promise we’ll cover exactly how and why a rolling pin works wonders, and I’ll share some insider tips based on my own missteps along the way.
Applying Uniform Pressure for Seamless Floors
Start by pre-cutting all your planks to ensure accurate fitting. When placing each plank, press firmly and evenly along its length using a rolling pin. Think of this process like kneading dough; consistent pressure helps eliminate air pockets and creates flat, tight seams. I recall a project where I skipped this step, resulting in gaps that became visible over time—using the rolling pin would have prevented that. Place each plank, then roll from one end to the other, applying steady pressure for about 10 seconds. This method ensures the adhesive bonds properly and the planks sit flush.
Choosing the Right Rolling Pin and Technique
Use a smooth, heavy-duty rolling pin, similar to those used in baking but with a durable core. Opt for a size that comfortably covers the width of your planks—typically 10 to 12 inches. When rolling, start from the center and gradually move outward, maintaining consistent pressure without pressing too hard or unevenly. My favorite tip? Wrap a piece of cloth around the handle for better grip and control, especially when working on vertical surfaces or in tight corners. This technique not only speeds up installation but also ensures a professional-looking finish that resists gaps and bubbles.
Dealing with Curves and Hard-to-Reach Areas
For edges, corners, or tricky joints, combine the rolling pin with a hand roller or small weight to apply focused pressure. This helps seat complex joints tightly, preventing movement or separation. During one renovation, I used a small rubber wheel roller along with the rolling pin on a curved wall, which dramatically improved the seam quality. Remember, the goal is to replicate the even pressure of a professional installer, ensuring your floor looks impeccable and lasts for years. Mastering this step is crucial—it’s like setting the foundation of a sturdy building, affecting every subsequent layer of your flooring project.
From Messy to Masterpiece: My Personal Lesson
Once, I tried to rush the process, skipping the rolling step altogether. The result was a mess of bubbles and uneven seams. I had to lift the affected planks and redo sections, wasting time and materials. Since then, I incorporated the rolling pin into my routine, and my results improved exponentially. Now, I see the difference every time I walk into a well-installed floor—smooth, seamless, and flawless. If I had known earlier how vital this simple tool is, I would have saved myself that headache. Incorporate this technique consistently, and you’ll be amazed at how professional your floors look without professional help.
Many DIY homeowners and even seasoned pros often get caught up in misconceptions when it comes to floor leveling, tile, and hardwood installation. One widespread myth is that a perfectly level subfloor isn’t critical, but in reality, even slight deviations can cause long-term issues like cracking, squeaking, or uneven surfaces. Overlooking these nuances can lead to costly repairs down the line. For example, some believe that using a basic leveling compound without proper prep is sufficient, but experts emphasize the importance of thorough surface cleaning and moisture testing—more on this at https://tiletrendshop.com/why-your-leveler-is-still-soft-after-three-days. A common mistake is assuming that all leveling products perform identically; however, selecting the right type—self-leveling underlayment versus trowel-applied mortar—depends on your specific subfloor conditions. Misunderstanding this can result in inadequate adhesion or surface cracking.
Another trap to watch out for involves tile installation. Many assume that a grout line’s width can be arbitrarily chosen, but inconsistent grout spacing affects not just aesthetics but also structural integrity. In advanced projects, understanding the interplay between substrate movement and expansion joints is vital; read more on proper techniques at https://tiletrendshop.com/precise-floor-leveling-techniques-to-achieve-flawless-surfaces. Additionally, applying thinset uniformly is often underestimated; uneven spots can lead to lippage and tile cracking as the floor settles. This is why meticulous troweling techniques and proper mixing are non-negotiable.
Ever wondered about the real importance of subfloor prep beneath hardwood? Many underestimate moisture levels or ignore the presence of existing adhesives, risking cupping or buckling. A nuanced point is that hardwood expansions vary with humidity, making climate considerations essential—see https://tiletrendshop.com/elevate-your-space-choosing-the-right-hardwood-floors-for-your-home for expert guidance.
Fascinatingly, the flooring industry now recognizes that the existing myths about quick fixes are just that—myths. In expert circles, the focus is shifting toward detailed surface testing, substrate stability, and gradual acclimation of materials. Understanding these advanced nuances can prevent common pitfalls and result in a durable, high-quality finish.
So, next time you start a project, remember that a little extra knowledge about these subtleties can save you headaches later. Always verify your subfloor’s condition, choose the right products, and invest time in proper preparation. Have you ever fallen into this trap? Let me know in the comments!Achieving professional-grade flooring results doesn’t end once your installation is complete; maintaining your floors and having the right tools are crucial for long-term durability and aesthetic appeal. A key piece of equipment I personally rely on is a high-quality floor scraper with replaceable blades. This tool is indispensable when removing old adhesive or debris without damaging your new surface. Additionally, I recommend investing in a digital moisture meter, such as the Tramex CME5, which provides accurate readings to prevent moisture-related issues like buckling or mold—common pitfalls when managing subfloor conditions. Regularly inspecting and cleaning your flooring with gentle, pH-neutral cleaners helps preserve finish and prevent buildup that can lead to premature wear. For hardwood floors, applying a rejuvenating finish every few years with a microfiber mop and appropriate polish can restore shine and fill minor scratches, extending the life of your investment. Looking ahead, advances in sensor technology may introduce smart coatings that self-heal or monitor structural integrity in real time, transforming maintenance from reactive to proactive. To keep your floors in top shape, establish a routine of annual inspections, focusing on looking for gaps, dents, or moisture intrusion. How do I maintain my flooring over time? I make it a habit to perform seasonal cleanings, check for signs of movement, and address issues promptly to prevent costly repairs. Combining proper tools with consistent upkeep ensures your flooring remains a beautiful and functional feature in your home for decades. For more detailed guidance on maintaining your specific flooring type, explore expert tips at [Mastering Hardwood Floor Refinishing](https://tiletrendshop.com/mastering-hardwood-floor-refinishing-expert-tips-for-2025). Don’t underestimate the power of a well-maintained floor—try implementing a quarterly cleaning schedule with the right equipment today and see the difference in longevity and appearance.
Lessons That Changed My Approach to Floor Installation
One of the most valuable insights I gained was the importance of patience and attention to detail. Rushing through the process often leads to mistakes that aren’t immediately visible but manifest over time, such as gaps or bubbles. Taking the time to properly prepare the subfloor, use the right tools like a rolling pin, and double-check measurements ensures a lasting, flawless finish. I also learned that even the most seemingly simple steps, like applying consistent pressure, can differentiate a professional-looking floor from a DIY disaster. This realization motivated me to refine my techniques and embrace thoroughness in every part of the installation process.
Another lightbulb moment was understanding that knowledge about materials makes a difference. For example, choosing high-quality vinyl planks with proper adhesive backing and understanding the best way to bond each row can prevent future issues. I discovered that reading manufacturer instructions carefully and not cutting corners during prep work significantly reduces rework and costs. These lessons taught me that investing time upfront pays dividends in the longevity and appearance of your floor, turning a once frustrating project into a rewarding achievement.
Finally, I recognized the importance of continuous learning. Following industry experts, reading detailed guides, and practicing techniques like pressure application have helped me improve with each project. For anyone tackling vinyl plank flooring, I recommend embracing patience, investing in quality tools, and staying open to new methods. The difference between a mediocre floor and a stunning, professional finish is often determined by these small, deliberate steps that many overlook. Remember, mastering flooring installation is a journey—one worth every effort for the lasting beauty in your home.