
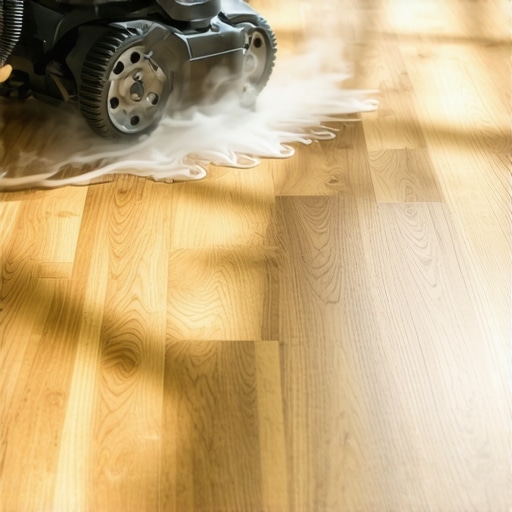
It was a Friday afternoon, and I was eager to give my living room a quick refresh. I grabbed my trusty steam cleaner, thinking it would make quick work of the muddy footprints my kids tracked in earlier that day. But as I glided the device over my engineered hardwood, I instantly heard a faint creak—a sound that sent my heart racing. Moments later, I noticed a subtle warp forming at the edge of a plank. That was my lightbulb moment: I had just unknowingly jeopardized my beautiful floors.
Protect Your Investment Before It’s Too Late
Engineered wood floors are prized for their durability and natural beauty, but they also come with specific care requirements. Many homeowners, like I once was, assume that any steam cleaning device is safe. Spoiler: it’s not. The high heat and moisture from steam cleaners can cause swelling, warping, or even buckling of these delicate layers. My mistake taught me a vital lesson—precisely why understanding how to care for hardwood and engineered floors is essential for longevity and aesthetic appeal.
Is Steam Cleaning Actually Worth the Hype?
Initially, I thought, “Why not? It’s quick, effective, and seems harmless.” However, I soon learned that the intense heat can penetrate the layers of engineered flooring, leading to irreversible damage. In fact, experts warn that excessive moisture and heat can compromise the adhesive layers holding the planks together. For more on this, check out [this detailed guide](https://tiletrendshop.com/why-you-should-never-use-a-steam-mop-on-engineered-wood-2) which explains the science behind why steam is a foe rather than a friend.
Early on, I made the mistake of using traditional mops and harsh chemicals, thinking that cheaper cleaning methods would suffice. But those practices can also harm the finish and reduce the lifespan of your floors. That’s why I now swear by proper cleaning routines tailored specifically for engineered wood. If you want to avoid costly repairs and maintain your floors’ shine, it’s worth investing time in learning the right techniques—something I wish I had done from the start.
As we proceed, I’ll share the best practices to keep your hardwood or engineered floors looking flawless without risking damage. After all, protecting your floors isn’t just about appearance; it’s about preserving the value of your entire space.
Prepare Subfloor Thoroughly
Start by removing all furniture and debris from the area. Sweep and vacuum to eliminate dust, which can compromise leveling compounds. Inspect the subfloor for damage or moisture issues; address any problems before proceeding. Use a moisture meter to ensure the subfloor moisture content is suitable for the type of flooring you’re installing, following guidelines in this comprehensive guide.
Identify and Address High and Low Spots
Use a long, straight leveling tool or a laser level beam to spot uneven areas. Mark these points clearly. For low spots, you might need to add a leveling compound or sand to build up the surface. High spots can be sanded down carefully for a smooth finish. I once marked uneven areas with a chalk line and used a floor grinder to remove high spots, achieving a flat surface that saved me hours during tile installation.
Apply Self-Leveling Compound Effectively
Mix the self-leveling underlayment according to the manufacturer’s instructions. Pour it onto the lowest point of the subfloor first, working your way across the entire space. Use a gauge rake or serrated trowel to spread the compound evenly, forcing it into low spots. Don’t rush; allow adequate drying time, which varies by product, typically 24 to 48 hours. Remember, precise techniques ensure a level surface for the best results.
Slope When Necessary for Drainage
If the floor is in a bathroom or kitchen, establishing a slight slope toward drains prevents water pooling. Use a laser level to set a consistent incline, typically 1/4 inch per foot. Mix and pour the leveling compound in sections, guiding the slope with a trowel. I once had to create a gentle slope in a shower area, which required meticulous work and multiple passes to prevent water retention.
Finish with Final Checks Before Installing
Once the compound is dry, recheck the surface with a long straight edge or laser level. Touch up any low spots by applying additional compound and smoothing them out. Lightly sand any uneven areas to enhance the flatness. This extra step prevents issues like tile cracking or uneven hardwood floors down the line. For more detailed methods, consult floor leveling mastery tips.
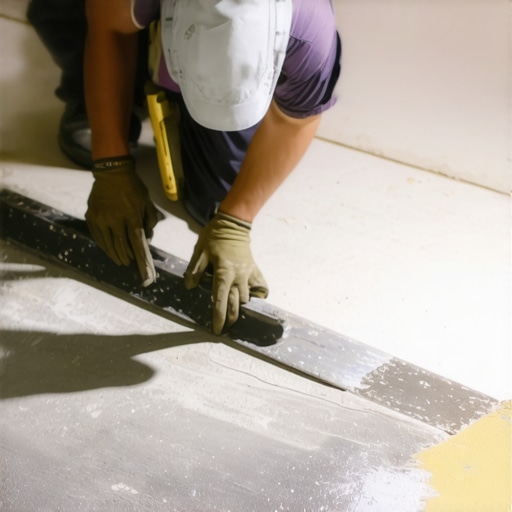 While many homeowners focus on the visible aesthetics of their floors, the true art of flooring lies beneath the surface. A prevalent myth is that a perfectly level subfloor isn’t critical—yet, neglecting subtle undulations can lead to long-term problems like tile cracking or squeaky hardwoods, as discussed in mastering floor leveling. Advanced installers know that the devil is in the details: even minor high spots or low spots can compromise the entire project. Common mistakes include relying solely on visual cues without using precise tools like laser levels or moisture meters, which can mislead even experienced DIYers. For example, a study by the National Wood Flooring Association emphasizes that a flat, dry surface reduces finish issues and increases longevity.
Many believe that traditional leveling compounds suffice for all situations, but in reality, the choice of product and application technique matters immensely. Using a self-leveling compound with insufficient dry time or improper mixing can create hidden weaknesses, not apparent until years later when tiles crack or grout joints open. It’s crucial to follow manufacturer instructions meticulously or risk ‘oops’ moments that threaten your flooring’s durability.
What about the assumption that the perimeters don’t require extra attention? Actually, many sophisticated installers recognize that perimeter gaps and expansion joints are vital, particularly in large areas. Without these, thermal expansion can cause buckling or warping. Hence, proper planning includes not just leveling but also accounting for movement, which is often overlooked in DIY projects.
Let’s not forget the importance of assessing moisture levels, especially over concrete slabs. A small oversight here can result in mold growth, floor cupping, or delamination over time. Using a calibrated moisture meter, as recommended in ultimate guide to floor leveling, helps identify potential issues before they escalate.
For those venturing into complex installations, consider the nuance of substrate compatibility. Not all leveling methods work equally on plywood, concrete, or old vinyl overlays. Incorrect application can trap moisture or introduce instability. The key is understanding the substrate’s nature and selecting tailored solutions—something seasoned professionals master with experience.
To wrap up, the hidden nuance in flooring installation is that success depends on meticulous preparation, precise measurement, and understanding material behaviors—not just choosing the right tiles or hardwood. Skipping these steps or underestimating their importance often leads to costly repairs down the line. For comprehensive strategies on avoiding pitfalls, explore common flooring mistakes and ensure your project stands the test of time. Have you ever fallen into this trap? Let me know in the comments.
How do I maintain my flooring tools over time?
Investing in quality tools is the first step toward achieving professional results and ensuring longevity. I personally rely on a high-grade laser level, such as the Bosch GLL 3-80, because its accuracy and durability make it indispensable for verifying floor flatness during installation and maintenance. A reliable moisture meter, like the Protimeter Surveymaster, helps monitor subfloor conditions before and after work, preventing costly surprises related to humidity fluctuations. These tools save me hours by giving precise readings, reducing guesswork, and improving the overall quality of the project.
Cleaning and proper storage extend the life of your equipment. After each use, I wipe down tools with a damp cloth, avoiding harsh chemicals that might degrade sensitive components. Regular calibration of laser levels and moisture meters is essential; I schedule annual checks to maintain accuracy, referencing manufacturer calibration instructions or professional calibration services.
What methods do I use for flooring maintenance and long-term results?
Once installed, floors require routine upkeep tailored to their material. For hardwood floors, I use a microfiber mop combined with specially formulated cleaning solutions, like those recommended in hardwood floor care secrets. This approach preserves the finish and prevents scratches. For tiles, sealing grout lines periodically with high-quality sealant protects against staining and moisture intrusion, extending the usability and aesthetic appeal of the surface.
Long-term results also depend on controlling environmental factors. Maintaining steady humidity levels, ideally around 40-60%, minimizes expansion and contraction, which can cause gaps or buckling. I use a combination of humidifiers and dehumidifiers, depending on seasonal needs, to keep these levels consistent—something detailed in the professional floor leveling guide. Regular inspections for signs of wear or damage allow me to address issues early, avoiding costly repairs later.
Why does scaling matter in flooring projects, and how can I prepare for it?
As your space evolves, so will your flooring needs. Scaling up from a weekend DIY to a full-scale renovation requires careful planning—think modular tools, portable elevation devices, and adaptable materials. Using modular leveling systems, like adjustable shims or portable self-leveling platforms, allows me to adapt quickly to larger or more complex areas without sacrificing accuracy. Adopting a scalable approach ensures that your investment continues to pay off, even if your project scope expands significantly.
Looking ahead, I predict that automation and smart tools—such as app-controlled laser levels and IoT-enabled moisture sensors—will become standard in flooring maintenance. These innovations promise even greater precision, efficiency, and long-term monitoring capabilities, leading to more durable and flawless results.
Try this advanced tip to elevate your flooring work
One technique I swear by is using a combination of a laser level and a simple reflective target to check for subtle high or low spots during long-term maintenance. Position the laser, set the target, and observe the reflection patterns to spot unevenness that might be invisible to the naked eye. This method has helped me achieve a perfectly flat surface after multiple repairs or installations. For more insights into maintaining professional standards, explore floor leveling mastery tips. Don’t hesitate—try this method on your next project to see immediate improvements.
Lessons Hidden in Plain Sight: My Flooring Journey
One of the most unexpected lessons I uncovered was how a small detail, like the accuracy of moisture measurements, can make or break a flooring project. I once ignored a slight moisture reading, thinking it was negligible, only to see tiles crack months later. That experience taught me to always trust my tools and double-check every parameter, especially when dealing with sensitive materials like engineered wood and tile.
Another revelation was the importance of proper subfloor preparation. It’s tempting to skip steps when rushing a remodel, but I found that even minor high spots or dips can cause long-term issues—like squeaks or uneven wear. Taking the time to level meticulously ensures a flawless finish and longevity, confirming that patience truly pays off.
Finally, I realized that understanding your materials—their behaviors, tolerances, and sensitivities—empowers you to avoid costly mistakes. Researching and choosing the right products, like specific leveling compounds or cleaning solutions, can transform your project from stressful to satisfying.