

The first time I tried to install hardwood flooring in my own home, I made a mistake that cost me hours of frustration: I didn’t properly undercut the metal door jambs. I remember crawling under the door frames, trying to saw through stubborn metal while risking damaging the flooring or the jamb itself. That lightbulb moment hit me hard—if I had just known the right way to do it, the whole project would have been smoother. Have you ever faced that moment of regret after realizing your door jambs just aren’t cutting it for that seamless floor transition?
The Secret Ingredient for a Flawless Floor Transition
Undercutting metal door jambs is an essential step that can seem small but has a huge impact on the final look of your flooring project. When I finally discovered the proper technique, everything changed. A clean, precise cut allows your flooring to slide underneath the jamb smoothly, resulting in a professional finish that’s worth every minute of effort. Today, I’ll walk you through how to undercut metal door jambs the right way, saving you frustration and helping you achieve that clean, polished look you desire.
Is The Right Undercut Technique Really Worth the Hassle?
Here’s a truth I learned early on: rushing through undercutting can lead to chipping, uneven cuts, or worse—having to redo the entire step. I once used a dull blade, thinking it was enough, only to end up with jagged edges that ruined the flooring alignment. That mistake taught me a valuable lesson—quality tools and proper technique are non-negotiable. A precise undercut not only makes your flooring look better but also ensures durability, especially if you’re working with delicate materials or intricate transitions. For detailed guidance, I recommend checking out [Flooring Installation Fundamentals: Leveling for a Seamless Look](https://tiletrendshop.com/flooring-installation-fundamentals-leveling-for-a-seamless-look).
Have you encountered issues with door jambs that just wouldn’t cooperate? Don’t worry—you’re not alone. In the upcoming sections, I’ll share step-by-step tips and hacks that will turn this tricky step into your new favorite part of the flooring process. With patience and the right approach, you’ll be amazed at how effortless and satisfying a perfect undercut can be.
Prepare Your Tools and Workspace
Start by gathering a high-quality hacksaw or oscillating tool with a metal-cutting blade, a tape measure, a pencil, a wood chisel, and safety gear like goggles and gloves. Clear the area around the door to ensure unobstructed movement. Remember, precision tools make a difference—using dull blades or improper equipment can lead to jagged cuts and extra work later.
Measure and Mark the Cutting Line
Measure the thickness of your hardwood flooring, including any underlayment, to determine how much material needs to be removed from the door jamb. Using a pencil, mark a line across the jamb at this measurement, ensuring it’s level and consistent on both sides. Think of it as drawing a clean cut line on a piece of fabric—you want accuracy to prevent gaps or uneven surfaces.
Cutting the Metal Jamb
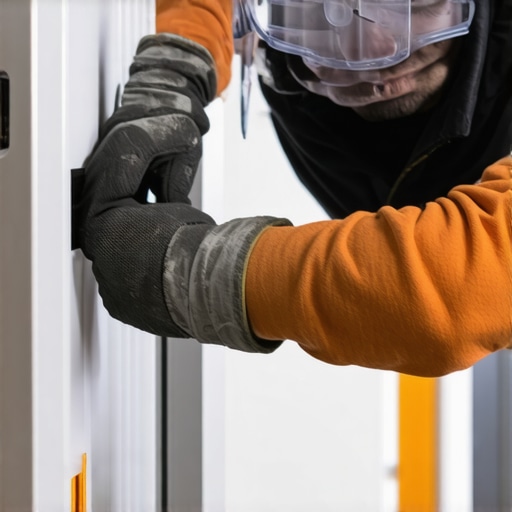
Secure the door jamb with clamps or have a helper hold it steady. Put on your goggles and gloves for safety. Carefully cut along the marked line with your hacksaw or oscillating tool, applying steady pressure. Maintain a slow, controlled motion—aim to mimic slicing through butter, but be patient. If the metal blades resist, pause and apply gentle back-and-forth motions rather than forcing the cut, which can cause jagged edges.
Handling Difficult or Thick Metal
If the jamb is particularly thick or hard, score the line first using a metal scribe or a chisel along your mark. Then, proceed with the cut, using a blade suited for thicker metal. Remember, a dull blade will make the job messier and more laborious, so replace it if necessary. When I did this in a recent project, switching to a fresh blade made a noticeable difference in speed and cleanliness.
Removing the Cut Section and Finishing
Once the cut is complete, use a chisel or file to smooth any rough edges or burrs. Think of this step as sanding a rough wood edge—you want a clean, flush surface for the flooring to nestle against seamlessly. Vacuum away metal shavings, and double-check your measurements against the flooring to ensure a snug fit.
Test Fit and Adjust if Necessary
Place the hardwood flooring underneath the cut jamb to verify fit. If there’s a slight bulge or gap, carefully trim a little more, repeating the cut-and-smooth process. This iterative approach ensures a precise undercut, resulting in a professional finish. For more on perfecting your technique, see our detailed guide on [floor leveling](https://tiletrendshop.com/the-ultimate-guide-to-floor-leveling-for-a-perfect-finish).
Final Checks and Installation
Reattach the jamb (if it was removed) with nails or screws, ensuring it’s flush with the flooring. Remember, accurate measurements and careful cuts prevent gaps that can cause uneven wear or aesthetic issues down the line. Mastering this step transforms a potentially messy job into a smooth transition that enhances your entire hardwood installation.
Many homeowners and even some contractors believe that flooring installation is a straightforward process, but in reality, there are several nuanced pitfalls that can compromise the final result. One widespread myth is that level floors are always perfectly flat; however, even when the floor appears level to the eye, subtle deviations can cause tiles or hardwoods to crack or buckle over time. Achieving a truly even surface requires meticulous floor leveling, which I recommend mastering through precise techniques outlined in our comprehensive guide to [floor leveling challenges and solutions](https://tiletrendshop.com/floor-leveling-challenges-common-mistakes-and-how-to-avoid-them). Another misconception is that using the thinnest possible layer of adhesive ensures a cleaner finish. In truth, improper adhesive application can lead to uneven tile surfaces, leading to lippage or loose tiles, especially with larger formats. Testing adhesive consistency and application method is critical for durability and aesthetic appeal.
Many assume that ceramic or porcelain tiles are impervious to cracks, but they can be sensitive to subfloor movements or moisture issues. Using an uncoupling membrane can prevent stress transfer, but this nuance is often overlooked, resulting in expensive replacements down the line. For optimal results, consult our article on [perimeter dams and moisture barriers](https://tiletrendshop.com/why-your-waterproof-flooring-still-needs-a-vapor-barrier).
When installing hardwood floors, the common mistake is ignoring seasonal expansion and contraction. Failing to leave appropriate gaps or failing to acclimate the wood can cause gaps or buckling months later. This level of detail is crucial for long-term performance, as highlighted in [our expert tips on hardwood care and installation](https://tiletrendshop.com/hardwood-floor-care-secrets-to-longevity-and-shine).
For the more advanced installer, a frequent trap is misjudging the drying time of leveling compounds or adhesives, leading to weak spots or cracking. Patience and a good understanding of product specifications are critical, as warned by flooring professionals in a recent study emphasizing the importance of proper curing times (Source: industry standards by The National Association of Home Builders).
It’s also important to recognize that choosing the wrong materials can undermine your project. For example, selecting tile that doesn’t match your climate or subfloor type can result in failure. Cross-referencing [tile trends and compatibility guides](https://tiletrendshop.com/best-tile-trends-for-complementing-hardwood-floors-this-year) helps in making smart decisions.
Have you ever fallen into this trap? Let me know in the comments. Avoiding these common misconceptions and paying attention to the finer details can dramatically extend the lifespan and aesthetic of your flooring. Remember, mastery in flooring is often about the little things done right, not just the big steps. For even more advanced insights, check out our detailed guides on [precision floor leveling techniques](https://tiletrendshop.com/precise-floor-leveling-techniques-to-achieve-flawless-surfaces) and [common leveling mistakes](https://tiletrendshop.com/flooring-installation-mistakes-to-avoid-for-lasting-results). Your attention to these nuances will truly set your project apart.Keeping your hardwood or tile flooring in top shape over the years requires more than just expert installation; it hinges on the right tools, regular maintenance, and proactive troubleshooting. As someone deeply involved in flooring projects, I can attest that having the proper equipment makes all the difference in achieving durable, beautiful results.
Invest in Precision Cutting Tools for Seamless Transitions
Personally, I rely on a high-quality oscillating multi-tool equipped with a metal-cutting blade. This tool allows me to undercut door jambs and cut through stubborn metal with precision, minimizing damage and ensuring a snug fit. Unlike cheaper hacksaws, my oscillating tool provides cleaner, more controlled cuts, saving hours during installation and reducing the need for touch-up work. Regularly replacing worn blades guarantees optimal performance—a lesson I learned the hard way when dull blades caused jagged edges and extra labor. For larger projects, a brick-level laser level helps in ensuring consistent elevation across expansive areas, which is crucial for long-term durability. As trends evolve, integrating smart, laser-guided leveling systems automatically detects subtle slope deviations, making floor leveling more accessible for DIYers and professionals alike.
Maintain Your Tools for Better Results
Routine care extends tool life and precision. Keeping blades sharp, cleaning debris after each use, and calibrating laser levels weekly ensures your equipment functions correctly. Over time, tools like power mixers and drills also benefit from lubrication and periodic inspections for worn components. I recommend bookmarking resources like [floor leveling fundamentals](https://tiletrendshop.com/flooring-installation-fundamentals-leveling-for-a-seamless-look) to stay updated on best practices that integrate equipment management with installation success.
Optimize Long-Term Floor Performance with Proper Care
Implementing a regular cleaning schedule, including gentle sweeping and cautious mopping, prevents grit buildup that can scratch surfaces. Applying protective pads on furniture and avoiding excessive moisture prolongs the life of wooden planks and tiles. For deeper protection, sealing grout lines and using high-quality urethane finishes create a barrier against stains and wear. To keep your floors looking impeccable, I suggest exploring advanced techniques like buffing and re-coating, which can be learned through tutorials like [mastering hardwood refinishing](https://tiletrendshop.com/mastering-hardwood-floor-refinishing-expert-tips-for-2025).
How do I maintain flooring over time? Regular inspections combined with the right tools—such as moisture meters to detect hidden water damage or plastic shims for minor leveling tweaks—are essential. Additionally, scheduling periodic professional assessments can catch issues early, saving significant costs later. For instance, monitoring humidity levels helps prevent wood cupping or buckling, a common concern in climate-variable regions. As technology advances, automated floor sensors integrated with smart home systems are poised to provide real-time alerts about potential problems, making proactive maintenance even more accessible. By staying vigilant and investing in quality equipment, homeowners can enjoy their floors’ beauty and durability for decades. Want to elevate your maintenance game? Try using a moisture meter regularly, especially before refinishing or sealing, to ensure your floors are dry and stable. This small step can prevent costly repairs and preserve your investment in beauty and functionality.
Unspoken Truths That Changed My Flooring Game
One of the biggest lessons I learned was the importance of patience over speed—rushing the undercutting process often led to jagged cuts and rework. Recognizing that every detail counts turned what was once a tedious chore into a satisfying craft. Additionally, I discovered that investing in quality tools like a sharp oscillating tool or a high-grade metal blade not only saved time but also elevated the overall finish of my projects. Lastly, understanding the subtle nuances of measuring and marking—such as double-checking measurements at different angles—prevented costly mistakes and ensured flawless fits every time.
Tools That Elevated My Approach
My go-to equipment now includes a versatile oscillating multi-tool with a metal-cutting blade because it provides precision and control unmatched by traditional hacksaws. I also rely on a laser level for achieving consistent elevation across larger areas, especially when handling complex floor plans. A high-quality chisel and file are indispensable for smoothing rough edges after cutting. These tools, paired with regular maintenance and blade replacements, have made a tangible difference, enabling me to accomplish professional results even on DIY projects. Curious about my full toolkit? You can explore other essential resources in our comprehensive floor leveling techniques guide.
Fuel Your Flooring Passion—Take Action Today
Achieving the perfect transition from floor to jamb isn’t just about tools and technique; it’s about cultivating patience and attention to detail. Every successful project boosts confidence and adds a personal touch to your home. Don’t wait to elevate your skills—start practicing these steps, and soon, seamless, professional-looking floors will become your new standard. Remember, every expert once started as a beginner, so embrace the learning process with enthusiasm. Ready to transform your space? Share your experiences or ask for tips below—your next great project begins now!