
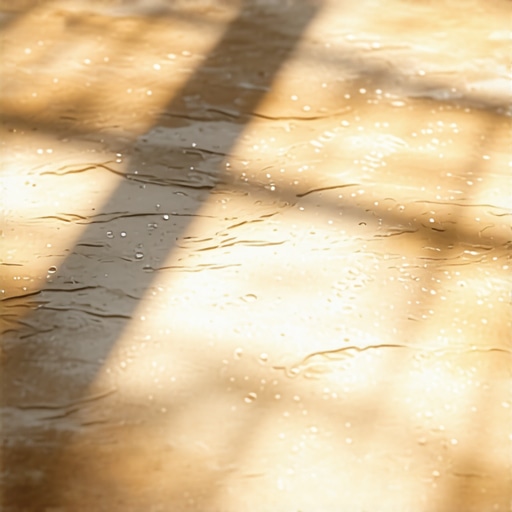
One scorching summer afternoon, I stepped into my living room and was greeted by an unexpected sight: sections of my luxury vinyl flooring starting to bubble and lift. It was a moment of frustration—and a lightbulb moment. I realized that despite choosing high-quality materials, I overlooked a crucial aspect of installation and maintenance that could make or break the longevity of my floors, especially under the relentless sun.
The Hidden Culprit Behind Bubbling Luxury Vinyl
This experience made me dig deeper into why vinyl floors, which are often marketed as durable and low-maintenance, can falter when exposed to too much sun. The truth is, exposure to heat and direct sunlight can cause vinyl flooring to expand. When this expansion is constrained—for example, if there isn’t enough space for the material to breathe—bubbles and warping inevitably occur. It’s a common issue that many homeowners face, often right after a hot day or season change.
But the real question is: how can you prevent this from happening in the first place? And if you’re already dealing with bubbling vinyl, what steps should you take to restore your beautiful floor? Today, I’m going to share my personal journey and proven solutions to keep your vinyl looking pristine and free of bubbles, regardless of the sun’s brightness.
Are You Falling for the Sun’s Trick? My Early Mistake
Before I cracked the code, I made a critical mistake—skipping proper acclimation of the vinyl planks and ignoring the importance of adequate expansion joints. I thought that as long as I installed the flooring carefully, it would stay perfect forever. Nope. It wasn’t until I noticed those persistent bubbles that I realized I needed to consider how environmental factors, especially temperature fluctuations, affect vinyl flooring. If you want to see some of the best techniques for durable installations, check out flooring installation fundamentals.
So, if you’ve experienced bubbling floors or worry about sun damage, keep reading. I’ll guide you through the essential steps to prevent, troubleshoot, and fix bubbling vinyl—saving you money, time, and the headache of replacing your entire floor.
Master the Proper Acclimation of Vinyl Planks
My first step was to ensure the vinyl planks acclimate correctly before installation. I laid them out in the room for at least 48 hours, mimicking real temperature and humidity conditions. Think of it like seasoning a steak—allow the material to adjust to its environment to prevent surprises later. During this phase, I also measured the room’s humidity and temperature using a reliable hygrometer and thermometer. This helps in planning the installation when conditions are optimal, reducing the risk of expansion and bubbling.
Create Adequate Expansion Gaps
Next, I focused on leaving sufficient space around the room’s perimeter and along any fixed structures. Expansion gaps are like the natural buffer in a suspension bridge—they absorb movement and prevent buckling. For most vinyl floors, a gap of about ¼ inch is recommended. When installing the planks, I used spacers to keep these gaps consistent. After laying the entire floor, I installed baseboards or moldings to hide these gaps, ensuring a clean look while allowing for thermal expansion.
Implement Smart Installation Techniques
During my project, I aligned each plank carefully, locking them tightly without forcing. I used a tapping block and a rubber mallet—these tools are like a gentle handshake that ensures snug fits without damaging the material. I also checked the seams frequently by walking across the planks, looking for any misalignments. Properly clicking the planks together prevents gaps and minimizes movement that could lead to bubbles when temperatures fluctuate.
Use Quality Adhesives and Proper Subfloor Preparation
I chose a high-quality, heat-resistant adhesive suitable for vinyl flooring, especially for areas prone to temperature swings. Before laying the floor, I cleaned and leveled the subfloor thoroughly—imagine preparing a canvas before painting; a smooth surface ensures even distribution and adhesion. I used a self-leveling compound where necessary, following the guidelines from this expert leveling guide. This prevents uneven support, which can cause the vinyl to lift or bubble over time.
Monitor Temperature and Humidity Post-Installation
After installation, I kept the thermostat steady and maintained consistent humidity levels. Sudden changes can trigger expansion or contraction, leading to bubbles or gaps. Using a humidifier or dehumidifier as needed is like giving your flooring the right weather conditions—imagine it as providing a cozy climate for your floors to stay put. Regularly checking these conditions helps catch problems early before bubbles develop.
Tackle Existing Bubbles with Confidence
If bubbles do appear despite precautions, the fix involves carefully puncturing the bubble, then pressing the underlying material flat. For larger bubbles, gently heating the area with a heat gun can soften the vinyl, making it easier to smooth out. Alternatively, a professional might recommend injecting a compatible adhesive into the puncture to bond the layers again. This process is like popping a bubble wrap—release the trapped air and press the surface flat, ensuring your floor looks flawless once more.
Many homeowners assume that common flooring misconceptions are harmless, but in reality, these myths can lead to costly mistakes and subpar results. Contrary to popular belief, perfect floor leveling isn’t just about using self-leveling compounds; the process requires attention to subfloor conditions, moisture levels, and precise application techniques. For example, relying solely on the “pour and forget” approach often results in cracks and uneven surfaces, especially over plywood or concrete substrates. Proper preparation, including testing for moisture and ensuring a mechanically sound subfloor, is essential for long-lasting results.
A widespread misunderstanding is that the subfloor’s flatness isn’t critical for tile installation. However, even minor deviations can cause tiles to crack or pop loose over time. Advanced installers use a straightedge or laser level to identify high and low spots, then employ custom leveling methods—like shimming or specific patching techniques—to achieve a seamless base. For detailed steps on this process, consult this comprehensive guide.
When it comes to hardwood floors, many believe that sanding removes all imperfections, but this can be misleading. Sanding alone can’t fix subfloor issues or prevent future gaps caused by humidity changes. The nuance lies in inspecting subfloor integrity beforehand and ensuring framing and joists are stable. Additionally, understanding the difference between engineered and solid hardwood—particularly their reactions to moisture—is vital. An advanced mistake many overlook is neglecting acclimation periods; rushing the process can result in cupping or buckling.
Have you ever fallen into this trap? Let me know in the comments.
**Question for Pros:** How do you balance moisture management with complex subfloor types during hardwood installation? Advanced techniques involve using diagnostic tools and tailored sealants, which can significantly improve stability. According to a study by the Flooring Contractors Association, meticulous moisture testing reduces failure rates by over 30%, emphasizing the importance of this often overlooked step. For expert insights, check out this article on installation pitfalls.
Keeping It Working: The Tools I Recommend for Flooring Maintenance and Installation
Maintaining hardwood floors and ensuring a flawless installation process require specialized tools that combine precision, durability, and ease of use. Over the years, I’ve curated a set of equipment and software that have proven invaluable for both DIY enthusiasts and professionals aiming for long-lasting, beautiful results. One standout piece is the Lippage–Free Leveling System, which guarantees perfectly even tiles and hardwood planks. Its adjustable wedges and clips allow for rapid realignment, saving hours of sanding and rectifying issues later. For measuring and monitoring environmental conditions, I rely on a digital hygrometer and thermometer. Maintaining consistent humidity and temperature is critical to prevent buckling or gaps in hardwood; these tools give real-time data, enabling me to act proactively rather than reactively.
When it comes to surface preparation, I swear by a high-performance orbital sander with variable speed settings. It helps in smoothing out minor subfloor imperfections before laying down underlayment or adhesives. Pairing this with a vacuum dust extractor not only keeps my workspace clean but also ensures no debris compromises adhesion or finishes. Additionally, for assessing subfloor flatness, I use a 100-inch straightedge and a laser level. These tools help me identify high and low spots with incredible accuracy, facilitating targeted corrections that save material costs and prevent future problems.
In terms of software, I integrate project management tools like Trello or Asana to track each phase — from acclimation to final inspection. This systematic approach ensures nothing slips through the cracks and that scheduling aligns with environmental conditions and curing times. Looking ahead, I predict that smart sensor integrations will become more common, providing ongoing data on moisture, temperature, and even subfloor stability, further enhancing long-term results and reducing installation errors.
How do I maintain flooring over time? Regular inspections combined with the right tools are key. For hardwoods, periodic cleaning with pH-neutral products and applying protective finishes help preserve shine and prevent scratches. For ongoing monitoring, I recommend using a moisture meter, especially in climates with significant seasonal shifts, to catch early signs of expansion or contraction. Don’t hesitate to try incorporating a seasonal check routine — it can extend your floors’ lifespan for decades.
Investing in high-quality tools might seem costlier upfront, but the payoffs in durability and finish quality are undeniable. Remember, each tool serves a specific purpose—like the innovative tile designs that elevate style and functionality, your toolkit should enhance your work’s reliability and aesthetic appeal. Try one of the advanced tips mentioned here, like using a laser level for subfloor assessment—it’s a game-changer for flawless results every time.
The Hidden Lessons That Changed My Approach to Flooring
- Never underestimate the power of environmental acclimation; I learned that patience in this step can prevent costly rework later.
- Quiet expansion gaps are your best friends—skipping them may seem minor but can lead to bubbling and buckling in the future.
- Tools matter more than you think; investing in quality leveling and measuring devices saved me countless headaches.
- Overconfidence in initial installation often masks underlying issues, reminding me that continuous learning keeps craftsmanship sharp.
- Monitoring conditions after installation isn’t just maintenance—it’s a safeguard against unseen environmental shifts affecting your floors.
Tools and Resources That Elevated My Flooring Projects
Throughout my experience, certain tools proved indispensable. The comprehensive flooring installation guide provided step-by-step clarity, ensuring I didn’t miss critical details. A quality laser level helped achieve perfect alignment, while environmental monitors like a digital hygrometer kept conditions in check. For troubleshooting bubbling issues, this resource outlined common pitfalls and solutions. Collectively, these tools transformed my approach from guesswork to precision, elevating the quality and longevity of my floors.
Keep Pushing, Your Floor Deserves It
Every step in mastering hardwood floors, tile, and flooring installation is an investment in your home’s future beauty. Embrace the learning curve, utilize the right tools, and remain vigilant about environmental conditions—your floors will thank you for years to come. Remember, perfection in flooring isn’t about never making mistakes; it’s about continually refining your craft and learning from each experience. Your journey to impeccable floors starts now—don’t hold back. How have environmental factors influenced your flooring projects? Share your stories below and keep the conversation thriving.
,