Ever laid down a new tile or hardwood floor only to realize it’s crooked, uneven, or just doesn’t look as polished as you imagined? I’ve been there, and let me tell you—nothing kills the excitement of a home upgrade faster than poor installation. I remember my first attempt, rushing through the process, skipping crucial steps, and ending up with a wobbly, unprofessional finish. That lightbulb moment hit hard: I needed to master the right techniques to get flawless results, especially with the ever-evolving standards of 2025.
Why Proper Floor Installation Can Make or Break Your Home’s Look
When I finally took the time to learn expert strategies, everything changed. Proper installation isn’t just about aesthetics; it’s about durability, safety, and saving money in the long run. A poorly installed floor can lead to cracks, squeaks, and costly repairs. Experts agree that investing in the right techniques now ensures your floors will stand the test of time. According to a recent study, improper flooring installation is a leading cause of early deterioration and failure, costing homeowners thousands annually (source). Ready to avoid these pitfalls and achieve a flawless finish? I’ll guide you through the most effective strategies, so your next project becomes a lasting success.
Have you ever faced the frustration of uneven floors or cracked tiles even after choosing quality materials? If so, you’re not alone. I once made the mistake of skipping the crucial step of floor leveling, which led to uneven surfaces that distracted from my entire room’s look. Trust me, mastering the right leveling techniques can save you from similar headaches. For comprehensive insights, check out this detailed guide and learn how expert-level leveling techniques can make your project flawless.
In the sections ahead, we’ll dive into proven methods for leveling, choosing the right materials, and ensuring your installation is durable and beautiful. Whether you’re a DIY enthusiast or hiring a professional, understanding these key strategies will elevate your home renovation game. Let’s get started on transforming your space with expert tips that really work for 2025 and beyond.
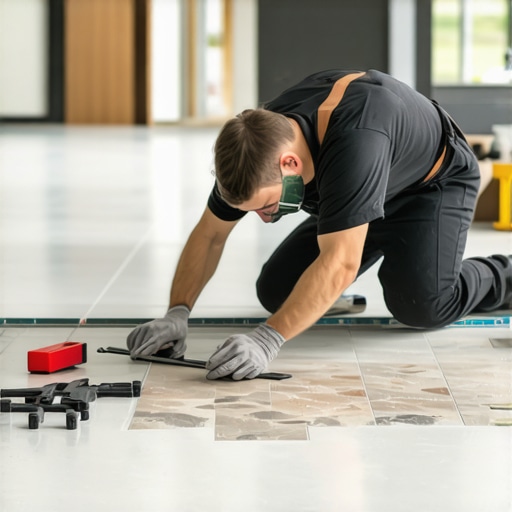
Prepare Your Surface with Precision
Before you lay down a single tile or plank, inspect your subfloor thoroughly. Look for any cracks, dips, or imperfections. I once skipped this step and ended up with uneven flooring that cracked under pressure. Use a high-quality level or laser level to identify low spots or high points. For large discrepancies, applying a self-leveling compound is essential. This step is like preparing a canvas before painting—without it, your masterpiece won’t stand the test of time. For detailed leveling techniques, check out this comprehensive guide.”} ,
Many homeowners and even seasoned DIYers often fall prey to myths or overlook nuanced details that can make or break a flooring project. Let’s dig deeper into some of the most common mistakes and the hidden nuances that can elevate your results beyond basic expectations.
Why the Industry’s Simplified Advice Can Lead to Advanced Mistakes
It’s tempting to follow generic tips like “skip the leveling process” or “use the same adhesive for all materials,” but these oversimplifications ignore crucial nuances. For example, while many believe that any self-leveling compound will do, in reality, the choice of compound must match your subfloor’s specific conditions. Using the wrong product can cause cracks or unevenness over time, especially with modern materials that demand precision. Experts recommend consulting detailed guides like this comprehensive guide to select the right leveling solutions.
Another widespread misconception is that flooring installation is purely about aesthetics. In truth, durability hinges on subtle steps like proper expansion gaps, moisture barriers, and correct acclimation of materials. Overlooking these can lead to costly repairs down the line, such as warping or buckling. For advanced insights on these details, I suggest reviewing this expert resource.
Advanced mistake to avoid: Underestimating the importance of precise subfloor preparation
One of the most overlooked aspects is the accuracy of subfloor preparation. Many believe that a quick sweep and a light mop suffice, but in reality, tiny dips or cracks can cause significant issues. Even a 1/8-inch discrepancy can lead to uneven flooring, squeaks, or cracked tiles over time. The common trap is to assume that a subfloor is inherently flat, but in advanced projects, meticulous inspection with laser levels and proper correction with self-leveling compounds is essential. For detailed techniques, I recommend this in-depth guide.
Have you ever fallen into this trap? Let me know in the comments. Remember, mastering these nuanced aspects ensures your flooring project isn’t just good-looking but built to last for years to come.
How do I maintain my flooring over time?
Maintaining your floors isn’t just about occasional cleaning; it requires specific tools and regular attention to preserve their beauty and durability. One of my go-to tools is a high-quality microfiber mop, which gently lifts dust and debris without scratching surfaces. For deeper cleaning, I rely on a pH-balanced floor cleaner, ensuring I don’t damage the finish or the material underneath. I personally avoid generic cleaning solutions because they can strip protective coatings or cause discoloration. Instead, I select products recommended by experts, such as those outlined in this guide. Regularly inspecting your floors for scratches, dents, or loose tiles allows for early repairs, extending their lifespan significantly.
For hardwood floors, I recommend applying a rejuvenating finish every few years. This process involves lightly sanding the surface and applying a fresh coat of polyurethane, which can dramatically restore shine and protect against wear. For this, I use a drum sander, which provides an even surface and saves time compared to manual sanding. Investing in a quality sander like the Bona Random Orbital Sander has paid off for me, offering smooth results and durability. As trends evolve, I predict that automated floor maintenance robots, equipped with sensors and cleaning algorithms, will become common, making upkeep even easier and more precise.
Tools I recommend for the best results
When it comes to tools, precision is key. I always use a laser level to ensure my floors are perfectly aligned before and after installation. This tool is invaluable because it eliminates guesswork and guarantees a flat, professional finish. For detailed leveling, I rely on a self-leveling compound, which requires a high-quality trowel—my personal favorite is the Marshalltown Notched Trowel. Its ergonomic handle and balanced weight help me spread compounds evenly, preventing dips or high spots that can cause issues later.
For ongoing maintenance, a microfiber duster attachment on my cordless vacuum keeps dust and debris at bay without scratching surfaces. Additionally, I keep a set of soft-bristle brushes for grout lines, ensuring they stay clean and free from mold or grime. As technology advances, I believe that smart sensors embedded in floors will monitor wear patterns and alert homeowners when maintenance is needed, optimizing longevity and saving costs.
Don’t hesitate to try these expert-recommended tools and techniques. Regular maintenance with the right equipment not only prolongs your floors’ life but also keeps them looking stunning for years to come. For more detailed strategies on maintaining your flooring, check out this comprehensive guide.
Lessons From My Flooring Journey That Changed Everything
- I once believed that quick fixes and skipping steps wouldn’t hurt—until I faced cracked tiles and uneven surfaces. That was my wake-up call to never underestimate the importance of proper surface preparation and leveling techniques that experts swear by.
- Understanding the subtle differences between materials and adhesives made my projects more durable and beautiful. For example, choosing the right self-leveling compound based on my subfloor’s condition prevented future cracks and dips.
- Investing in quality tools like laser levels and professional-grade trowels was a game changer. These tools helped me achieve a professional finish that lasted, avoiding costly repairs down the line.
- Regular maintenance isn’t just about cleaning; it’s about proactive care, like applying rejuvenating finishes and inspecting for early signs of wear. This approach keeps floors looking fresh and extends their lifespan significantly.
My Essential Tools and Resources for Perfect Floors
- Laser Level: For ensuring absolute precision in alignment, it’s an investment that pays off every time. I personally use the expert-level laser level.
- Self-Leveling Compound: Choosing the right product for your subfloor is crucial. I trust the comprehensive guides at this resource for expert advice.
- Quality Trowels: For spreading compounds evenly, I prefer the Marshalltown Notched Trowel. It’s ergonomic and helps prevent dips or high spots.
- Floor Maintenance Products: Regularly using pH-balanced cleaners and microfiber mops, as recommended by this guide, keeps my floors pristine.
- Refinishing Tools: Every few years, I rejuvenate hardwood floors with light sanding and a new polyurethane coat, using a drum sander for even coverage. It’s a simple step that makes a huge difference.
Take Action and Elevate Your Flooring Skills
Now that you have the insider tips, tools, and resources, it’s your turn to transform your space with confidence. Remember, mastering these techniques ensures your floors won’t just look great but will stand the test of time. Your home deserves that professional touch—so don’t hold back!
What’s the biggest challenge you’ve faced in your flooring projects? Share your story below, and let’s learn and grow together!
This post really hits home about the importance of surface prep—something I underestimated in my last DIY flooring project. I learned the hard way that even small dips can cause major issues down the line. I particularly appreciated the emphasis on proper tools like laser levels and self-leveling compounds. In my experience, the right equipment not only makes the job easier but also drastically improves the finish. One thing I’ve found helpful is double-checking moisture levels before starting, especially with hardwood. Has anyone experimented with different moisture barriers or primers to enhance long-term durability? It seems like a small step but could prevent future buckling or warping. Overall, this was an eye-opening read, and I feel more confident approaching my next project with a better understanding of the nuanced details that matter most. Would love to hear others’ tips on organizing and planning for a flawless installation from start to finish!