
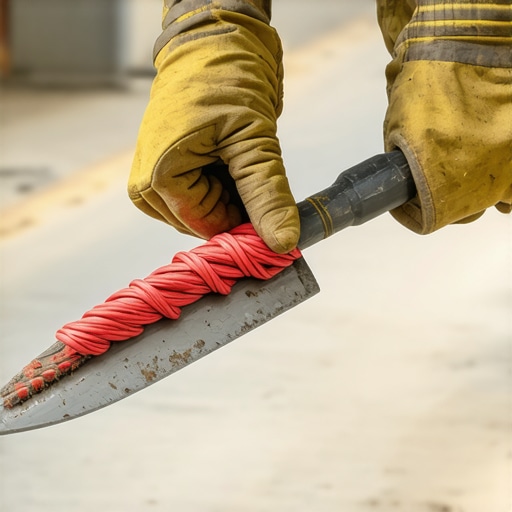
I remember the moment clearly. I had just finished a long day of floor tiling, sweat dripping down my brow, and I reached for my trowel—only to find it caked with dried mortar and grout. Trying to scrub it clean with just a sponge felt like chasing a ghost. That mess seemed stubborn, unyielding, and honestly, pretty frustrating. It hit me then—there had to be a better way to keep my tools pristine without wasting precious time.
Say Goodbye to Dirty Trowels: The Rubber Band Hack
Ever since I discovered the simple rubber band trick, my tool-cleaning routine has transformed dramatically. Instead of battling dried mortar that hardens in minutes, I now keep a few rubber bands handy and slide one around my trowel handle just before I start working. As I work, the rubber band acts as a barrier, preventing excess mortar from sticking to the handle and keeping the edge clean for the next use. Honestly, it’s such a game-changer that I wonder why I didn’t think of it earlier.
This small, inexpensive tweak has saved me hours of scrubbing, reduced wear and tear, and made my workdays more enjoyable. Plus, it’s adaptable—use different colored bands for various tools or projects, or replace them as needed.
But hold on—what about those skeptics who might think this is all just a DIY fad? Well, I used to be the same until I read that tools coated with sticky residue can cause uneven applications, leading to flaws in your tile or flooring job. Keeping your tools in top shape means better results and less rework, which ultimately saves money—and who doesn’t want that?
Is the Rubber Band Trick Really Worth the Hype?
I’ll admit, I made a rookie mistake early on—assuming I could get away with using old, worn-out rubber bands that had lost their elasticity. That backfired fast. The bands snapped or slid off, defeating the purpose altogether. So, I learned to replace them regularly, which still cost less than replacement tools or hours of cleanup.
If you’ve been battling stubborn mortar or grout on your trowels, you might be wondering if a small rubber band can truly make a difference. Well, it’s a tiny investment with a surprisingly big payoff. Plus, it aligns perfectly with the broader goal of efficient and professional tile installation—and you can see more tips at our [Ultimate Guide to Floor Leveling](https://tiletrendshop.com/the-ultimate-guide-to-floor-leveling-for-a-perfect-finish).
Are you tired of wasting time on tedious tool cleaning? Have you tried this trick yet, or do you have a favorite hack of your own? Let’s talk in the comments—we all have our tried-and-true secrets.
Prepare Your Subfloor Effectively
Start by inspecting your subfloor for any uneven spots, cracks, or moisture issues. Use a long, straightedge or a level to identify high and low points. Address minor discrepancies with a self-leveling compound—apply it carefully to fill low areas, ensuring you don’t trap air bubbles. For larger gaps, screw down loose sections or add plywood patches. This preparation creates a stable foundation, critical for a flawless finish. Remember, a well-prepared subfloor prevents tiles or hardwood from cracking or shifting over time. Detailed guidance is available at How to Achieve Flawless Floor Leveling.
Apply Leveling Compounds Correctly
Mix your leveling compound according to the manufacturer’s instructions—use a clean bucket and a drill with a paddle attachment for consistency. Think of this process like stirring a thick batter; avoid overmixing to prevent bubbles. Pour the compound in stages—work from the farthest corner to prevent it from pooling—and spread with a gauge rake or trowel, feathering edges for a smooth surface. Use a primer if recommended, especially over porous or moisture-sensitive substrates. During curing, keep foot traffic away to avoid disturbing the setting. For precise techniques, see Precise Techniques for Leveling.
Check Surface Flatness Rigorously
After curing, verify the flatness with a long straightedge or laser level—imagine dragging a heavy ruler across your floor, watching for any gaps or rocking. If you find high spots, lightly sand them down with a pole sander or diamond-grit pad, being careful not to create dips. Low spots can be filled again with a skim coat of leveling compound. Repeat the process until the surface is uniformly flat within even minimal tolerances—ideally no more than 1/8 inch over 10 feet. Remember, the key is consistency; flaws now will magnify once tiles or planks are installed. Consult Common Leveling Mistakes for pitfalls to avoid.
Use Proper Tiling or Hardwood Fasteners
Once your surface is perfectly flat, focus on fastening techniques. For tiles, ensure your adhesive is spread evenly, not starving the thinset by over- or under-troweling—an analogy is spreading peanut butter; too thick or too thin, and it won’t adhere properly. For hardwood, acclimate planks in the room for at least 48 hours to prevent expansion or contraction. Use spacers between tiles or underlayment for hardwood to allow for movement. Fasten with the right torque; too tight can damage materials, while too loose causes creaks—think of threading a screw as threading a needle: smooth and snug is best. For more about installation strategies, visit Installation Strategies.
Inspect and Adjust After Completion
Finally, once installation is complete, walk the surface carefully to identify any uneven spots or loose tiles. Use a level or straightedge to confirm flatness—think of this as giving your floor a final health check. If you spot irregularities, address them swiftly—loose tiles can be reset, and uneven areas can be corrected with supplementary leveling compounds. Regular maintenance and proper cleaning, guided by Hardwood Floor Care, will prolong your floor’s lifespan. Remember, diligent post-installation inspection enhances both the beauty and durability of your flooring investment.Many DIY enthusiasts and even seasoned contractors fall prey to misconceptions that can significantly impact the quality and durability of their flooring projects. Let’s dig deeper into some of these hidden pitfalls and how to avoid them to ensure flawless results. One prevalent myth is that a perfectly level subfloor isn’t crucial if you’re using high-quality adhesive or tiles. However, even minor irregularities can lead to lippage, cracked tiles, or squeaky floors over time. Advanced techniques, such as thorough surface testing with a long straightedge, are essential to identify subtle high and low spots that might be invisible to the naked eye. Relying solely on visual inspection can be misleading, so employing tools like laser levels or moisture meters adds precision. Moreover, many believe that self-leveling compounds can compensate for major unevenness, but misapplication or choosing the wrong product for your substrate can cause cracks or delamination. Always follow manufacturer guidelines closely and pre-treat problematic areas to prevent future issues. A common mistake in hardwood flooring is ignoring the importance of acclimation. Many underestimate the time needed for wood to reach equilibrium with indoor humidity, leading to gaps or buckling later. This step is critical, especially in variable climates, and should be tailored based on species and finish type. Advanced installers utilize environmental control during storage and installation to mitigate these risks. The biggest trap to avoid, however, is rushing the cure time of leveling compounds or adhesives. Premature foot traffic or tile placement can disrupt the curing process, resulting in uneven surfaces or bond failure. Patience and proper curing time, as specified by product data sheets, are non-negotiable for long-lasting results. For even more insights on avoiding common installation mistakes, visit our comprehensive guide on Flooring Installation Mistakes. Remember, achieving a durable and flawless finish isn’t just about right tools or materials—it’s about understanding the nuances that separate good work from great. Have you ever fallen into this trap? Let me know in the comments.
Tools I Recommend for Superior Flooring Results
To ensure consistent quality in flooring installation, having the right tools and understanding their maintenance is crucial. I personally rely on a high-quality angle grinder with a diamond blade for cutting tiles precisely, especially in tight corners. This tool’s durability and sharpness directly impact the cleanliness of cuts and the overall finish. Additionally, I use a laser level connected to a smartphone app for quick, accurate assessments of floor flatness, saving me hours on manual checks and preventing future issues like lippage or uneven tiles.
For mixing leveling compounds and thinset, a heavy-duty paddle mixer attached to a cordless drill provides a homogenized, bubble-free mix. Regularly cleaning the paddle immediately after use prevents residue buildup that could compromise future batches. I also swear by a moisture meter for evaluating substrate moisture levels; preventing moisture problems is key to avoiding failures like tile delamination or hardwood buckling over time.
Investing in a good-quality straightedge or long level helps me spot uneven spots that might be missed with a shorter tool. Consistent checking during the installation guards against backtracking and rework. As for personal maintenance, I always wash tools like trowels and spacers immediately after use and store them in a dry, protected place. Applying a light coating of mineral oil helps prevent rust and stickiness, extending their lifespan.
In the future, I predict smart tools with embedded sensors will provide real-time data on moisture, temperature, and even tool wear, making maintenance even more proactive. Staying ahead of emerging tech ensures better outcomes and reduces downtimes in professional projects.
How do I maintain my flooring tools over time?
Establishing a routine of cleaning, inspecting for damage, and proper storage is essential. For example, always wipe down tools immediately after use to remove any mortar or grout, which can harden and damage blades or metal parts. Sharpening blades periodically, especially diamond blades used in cutting, keeps them at peak performance. Using protective covers or cases prevents accidental damage and rust formation. Regularly replacing worn-out components, like rubber handles or worn blades, ensures safety and efficiency. Fine-tuning your maintenance schedule based on the frequency of use and the specific tools you have will maximize their longevity and your project quality. For comprehensive tips on floor leveling and tool care, see our guide on floor leveling.
If you haven’t already, try implementing a scheduled cleaning routine for your tools after each project. It might seem simple, but this small step can drastically extend the lifespan of your equipment and maintain the precision needed for flawless floors. Want to take your maintenance game even further? Incorporate moisture meters regularly, especially when working with substrates prone to humidity fluctuations, to prevent long-term issues like hardwood gaps or tile cracks. Remember, well-maintained tools not only deliver better results but also save you money over time—it’s a smart investment in your craft. Curious about advanced tech? Keep an eye on upcoming innovations in smart tool technology that will revolutionize how professionals manage their equipment.
Top Secrets the Pros Won’t Tell You About Floor Leveling
Over time, I’ve discovered that the smallest overlooked detail—like double-checking moisture levels or meticulously cleaning tools—can make or break a flooring project. These lightbulb moments often come from costly mistakes or unexpected setbacks that teach patience and precision. Embracing continuous learning, like integrating the latest leveling techniques at our guide on levelness, ensures every project stands the test of time. Remember, success in flooring isn’t just about tools or materials—it’s about your commitment to perfection in each step.