
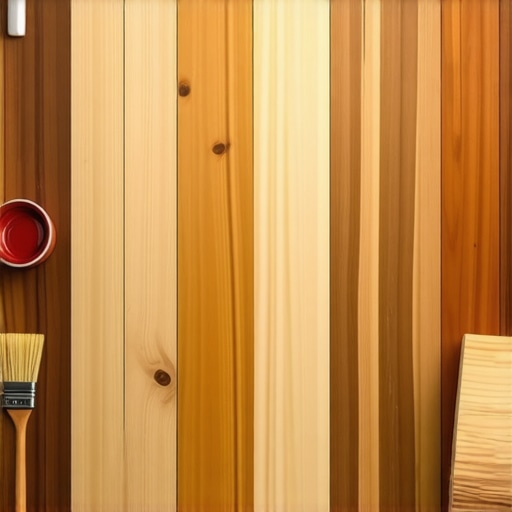
There I was, standing in my living room with a mismatched patch of floor staring back at me. It was one of those moments where you realize that a tiny repair has turned into a full-blown frustration. The color was off, the sheen was different, and it felt like my beautiful hardwood just sneered at my efforts. Sound familiar? If you’ve ever faced the headache of blending a repair spot seamlessly into your existing flooring, you’re not alone. I learned the hard way that matching old hardwood stains isn’t just about grabbing some stain and hoping for the best. It’s a delicate dance of understanding underlayers, age, and subtle color shifts—kind of like trying to match a favorite sweater’s thread color after years of washing.
The Secrets to Blending Old Hardwood Stains Like a Pro
Will You Ever Achieve a Perfect Match or Is It Just a Myth?
Early on, I made the mistake of assuming that staining alone would solve everything. Spoiler alert: it doesn’t. I tried to use a stain that looked close in the can, but once dried, the patch stood out more than a sore thumb. Since then, I’ve discovered that successful color matching requires patience, a keen eye, and knowing the right sequence of steps. It’s about understanding the history of your floor—how many times it’s been sanded, what kind of stain was originally used, and how aging has altered that hue over time. Interestingly, a study from the National Wood Flooring Association notes that older finishes tend to fade unevenly, making perfect matches a rare but achievable goal with the right approach. My own early attempts were riddled with mistakes—like applying too much stain too fast or not testing in an inconspicuous spot first—which taught me that patience and experimentation are key.
So, what’s the real secret? It’s learning to read your floor’s history, adjust your technique, and layer your colors thoughtfully. Don’t worry—this isn’t an exclusive skill reserved for pros. I’ll walk you through how to identify your floor’s unique character and blend your patch effortlessly. The goal is simple: make your repair blend so well only you know it’s there. Ready to turn that frustration into success? Then let’s dive into the practical steps that bring harmony back to your hardwood.
.
Assess Your Floor’s Unique History
The first step is to gather information about your existing floor, such as age, previous stains, and finish condition. I once took a close-up photo of my floor and compared it to samples in different lighting, which revealed subtle color shifts. This helped me choose stains that would blend better. Use a strong flashlight and natural light to observe these nuances. Knowing whether your floor is oil-based or water-based stained will influence your approach, so check for residue or finish type beforehand.
Prepare Your Workspace and Materials
Clear the area and protect adjacent surfaces with painter’s tape. Gather your stains, applicators like brushes or rags, and a test board. I used an old piece of scrap hardwood to mix small stain samples, experimenting with different dilutions to match the tone. Having a palette of colors ready allows for quick adjustments and prevents mismatched areas. Also, ensure good ventilation, especially if using solvent-based stains, to safely work through the layering process.
Test and Adjust Your Stain Mixture
Before touching the actual floor, test your stain blend on the scrap board. I poured small amounts into a container, then added tiny drops of stain to darken or lighten the mixture gradually. This iterative process mirrors mixing paint — small adjustments make a big difference. Once satisfied with the match, note the proportions for consistency, and always test in a less visible corner of your floor if possible.
Apply Thin Layers for Depth and Control
Begin applying the stain with a lint-free cloth or brush, working in the direction of the wood grain. I started with light, even coats, allowing each layer to dry thoroughly before adding more. Think of this like building layers of an onion: each one is thin but adds to the overall tone. If a patch doesn’t blend, lightly sand it with fine-grit sandpaper and reapply. This prevents over-staining and uneven coloration, a mistake I made initially when rushing the process.
Blend Edges to Hide Transitions
To prevent noticeable scars between the repair and original wood, feather out the stain at the edges. Using a dry brush or rag, gently wipe the perimeter of the stain area to diffuse any harsh boundaries. I found that working quickly and softly eased the transition, making it less obvious. For stubborn borders, lightly sand the edge to help the next layer blend better. Patience here ensures your repair looks naturally embedded within the existing floor.
Use a Sealer or Finish for Long-Term Matching
After achieving your desired color, seal the area with a clear finish or polyurethane to protect and lock in the stain. I opt for a matte finish to avoid reflections that could reveal inconsistencies. Applying thin coats with a brush or roller, followed by light sanding between layers, produces a smooth surface. Keep in mind that finishing can deepen or alter the stain’s appearance—so plan accordingly during your initial mixing and application.
Final Checks and Adjustments
Once the sealant cures, examine the patch under different lighting conditions. Sometimes, colors shift slightly as the finish dries. I learned this the hard way when a patch looked perfect indoors but stood out outside. If the color still doesn’t match, light sanding and a subtle reapplication of stain may be necessary. Patience and attention to detail turn a tricky match into a seamless repair, saving you from future headaches.
When it comes to floors and tiles, many DIYers and even seasoned pros often fall prey to misconceptions that can compromise the final result. One prevalent myth is that leveling subfloors is merely about adding a self-leveling compound and calling it a day. However, the subtle nuances—such as substrate integrity, moisture content, and proper priming—are critical for long-lasting and flawless installations. Neglecting these details can lead to cracks, uneven surfaces, or tiles that pop up over time, as highlighted in expert sources like this guide on leveling mistakes. Additionally, many believe that thinner is always better when setting tiles; in reality, using the correct trowel size and adhesive thickness ensures proper bonding, preventing delamination or cracking.
A common trap during hardwood floor refinishing involves sanding too aggressively, which can thin or even breach the wear layer, especially on engineered woods. This mistake diminishes the floor’s durability and beauty, as noted by industry experts. Furthermore, in wall-to-wall carpeting installation, some assume a uniform padding height is sufficient, but subtle variations can cause uneven seams or wrinkling over time. Precision in measuring and adjusting underlayment thickness is often overlooked but vital for a smooth finish.
For advanced installers, understanding the interaction between different flooring materials is essential. For example, laying tile directly over hardwood without an uncoupling membrane can lead to cracking due to substrate movements, a nuanced detail often missed in beginner tutorials. According to this article on tile cracking, incompatible combinations without proper preparation are a recipe for failure.
Make sure to always assess your subfloor’s dryness, slope, and surface evenness before starting. Small errors here often go unnoticed but are the hidden causes of larger issues down the line. These oversights aren’t just technical; they can be disguised as aesthetic flaws, making the difference between a professional-looking finish and a costly redo. To master these nuances, consult detailed resources like the ultimate guide to floor leveling.
Have you ever fallen into this trap? Let me know in the comments and share your experiences. Remember, understanding the subtle details ensures your project not only looks great initially but stands the test of time.
Tackle Flooring Projects with Precision Tools
Investing in the right tools is crucial for professional-quality results and maintaining your flooring over the years. I swear by a high-quality cordless orbital sander because it allows me to meticulously level uneven surfaces without risking gouges or over-sanding. The variable speed feature is a game-changer, giving me control over delicate hardwood finishes and ensuring I don’t damage the wood during touch-ups. For measuring, I prefer a laser level over traditional bubble tools; it provides pinpoint accuracy and makes aligning new tiles or planks effortless, especially when dealing with complex layout patterns. When setting tiles, I always opt for a notched trowel tailored to the specific size of my tiles, which ensures proper adhesive coverage and prevents future cracking—something I learned from this expert guide.
Keep Your Floors in Prime Condition
Long-term maintenance starts with regular cleaning using the correct products. I recommend a pH-neutral cleaner designed for hardwood or tile, as harsh chemicals can degrade finishes over time. Additionally, applying a quality polish or protective sealant annually keeps the surface resilient against scratches and moisture infiltration. For stubborn grime in grout lines or textured tiles, a dedicated grout brush combined with a steam cleaner offers effective deep cleaning without chemicals that could harm your grout sealers or wood finishes.
Upgrade with Thoughtful Accessories and Technology
Smart sensors embedded in modern flooring can alert you about moisture levels or temperature fluctuations, extending the lifespan of your investment. Moreover, consider investing in underfloor heating mats compatible with your flooring type—they provide comfort and reduce the need for frequent cleaning caused by static or dust accumulation. When it comes to refinishing, a professional-grade buffer with variable speed control makes the process smoother and less labor-intensive, saving you time and ensuring consistent results. Remember, maintaining your floors isn’t only about cleaning; it’s about proactively protecting the surface from wear and tear.
How do I maintain hardwood floors over time?
Proper maintenance involves regular sweeping or vacuuming with soft attachments, immediate cleanup of spills, and periodically reapplying protective finish. For deeper care, I recommend sanding and resealing high-traffic areas—this prevents the buildup of scratches and nicks that can mar the appearance. Consistent care preserves your floor’s beauty and prevents costly restorations in the future. For advanced strategies, consult this comprehensive guide on floor upkeep and long-term results. Don’t be afraid to try a microfiber mop paired with a quality floor-specific conditioner—it’s an easy step that offers significant longevity benefits and maintains that just-installed gleam.
Lessons from the Trenches: Surprising Truths About Floor Blending
Over the years, I’ve realized that patience trumps perfection when it comes to blending old hardwood stains; rushing only highlights mismatches. One lightbulb moment was understanding that every floor tells a story of its history—knots, grain, and wear—and ignoring these details makes matching a disaster. Additionally, I discovered that layering stains gradually creates depth and minimizes color discrepancies, a tactic that transformed my approach and saved me time and frustration.
Tools and Resources That Changed My Game
Investing in a high-quality cordless orbital sander and a laser level changed my entire flooring game. They provided precision and control, reducing errors and ensuring professional results. The “Ultimate Guide to Floor Leveling” has become my go-to resource for understanding substrate preparation and avoiding common pitfalls. Lastly, I trust the industry insights from the National Wood Flooring Association, which continually inform me about best practices and emerging techniques.
Your Next Step: Embrace the Journey of Flooring Excellence
Remember, mastering these subtle arts in flooring installation and repair is an ongoing journey. Every project teaches us new lessons and sharpens our skills. Don’t shy away from experimenting patiently; your floors will thank you with lasting beauty and durability. Dive into your next project with confidence, knowing that your attention to detail makes all the difference. Ready to transform your space and impress with your craft? Share your experiences below—what’s the biggest lesson you’ve learned in flooring repair and leveling? Visit our contact page if you need expert guidance along the way.