
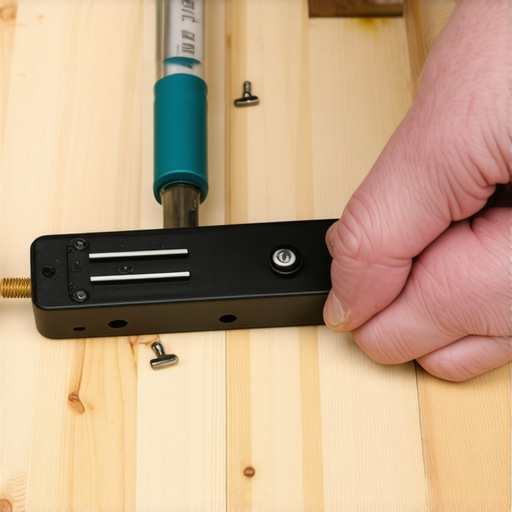
I remember the moment vividly. I was laying down new hardwood in my living room when suddenly, I felt a tiny bump under the planks. My heart sank. That little obstacle turned out to be a hidden subfloor screw, one I hadn’t seen or anticipated. At first, I freaked out. How could something so small cause such a headache? Turns out, I wasn’t alone in my struggle. Many homeowners and DIY enthusiasts grapple with discovering those elusive subfloor fasteners that threaten to ruin a perfect floor installation.
The Hidden Challenges in Flooring Projects
Finding concealed screws or nails beneath the surface is a common frustration. These hidden obstacles can cause unevenness, damage your tools, or even crack tiles if you try to work over them blindly. It’s a problem that costs time, money, and patience. Having faced this myself, I learned that the key isn’t just luck but knowing a reliable strategy to uncover these sneaky fasteners before they become a full-blown issue. And that’s where the Magnet Hack comes into play, transforming a frustrating guesswork into a straightforward search.
Using a simple magnet to locate the embedded screws is a game-changer. It’s inexpensive, non-destructive, and surprisingly effective—even for those screws that are deep or partially obscured. But here’s the thing—many overlook the power of this technique or dismiss it as unreliable. Well, I made a mistake early on by relying on visual inspection alone, which is often insufficient. I’ll be honest: if you’re skeptical about the magnet method, I get it. But with proper technique, it can save you hours, unnecessary drips of sweat, and potential damage to your flooring. Ready to learn how to harness this clever trick? Let’s dive into the details so you won’t be caught off guard like I was.
Prepare Your Tools for Precision Search
Start by gathering a strong neodymium magnet, roughly the size of a small coin but with enough pull to attract ferrous metals deeply embedded. Ensure you have a comfortable grip or a magnetic wand if available. This simple tool is your first line of defense against unseen fasteners beneath your flooring.
Locate the Suspicious Areas
Identify areas where the surface feels uneven or where previous work suggests hidden screws—look for protrusions, slight depressions, or discoloration. For instance, I once noticed a subtle dip in a corner, prompting me to focus there. Mark these spots with painter’s tape for quick access during the magnet pass.
Perform the Magnet Scan
Place the magnet gently against the floor surface, moving it slowly in a grid pattern over the marked trouble spots. Think of it as a metal detector, but for screws embedded in wood or subfloor sheets. Keep the magnet in constant contact, and watch for it pulling toward a hidden fastener. When it jerks or pulls strongly, you’ve located a screw beneath the surface—sometimes even through multiple layers.
Tip: Use a Firm but Gentle Pressure
Applying a moderate pressure helps the magnet reach slightly deeper fasteners without disturbing the surface. Too much pressure may cause surface disturbance, risking damage or false positives. Practice this technique on a small, inconspicuous area first to gauge your magnet’s strength and your touch.
Confirm the Findings
Once the magnet pulls strongly, verify by gently tapping the surface around the spot with a plastic hammer or your hand. If the area feels firmer or resists, you’ve likely found a screw or nail. For more certainty, slide a thin metal probe or drill bit gently into the suspected area. If it encounters resistance, you’ve hit metal fasteners, confirming their position beneath.
Extracting or Bypassing the Fasteners
After locating the fasteners, decide on your next step. If the screw is protruding, use a screwdriver to remove or countersink it. If embedded and not causing issues, you can often proceed with your project, knowing where they are to avoid damaging tools. In some cases, I had to pre-drill or temporarily remove the fastener to continue smoothly.
Record and Document for Efficiency
Keep a mental or physical note of custom fastener locations to avoid surprises later. For complex projects, a simple diagram indicating fastener locations saves time and potential damage. Over time, this method becomes second nature, enabling faster projects with fewer rework issues.
Practice Makes Perfect
My first attempt was messy—I moved the magnet too quickly and missed a screw or two, leading to a slight gouge. But with patience, I improved my technique, gaining confidence in locating even deeply embedded fasteners without tearing up the surface. Remember, slow and steady wins this race. For detailed insights into floor preparation and leveling, check out this comprehensive guide. If you run into tough spots, don’t hesitate to consult an expert by visiting our contact page.Many DIY enthusiasts and even seasoned contractors often fall prey to misconceptions that can compromise the quality and longevity of flooring projects. Let’s dig deeper into some of these misunderstandings and reveal the nuances that can make or break your results.
Myth: All floors must be perfectly level for successful installation
This is a common belief, but in reality, perfection isn’t always necessary. Small deviations, if properly addressed, don’t compromise the aesthetic or durability. Flexibility in tolerances can save you time and money, especially with modern materials that accommodate minor unevenness. However, neglecting significant level differences can cause tiles to crack or hardwood planks to buckle. For expert techniques to handle these issues, check out mastering floor leveling and the ultimate guide to floor leveling.
Advanced Mistake: Underestimating the impact of moisture
Many assume that once the subfloor is dry, they’re all set. Yet, moisture can linger and cause swelling, warping, or mildew over time. This is especially true for hardwood floors, which are highly sensitive to moisture levels. An overlooked moisture issue may lead to costly repairs down the line. For detailed strategies, explore how to spot water damage and the cost of ignoring moisture barriers.
What sophisticated queries do experts ask about floor prep?
Advanced professionals often question, ‘How can I accurately predict and compensate for subfloor imperfections during leveling?’ Calibration techniques, such as using laser levels and understanding substrate properties, are essential. Studies indicate that precise subfloor assessment reduces failure rates significantly (see expert techniques). Understanding these nuances helps in achieving a seamless, durable finish that surpasses standard DIY methods.
Remember, the key isn’t just in following steps but in understanding the critical nuances that influence the success of your flooring project. Don’t let myths or overlooked factors derail your work. Are you aware of other misconceptions? Share your experience in the comments, and if you need expert guidance, consider reaching out through our contact page. Happy flooring!
,
Keep Your Flooring in Top Shape: Tools and Maintenance Strategies
Achieving stunning, long-lasting floors isn’t just about the initial installation—it’s equally about diligent maintenance and having the right tools at your disposal. As a seasoned DIY enthusiast and flooring professional, I can attest that investing in quality tools and understanding proper upkeep makes all the difference in preserving your floors’ beauty and integrity over time.
Invest in Precision Measuring Equipment
One of the most underrated aspects of flooring maintenance is accurate measurement. A laser level, such as the , provides consistent, high-precision readings, ensuring your floor remains perfectly level even years after installation. I personally favor laser tools because they allow me to detect subtle shifts or dips in the subfloor, which are often missed with traditional bubble levels. Regularly calibrating your laser level ensures ongoing accuracy, preventing costly repairs down the line.
High-Quality Cleaning Tools for Daily Upkeep
Maintaining hardwood or tile floors requires more than just sweeping. I recommend a microfiber mop like the Microfiber Dreamer combined with a pH-neutral cleaner like this specialized hardwood floor cleaner. This combo gently lifts dirt without damaging surface sealants or finishes. For tile, a handheld scrub brush with soft bristles can remove stubborn grout haze or residue after deep cleaning. Consistent, gentle cleaning preserves the finish and prevents dirt buildup that can cause scratches or wear.
Tools for Long-Term Repairs and Touch-Ups
No matter how careful you are, floors may require repairs over time. A fine detail repair kit—including wood filler, touch-up pens matching your flooring color, and a small putty knife—is invaluable. For tiles, keep a set of replacement tiles and adhesive ready for unexpected cracks or chips. Having these tools on hand allows for quick fixes that prevent minor issues from escalating, saving both money and hassle.
The Future of Flooring Maintenance
Looking ahead, I believe smart sensors embedded in flooring might revolutionize maintenance routines. These could monitor moisture levels, detect temperature fluctuations, or even track wear patterns, alerting homeowners to issues before they become visible. Such innovations will empower proactive care, enhancing flooring longevity and aesthetic appeal.
How do I maintain flooring over the years?
Developing a routine that includes regular visual inspections, prompt cleaning with the right tools, and timely repairs will ensure your floors remain beautiful for decades. I also recommend reviewing fundamental flooring techniques periodically to refresh your maintenance approach. Don’t overlook the importance of using the correct cleaning agents, as harsh chemicals can damage finishes and reduce lifespan.
For advanced care, consider periodically applying protective sealants or polishings recommended by flooring manufacturers. Remember, the key isn’t just in installing your floor correctly but in nurturing it daily to prevent wear and tear. Try implementing a weekly maintenance routine with the tools and tips I’ve shared, and you’ll enjoy durable, stunning floors for years to come.
If you’re interested in deepening your maintenance skills or facing specific challenges, reach out to experts via their contact page. Protect your investment and keep your flooring looking impeccable—because long-term beauty starts with consistent care.

Lessons That Reshaped My Flooring Journey
- Discovering the magnet hack taught me patience and precision, transforming a tedious search into an empowering skill that saves time and materials, making me confident during installation.
- Realizing the importance of proper subfloor assessment prevented future cracks and shifts—understanding that preparation outweighs the project’s end result brought me a new respect for proactive planning.
- Embracing continuous learning through expert resources like mastering-floor-leveling-pro-secrets-for-perfect-installations inspired me to refine my techniques, turning challenges into opportunities for mastery.
My Go-To Tools and Resources for Flooring Excellence
- Neodymium Magnets: Inexpensive yet powerful, they are my first choice for locating hidden fasteners without damage.
- Laser Level Kits: Brands like Bosch GOL 32 have transformed my ability to maintain perfect levelness, ensuring longevity and visual appeal.
- Quality Cleaning Supplies: Microfiber mops and pH-neutral cleaners help preserve finishes, extending the life of my floors.
- Educational Guides: I trust step-by-step installation guides for their comprehensive, up-to-date insights that elevate my understanding and outcomes.
Your Turn to Elevate Floors with Confidence
Embarking on a flooring project isn’t just about laying materials—it’s about cultivating a craftsmanship mindset that values preparation, patience, and ongoing learning. With the right tools and knowledge, you can transform even the hidden challenges into opportunities for excellence. Remember, every detail you perfect now builds a foundation for durability and beauty that lasts for years. So, are you ready to take your flooring skills to the next level and enjoy the satisfaction of a job well done? Share your thoughts or ask questions below—let’s learn together!