
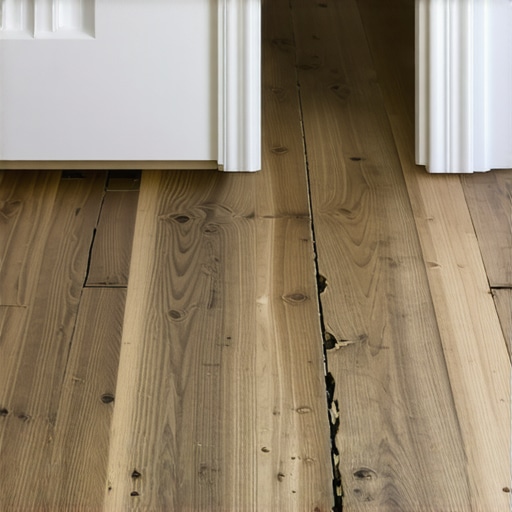
It was a chilly Saturday morning when I unrolled a fresh roll of vinyl flooring, ready to transform my living room. As I laid it out, I noticed tiny bubbles forming, and my heart sank. Turns out, the problem wasn’t the vinyl but what lay underneath—a poorly prepared subfloor that I had overlooked. That lightbulb moment taught me a crucial lesson: the real challenge isn’t just installing the floor; it’s ensuring the foundation is solid first.
Spotting the Warning Signs Before It’s Too Late
When you’re eager to revamp your space with new vinyl, hardwood, or tile, it’s tempting to jump right in. But ignoring the condition of your subfloor can lead to disastrous results—peace of mind and hard-earned money wasted on repairs, or worse, new floors that buckle or crack prematurely. I’ve learned that the secret lies in knowing what to look for and how to evaluate your subfloor’s health.
Early on, I made a mistake by ignoring noticeable unevenness, thinking a quick releveling would suffice. That oversight cost me several additional steps later. According to flooring experts, failure to identify subfloor issues before installation can compromise the entire project—leading to uneven surfaces, cracking, or delamination. For more on what to look out for, check out [this detailed guide](https://tiletrendshop.com/step-by-step-guide-to-flooring-installation-and-leveling-success).
Is your subfloor ready for new flooring, or is it hiding problems that could ruin your DIY project? If you’ve faced even a hint of unevenness, creaking, or water damage, it’s worth taking a closer look before proceeding. I’ll walk you through the key indicators and how to assess them effectively, helping you avoid costly mistakes down the line.
Let’s explore how to determine whether your subfloor is up to the task, setting a foundation for lasting beauty and durability in your home.
Assessing the Existing Surface
Start by thoroughly inspecting your subfloor for any signs of damage or unevenness. Walk across the surface and listen for creaks or notice soft spots. Use a long level or straightedge to check for dips or humps. Remember, the subfloor is the foundation of your new floor—like building a house on solid ground, you can’t skip this crucial step. During my first attempt, I neglected this step and ended up with a wavy floor; a mistake I won’t repeat.
Cleaning and Clearing the Area
Clear all furniture and debris from the space. Sweep and vacuum thoroughly to remove dust, dirt, and loose particles that could interfere with leveling compound or adhesives. A spotless surface ensures proper bonding and reduces the risk of bubbles or looseness—similar to preparing a canvas before painting. In my experience, skipping this step led to poor adhesion and uneven tiles.
Identifying Problem Areas
Look for water damage, mold, or rotting wood. Use a moisture meter to detect excess moisture which can cause warping. Pay attention to dark stains or soft spots; these are red flags that require attention. Think of it like diagnosing a patient—you need to know what’s underneath to treat it effectively. I once found water damage hidden under a carpet, which saved me from laying new flooring over a compromised surface.
Choosing the Right Tools
Gather tools such as a circular saw, drill, self-leveling compound, sanding blocks, primer, and a trowel. Having the correct gear is vital for efficient work—like a chef with the right knives. For leveling, a laser level can expedite your process, providing precise readings. In my project, using a laser level saved hours of manual measurement and ensured accuracy for tile installation, avoiding future cracks.
Preparing the Surface
If the subfloor has minor imperfections, lightly sand high spots and fill low areas with a suitable patching compound. For larger indentations, employ a self-leveling compound, spreading it evenly with a trowel. Think of leveling as smoothing a rippled lake surface—your goal is a flat, uniform plane. During my experience, applying the leveling compound was messy but critical; I used a straightedge to feather the edges, preventing sharp transitions.
Implementing Proper Leveling Techniques
Pour the self-leveling compound at the lowest point first, then gradually work outward, allowing each area to settle. Use a gauge rake to spread the compound evenly—like icing on a cake—ensuring no air pockets or bubbles. For large spans, it’s best to work in sections to manage curing times. I once rushed the process and ended up with bubbles; after that, I followed guidelines from [Floor leveling challenges](https://tiletrendshop.com/floor-leveling-challenges-common-mistakes-and-how-to-avoid-them), which taught me patience pays off.
Allowing Adequate Curing Time
Let the leveling compound cure fully—typically 24 hours—before proceeding. Rushing this step can compromise adhesion and lead to cracks. Think of it as baking bread; patience yields the best crust. During my project, I delayed the next phase by a day, but it paid off with a perfectly smooth surface ready for flooring installation. Check the manufacturer’s instructions for specific curing times and conditions.
Final Inspection and Testing
Once cured, re-verify the surface with a level or straightedge. Perform the vacuum test: walk across the surface, then press with your foot to listen for hollow sounds indicating low spots. If needed, reapply leveling materials to these areas. Remember, a solid foundation minimizes future issues. My mistake was ignoring this step, which caused tiles to crack after a few months. To ensure your subfloor is truly ready, consult [The ultimate guide to floor leveling](https://tiletrendshop.com/the-ultimate-guide-to-floor-leveling-for-a-perfect-finish).
Many homeowners believe that laying new flooring is simply about choosing the right material and following basic instructions. However, this oversimplification often leads to costly mistakes and frustration. **Let’s dig deeper into the details most people overlook** and clarify some widespread misconceptions. One prevalent myth is that all subfloors are suitable for any flooring type. In reality, **each subfloor requires specific preparation and assessment**; for instance, a concrete slab behaves differently from a plywood surface, affecting the choice of leveling techniques. Rushing this step or ignoring moisture levels can cause tiles to crack or vinyl to bubble, as evidenced in studies by flooring experts. An advanced mistake many make is believing that leveling compounds cure quickly enough for immediate flooring installation. But, as outlined in the [Floor leveling challenges guide](https://tiletrendshop.com/floor-leveling-challenges-common-mistakes-and-how-to-avoid-them), proper curing time—often 24 hours or more—is vital to prevent future failures.
Another misconception surrounds the use of self-leveling compounds on uneven surfaces. Many think that pouring them directly over a damaged or contaminated subfloor will solve underlying issues. In fact, this can trap moisture or debris, leading to adhesion problems later. **Proper surface preparation is crucial, including cleaning and repairing** before applying leveling products. On an advanced note, understanding the differences between floor leveling methods can save you significant headaches. For example, a simple pour of self-leveling compound isn’t suitable for large dips if not supported by proper subfloor repair or reinforcement, as discussed in [expert-level leveling techniques](https://tiletrendshop.com/precise-floor-leveling-techniques-to-achieve-flawless-surfaces).
Have you ever fallen into this trap? Let me know in the comments.
Let’s uncover one more nuance: the importance of controlling environmental conditions during installation. Many overlook humidity and temperature, which can affect curing times and adhesion. For instance, high humidity can prolong drying, leading to uneven surfaces or weak bonds. Conversely, excessively dry conditions may cause compounds to cure too quickly, creating cracks. According to industry studies, maintaining a stable environment—ideally between 65-75°F and 40-50% humidity—can improve results significantly. For advanced DIYers aiming for perfection, paying attention to these subtleties is key. Don’t just focus on the visible parts of your project; the **hidden details, such as moisture content and curing conditions**, determine the longevity and beauty of your floors. For comprehensive guidance, visit [flooring installation fundamentals](https://tiletrendshop.com/flooring-installation-fundamentals-leveling-for-a-seamless-look).When it comes to maintaining impeccable tile, hardwood, or level floors, possessing the right tools is paramount. Not only do they ensure precision during installation and repair, but they also significantly extend the longevity of your floors. Personally, I rely on high-quality equipment that I’ve tested over numerous projects to deliver superior results. One such indispensable tool is a professional-grade laser level. Unlike traditional bubble levels, laser levels project a consistent, 360-degree beam that helps you achieve perfect floor flatness, essential for avoiding cracks and uneven wear. I use the self-leveling laser for its accuracy in complex leveling scenarios, which streamlines my workflow and reduces setup time.
Another critical instrument is a moisture meter, particularly when dealing with concrete slabs or historic wooden floors. Moisture levels directly impact adhesion and prevent issues like buckling or mold. I prefer a pin-type moisture meter with dual pins, as it provides reliable readings without damaging the surface, a crucial aspect when preserving older hardwood. Regularly monitoring moisture content aligns with evolving industry standards, which emphasize environmental control for long-term durability.
For surface preparation, an industrial-grade random orbital sander with dust extraction is a game-changer. It ensures clean, flat surfaces ideal for applying leveling compounds or finishing coats. I’ve found that a dustless sander minimizes cleanup and maintains a healthier workspace, especially when working indoors. Pair this with a high-quality vacuum system, such as a HEPA-filtered shop vac, to keep debris contained and avoid contaminating your work area—the importance of which can’t be overstated.
When doing extensive repairs or level adjustments, a good-quality mixing drill with a paddle attachment is crucial. This combination ensures your leveling compounds—like self-leveling underlayment—are thoroughly blended, preventing air pockets or inconsistencies that could compromise the entire installation. Using precise mixing methods, as outlined in expert guides, can dramatically improve surface smoothness and adhesion.
Looking ahead, I predict that smart tools integrated with IoT technology, such as moisture sensors or auto-leveling devices, will become standard in professional flooring projects. These advancements promise even greater precision and efficiency, reducing the margin for error.
How do I keep my equipment in top shape? Regular calibration and cleaning are essential. Invest time monthly to verify your laser levels and moisture meters, ensuring they provide accurate readings when most needed. Advocating for routine maintenance based on manufacturer guidelines guarantees your tools won’t let you down at critical moments.
If you’re eager to elevate your flooring projects, I highly recommend trying advanced leveling techniques using a high-quality laser level combined with moisture monitoring. These methods might seem complex at first glance, but mastering them results in floors that are not only beautiful but built to last for decades. For detailed instructions, revisit the challenges of floor leveling and learn how precision tools can mitigate common issues. Investing in these tools truly pays off in the long run, providing the confidence and accuracy needed for flawless results.
What I Wish I Knew Before Laying the First Tile
The biggest breakthrough in my flooring journey was realizing that a flawless finish begins well before the first tile or hardwood plank is installed. Proper subfloor assessment might seem tedious, but it’s the heartbeat of durable, gorgeous floors. Discovering hidden moisture or minor dips during my initial project saved me from heartbreak in the long run. Never underestimate the power of thorough inspection; it’s the lesson that transformed my approach from guesswork to precision.
Tools That Turn DIY Dilemmas into Masterpieces
Investing in the right tools changed everything for me. A laser level ensured symmetry, while a moisture meter kept my hardwood looking pristine. High-quality sanders and vibratory tools sped up prep and repairs, making once daunting tasks manageable. I trust these tools — and the knowledge that their proper use is an untapped secret for those who want their flooring projects to stand the test of time. For a curated list, check out my favorite [tools for flooring perfection](https://tiletrendshop.com/precise-floor-leveling-techniques-to-achieve-flawless-surfaces).
When Experience Becomes Your Best Teacher
Every mistake, from rushing curing times to ignoring subtle signs of water damage, was a lesson toward mastery. I’ve learned that patience and attention to detail are invaluable. One unforgettable moment was discovering small air pockets that almost caused future cracks—an issue I avoided by re-evaluating my curing process. These lessons aren’t always found in manuals but through careful observation and persistence. Remember, your efforts now pave the way for floors that can last decades.
Embracing the Nitty-Gritty for a Showstopper Finish
Surface preparation, environmental conditions, proper tool handling—these aren’t glamorous topics but are fundamental. Tiny dust particles or uneven moisture levels can sabotage even the best materials. During one project, I managed to control humidity with portable dehumidifiers, which dramatically improved the bond and finish. Little details like this elevate your work from amateur to pro. Want to see comprehensive tips? Visit [how to achieve flawless floor leveling](https://tiletrendshop.com/how-to-achieve-flawless-floor-leveling-before-tile-laying).
Turning Knowledge into Tangible Results: My Path Forward
The journey from beginner to confident installer has been filled with trial, error, and rewarding discoveries. I encourage you to start small, focus on learning each step thoroughly, and don’t shy away from tackling new techniques. With patience, the right tools, and a helpful community, you can create stunning floors that will be the envy of your home. Remember, every expert was once a novice—your turn begins now.
Insight from the Trenches: Lessons Learned About Flooring Prep
- Don’t skip subfloor checks: Hidden issues can sabotage your entire project if overlooked. I once ignored a moisture problem, leading to buckling, and wished I’d tested more diligently.
- Level before you lay: Rushing to install without leveling turns minor imperfections into glaring flaws. I learned this the hard way after tiles cracked prematurely.
- Control your environment: Temperature and humidity play a huge role. Using simple environmental controls saved my finish from unexpected warping and cracks.
- Patience is a virtue: Allow materials to cure fully, even if it’s tempting to proceed quickly. Rushing curing was the biggest mistake I made, costing me time and money.
Here’s to Building Floors That Last
If you’re committed to creating a foundation that stands the test of time, pay attention to these insider secrets. Every step, from assessment to curing, contributes to the final masterpiece. For more in-depth guidance and expert tips, revisit [the ultimate guide to flooring installation](https://tiletrendshop.com/step-by-step-guide-to-flooring-installation-and-leveling-success) and turn your next project into a lasting success.