
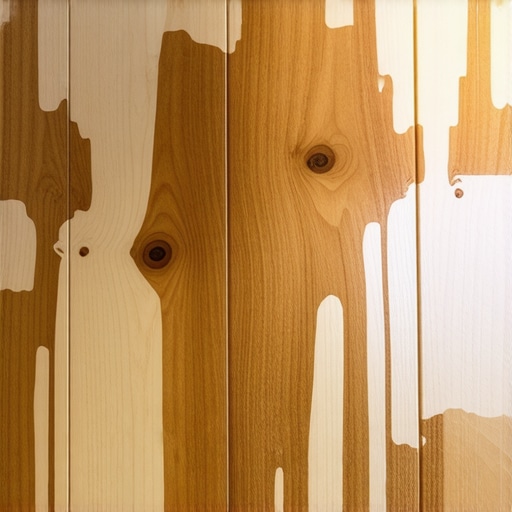
It happened in the middle of a rainy night. I woke up to a strange creaking sound coming from my living room floor. As I tiptoed closer, I noticed a slight unevenness, like the planks were trying to rise above each other. Turns out, a leak from the upstairs bathroom had been dripping for hours. The next morning, I found my beautiful hardwood floor crowned and warped—completely unexpected and frustrating. This experience was my lightbulb moment: water damage can do more than just stain or warp your floors; it can cause the wood to literally crown, creating a high spot that messes with the entire room’s aesthetic and functionality.
Understanding Why Your Hardwood Crowns After a Leak
Don’t Jump to Conclusions—Here’s What’s Really Happening
My early mistake was assuming the damage was just surface-level. I quickly learned that hardwood’s response to moisture isn’t simple—it expands, contracts, and sometimes warps in ways that aren’t immediately visible. When water seeps into the wood, it causes swelling from within, and if left unchecked, this swelling causes the plank to lift in the center, creating that unmistakable crown shape. This isn’t just a cosmetic issue; it’s a sign that the underlying structure is compromised, and ignoring it could lead to more serious problems like buckling or even mold growth. According to experts, water-induced warping is a common cause of crowned floors after leaks, especially if the moisture isn’t addressed promptly (source).
So, how do we prevent this from happening? The key is understanding the moisture content and how it affects your specific hardwood type. Early detection can make all the difference. Have you ever experienced a leak that seemed minor at first but led to an irreversible change in your flooring? If so, you’re not alone, and the good news is, there are effective solutions. In the upcoming sections, I’ll guide you through the steps to fix crowned hardwood floors and prevent future water damage from turning into costly renovations. Ready to tackle this problem head-on? Let’s get started.
Assess and Prepare Your Workspace
Start by removing any furniture or rugs from the affected area. Wear protective gear like gloves and a mask to avoid dust and mold spores. Examine the warped planks to determine the extent of damage. Use a moisture meter to measure residual humidity, ensuring you wait for readings within safe ranges before proceeding (source).
Dry Out the Affected Area Thoroughly
Use industrial fans and dehumidifiers to remove moisture from the subfloor and hardwood. This step is crucial; rushing into repairs with damp wood ensures the problem returns. Keep running the equipment until moisture levels stabilize. Remember, moisture trapped beneath the surface causes the crown to reappear even after initial flattening.
Remove Screwed or Nailed-in Damaged Planks
Identify warped or severely damaged boards. Use a pry bar and a circular saw to carefully cut and remove these planks. Be precise to avoid damaging adjacent flooring. This creates a clean base for repairs and prevents future buckling. For small repairs, consider replacing only the problematic sections following this guide.
Address the Subfloor Before Reinstalling Wood
Inspect the subfloor for water damage, warping, or elevated areas. Use a straightedge or a laser level to identify high spots. Fill gaps or cracks with an appropriate wood filler, and sand down any uneven surfaces (source). Pay special attention to areas where water seeped through, as these can cause future instability if left untreated.
Apply a Floor Leveling Compound
If significant unevenness exists, spread a self-leveling cementitious compound over the subfloor. Use a serrated trowel to evenly distribute the material, working from the farthest corner toward the exit to prevent stepping on fresh compound. For best results, follow expert leveling techniques. Allow sufficient curing time, typically 24 hours, before proceeding.
Flatten the Hardwood Using a Sander
For minor crowns, use a floor sander with a coarse grit pad to gently smooth out the high spots. Set the sander to a low speed and proceed slowly to avoid removing too much material or creating additional gouges. Fine-tune the process with a buffer and fine grit to achieve a uniform surface (source). Never skip test sections to gauge your progress.
Reinstall and Secure the Floorboards
Once the surface is flat, re-secure any loose planks with nails or screws. Use a pneumatic nailer for even pressure and avoid over-tightening, which can cause splitting. Fill any nail holes with matching wood filler. For a seamless finish, sand the entire floor lightly after fastening to blend repaired sections with existing flooring.
Finish with Proper Sealing and Maintenance
Apply a protective sealant suitable for your hardwood type to prevent future water damage. Regularly inspect for leaks, especially in bathrooms or kitchens, and maintain humidity levels below 60%. Proper upkeep preserves your repairs and keeps the floor crowned-free for years, aligning with expert [hardwood floor care secrets](https://tiletrendshop.com/hardwood-floor-care-secrets-to-longevity-and-shine).
Many homeowners and even seasoned DIY enthusiasts believe that achieving perfectly level floors is simply about using the right tools or following standard procedures. However, in my experience, there’s a hidden nuance that many overlook: the significance of understanding substrate behavior and moisture movement over time. This oversight often results in future buckling, uneven surfaces, or even cracked tiles, despite adhering to conventional leveling techniques.
Is It Enough to Just Level Before Installing Tile or Hardwood?
Contrary to popular belief, leveling before installation isn’t a one-and-done step. Floors are dynamic systems, influenced by temperature changes, humidity fluctuations, and structural shifts. For instance, improper assessment of subfloor stability or neglecting to account for expansion gaps can lead to costly repairs down the line. A study published by the National Wood Flooring Association highlights that neglecting subfloor prep ranks among the top causes of finished-floor failure (source).
Beware of the Common Myth Surrounding Self-Leveling Compounds
Many believe that pouring a self-leveling compound guarantees a flawless surface for tile or hardwood. But in fact, these compounds are sensitive to application conditions and substrate quality. Applying over contaminated or improperly prepared surfaces can trap moisture or create weak spots, ultimately leading to further unevenness or cracking. It’s essential to follow proper surface preparation protocols and consider long-term substrate movement, not just immediate flatness (learn more here).
Advanced Insight: How Moisture Matters More Than You Think
In expert flooring circles, there’s a growing emphasis on moisture management as the critical factor in long-lasting installations. Even subtle moisture differences can cause wood to swell or shrink over time, resulting in unexpected cupping or crowning. For example, a thorough moisture mitigation plan, including vapor barriers and climate control, isn’t just recommended—it’s vital. Ignoring this can undermine your entire leveling effort, leading to the very issues you’re trying to avoid. A recent study emphasizes that moisture-related failures account for nearly 50% of flooring problems (source).
So, what’s the take-home message? Superior floor leveling is more than just applying a compound or sanding down high spots. It requires a comprehensive understanding of substrate behavior, moisture flow, and environmental conditions. Overlooking these nuanced factors can diminish your project’s durability and aesthetic appeal. Remember, every step counts—skipping or rushing the preparatory phase is like building a house on shifting sands. Ensure you analyze your substrate thoroughly, incorporate moisture controls, and follow expert-approved techniques for the best results.
Have you ever fallen into this trap? Let me know in the comments or reach out through our contact page. Sharing your experience may help others avoid common pitfalls and achieve flawless, long-lasting floors.Maintaining perfect floors requires the right tools and methods to ensure longevity and aesthetic appeal. One essential piece of equipment I rely on is a high-quality moisture meter, such as the Delmhorst J-Lite or Protimeter Surveymaster, which I personally use to assess moisture levels before and after installation. This step is crucial because subtle moisture imbalances can lead to warping or buckling over time, especially in hardwood floors. Regularly monitoring humidity with these devices helps me catch potential issues early, saving time and costly repairs. Additionally, a professional-grade belt sander with variable speed control allows for precise sanding to correct minor unevenness, whether due to settling or previous repairs. I prefer models with dust collection systems integrated, like the klindex HTC 420, which keeps my workspace clean and minimizes airborne dust, contributing to healthier indoor environments.
For detailed leveling, I utilize self-leveling compounds like Ardex K 15, applied with a flowable consistency that I control using a calibrated mixing paddle. This technique ensures that even complex, irregular subfloors are smoothed effectively, providing a flawless base for tile or hardwood installation. To optimize the curing process and prevent future issues, I use digital temperature and humidity sensors during curing, ensuring conditions stay within recommended ranges.
Looking ahead, I predict that automation will play a larger role in flooring maintenance. For example, emerging smart sensors integrated into subfloors could continuously monitor moisture and structural shifts, alerting homeowners or contractors via smartphone apps when intervention is needed. This proactive approach will significantly reduce long-term damage risks and maintenance costs.
How can you keep your floors functioning flawlessly over time? Implement regular inspections with a moisture meter, invest in quality sanding equipment for minor repairs, and always ensure your subfloor and environmental conditions are optimal before installing or repairing. Remember, the key to durable flooring lies in meticulous preparation and ongoing care.
A tip I recommend trying today is the ‘bucket of water’ test—using a damp cloth to spot-check moisture content on your subfloor or hardwood surface. This simple, cost-effective method can reveal hidden issues before they become major problems, aligning with expert advice on floor leveling best practices. Jumpstart your maintenance routine by incorporating this quick test, and keep your floors looking and performing their best for years to come.
Lessons From My Floor Failures That Changed My Approach
- I’ve realized that patience and thorough moisture assessment are essential; rushing the process only deepens the damage and increases repair costs.
- Understanding the behavior of subfloor materials and moisture migration has empowered me to choose better solutions and avoid repeating mistakes.
- Investing in quality equipment like a reliable moisture meter and a professional sander has made a significant difference in achieving lasting, level floors.
Tools and Resources That Elevated My Flooring Journey
- Delmhorst J-Lite Moisture Meter: Its accurate readings helped me determine when the subfloor and hardwood were sufficiently dry for repairs, avoiding future warping.
- Ardex K 15 Self-Leveling Compound: This product allowed me to create a perfectly flat surface, even over uneven subfloors, ensuring long-term stability.
- Expert Guides from TileTrendShop: Their articles on floor leveling and moisture management provided invaluable step-by-step instructions tailored for DIY enthusiasts and professionals alike.
- Professional Floor Sanders like Klindex HTC 420: Their precision and dust collection features made refinishing minor crowns straightforward and effective.
Turning Challenges into Opportunities for Better Floors
If your hardwood floors have crowned due to water leaks, remember that each obstacle offers a chance to learn and improve your skills. By understanding the intricate dance of moisture, substrate behavior, and proper preparation, you can prevent future issues and create beautiful, durable surfaces. Embrace the process, invest in the right tools, and consider expert advice as your allies in this journey. Your future self will thank you for the effort you put in today. Ready to transform your approach and achieve flawless floors that stand the test of time? Let’s make it happen—you’ve got this! Feel free to share your experiences or ask questions below. And for more tips on flooring mastery, check out our latest tile trends or get inspired by expert installation guides.