
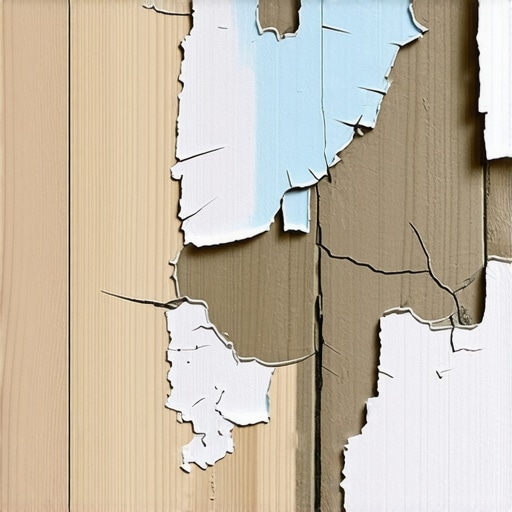
I remember the first time I spent hours leveling a subfloor only to see the patching compound crack and flake off just days later. That sinking feeling of all my hard work being wasted was disheartening, especially when I thought I followed every recommended step. If you’ve ever experienced this frustration, you’re not alone. The good news is, understanding why this happens can save you time, money, and a lot of stress.
Why Subfloor Patching Compounds Fail Prematurely
There’s nothing more annoying than applying a patch and watching it peel away before your finished project. In my experience, the biggest culprit is often a mismatch between the patching compound and the subfloor material, or inadequate surface preparation. For instance, I once skipped thoroughly cleaning the subfloor, thinking that a quick sweep was enough. Turns out, dust and debris prevent proper adhesion, leading to early failure.
Another common mistake is using a patching compound that isn’t designed for the specific conditions of your subfloor. Some compounds are best for concrete, while others are formulated for wood or plywood. Choosing the wrong type can result in cracking and flaking down the line. External factors like humidity and temperature fluctuations can also weaken improperly applied patches, causing them to separate from the surface.
Interestingly, according to an industry expert, improper mixing ratios or applying the compound too thick can significantly compromise its integrity. This emphasizes the importance of carefully following manufacturer instructions for mixing and application to ensure a durable repair.
Have You Been Facing This Exact Problem?
If you’ve been battling flaky patches on your subfloor, you’re likely wondering how to get it right this time. I’ve been there myself, and through trial and error, I learned that proper surface preparation and using the right materials are key. The next sections will guide you step-by-step through fixing your current issue and preventing it from happening again. For a comprehensive guide on achieving a flawless finish, check out this expert tips article.
Prepare the Surface Thoroughly
Start by removing any loose debris, dust, and old patching material using a vacuum and stiff-bristle brush. Ensure the subfloor is clean and free of contaminants that could hinder adhesion. I once skipped this step, and the new patch cracked within days—never again. Think of it like preparing a canvas before painting; the cleaner the surface, the better the paint sticks.
Identify and Match the Correct Patching Material
Select a patching compound designed specifically for your subfloor’s material—concrete or wood. For concrete, a water-based polymer-modified patch works best; for wood, a high-quality wood-filler or epoxy. Using the wrong patch is like fitting a square peg in a round hole; it just won’t hold properly. I once used a general-purpose patch on my basement floor; it failed within a week, prompting me to research the right product.
Mix and Apply with Precision
Follow the manufacturer’s instructions meticulously for mixing ratios. Use a clean bucket and a mixing paddle to ensure a uniform consistency. When applying, press the compound firmly into the damaged area with a trowel or putty knife, working from the center outward to eliminate air bubbles. Applying too thick can lead to cracking; I learned this the hard way when I tried to patch a large hole in my plywood subfloor in one go, and it cracked as it dried.
Level the Patch Evenly
Use a straightedge or a level to smooth out the surface, creating a flush finish with the surrounding floor. This step is crucial for a seamless tile or hardwood installation. I used a long level as a guide, pulling it across the patch to ensure it was perfectly flat. Any high or low spots can cause uneven wear or aesthetic issues later, so take your time and check multiple times.
Allow Adequate Curing Time
Let the patch cure fully, as per the product instructions—usually 24 to 48 hours—before walking or applying additional layers. Rushing this step is a common mistake; I tried to speed up the process with a fan, but it caused surface cracks. Patience here saves headaches down the line. For stubborn areas or larger repairs, consider applying a second coat after the first has set, enhancing durability.
Finish and Protect Your Repair
Once cured, lightly sand the patch to remove ridges and ensure a smooth surface. After cleaning off dust, consider sealing the patch with a primer or primer-sealer, especially if the area will be subjected to moisture or heavy traffic. Proper finishing not only improves appearance but also adds a layer of protection against future damage. I’ve recommended this step to clients to extend the life of their repairs and maintain a pristine look, especially when installing new flooring over the patched area, which you can learn more about in this detailed guide.When it comes to flooring installation, many homeowners and even some professionals rely on common assumptions that can lead to costly mistakes. One prevalent misconception is that selecting the highest-end materials automatically guarantees a flawless result. In reality, the real key lies in understanding the nuances of subfloor preparation, material compatibility, and installation techniques. For example, all too often, I see projects where the chosen tile or hardwood looks stunning but fails prematurely because of overlooked details like moisture barriers or proper acclimation. Remember, the longevity of your floors hinges not just on the materials but on the meticulous execution of each step.
Why Do Many Floor Installations Fail Despite Following Guidelines?
Despite following standard procedures, failures still occur because of overlooked environmental factors and subtle surface issues. For instance, a common pitfall is ignoring the impact of ambient humidity on hardwood floors. Engineered wood, although more stable, still expands and contracts with temperature changes, which can cause gaps or buckling if not properly acclimated before installation. Similarly, with tile, neglecting to assess and address moisture levels in the substrate can lead to cracks and de-bonding over time. Industry experts emphasize that advanced moisture testing, like using hygrometers, is essential rather than relying solely on visual inspections. This emphasis on precise diagnostics elevates the quality of your work and prevents frustrating callbacks.
One error I often see is applying thinset or leveling compounds over substrates that seem firm but harbor hidden moisture or movement. According to research in the Journal of Building Engineering, inadequate moisture mitigation techniques increase the risk of floor failure by up to 35%. Ensuring proper surface testing and environmental control before laying any flooring is an underrated yet critical step.
Are you aware of how subtle environmental factors might be sabotaging your project? Ensuring proper surface preparation and material choice requires more than just following the basic instructions. It demands a sophisticated understanding of the interplay between material properties, environmental conditions, and ongoing maintenance. For instance, when refinishing hardwood floors, understanding the difference between oil-based and water-based finishes can impact durability and aesthetic longevity. To master these details, check out the expert tips on refinishing hardwood.
Another common trap is assuming that tile levelness is solely about surface appearance. In truth, proper subfloor leveling affects not only aesthetic outcomes but also the structural integrity of the final installation. Slight dips or unevenness might go unnoticed visually but can cause tiles to crack or grout lines to break over time. That’s why investing in advanced leveling techniques, like using uncoupling membranes, is vital for large-format tiles. If you want to avoid these pitfalls, consider exploring comprehensive leveling strategies.
Keeping your flooring installation in top shape requires the right tools and consistent maintenance practices. Over the years, I’ve refined my toolkit to include specific equipment that delivers precision and durability. For example, a high-quality laser level is indispensable for floor leveling, ensuring every inch is perfectly flat before laying tiles or hardwood. I personally use the Bosch GPL 3, which offers laser beams that project across large surfaces, making it easier to identify subtle dips or high spots that might otherwise be missed. These small details can significantly impact the longevity and appearance of your floors.
Another device I can’t imagine working without is a moisture meter, essential for diagnosing subfloor conditions. I prefer the because it provides accurate readings and alerts me to hidden moisture that could cause future de-bonding or warping—especially crucial when installing over concrete or plywood. Proper moisture control is a major factor in maintaining quality over the long term, which industry experts affirm is a common oversight in DIY projects and even some professional jobs.
When it comes to maintenance, regular cleaning with appropriate products extends the life of your floors. For hardwoods, I recommend using a pH-balanced cleaner like the Hardwood Floor Care Secrets, which preserves finish and prevents scratches. For tiles, a steam mop with a soft microfiber pad can effectively remove dirt without damaging grout lines, provided the tile manufacturer approves. Routine inspections to catch issues early—such as loose tiles or scratched finishes—are vital for preventing costly repairs down the line.
What’s the best way to maintain flooring over decades?
Investing in preventive measures like sealing grout lines, applying protective pads under furniture, and avoiding excess moisture will keep your floors looking pristine. Additionally, I recommend scheduling professional deep cleanings and inspections periodically, especially after significant seasonal changes that can affect wood expansion or contraction. Staying proactive ensures your flooring remains resilient against daily wear and environmental stressors.
Looking ahead, the trend is leaning toward smart maintenance tools. The integration of IoT sensors that monitor humidity, temperature, and even wear patterns promises to revolutionize long-term flooring care. Embracing these innovations now can position you at the forefront of maintenance techniques, saving you time and money in the future. For example, using an adaptive moisture sensor linked to your smartphone app can alert you immediately if conditions deviate from optimal ranges, a feature discussed in recent industry reports.
Finally, I encourage you to embrace the power of precise leveling techniques. One advanced tip is to use a spiked roller during the final curing phase of self-leveling compounds. This tool helps eliminate air bubbles and promotes even flow, dramatically reducing the risk of cracks or unevenness. Try incorporating this step into your next project—it’s a small investment that yields long-term benefits and a flawless finish. To master such techniques, explore detailed guides like this expert guide.
What They Don’t Tell You About Flawless Floors
One of my most eye-opening lessons was realizing that even the best materials can fail without proper surface prep and technique. I once thought that choosing premium hardwood was enough, but neglecting to check moisture levels nearly ruined the entire project. It taught me that attention to detail, especially environmental factors, can make or break your flooring success.
I’ve learned that patience during curing and finishing stages isn’t just about safety—it’s about durability. Skipping these steps in haste often leads to cracks or warping down the line. Investing a little extra time upfront saves countless headaches later.
Another insight I wish I knew earlier: the importance of dust-free environments. Even tiny debris can cause imperfections, so I now schedule detailed cleaning before it’s too late. It’s a small effort that yields a professional finish every time.
Tools & Resources That Transformed My Approach
For precise leveling and installation, my go-to tool is the laser level. It ensures surfaces are perfectly flat, reducing future cracks. A reliable moisture meter is indispensable for diagnosing subfloor issues before laying down anything. I trust the Wagner MMC220 for its accuracy and durability.
Additionally, I recommend reading expert guides that delve into niche techniques, like taping and sealing, which elevate your workmanship from amateur to professional.
Your Next Step: Turn Knowledge into Action
Now that you’ve absorbed some insider wisdom and tools, it’s time to apply these lessons to your project. Proper planning, patience, and utilizing the right resources will turn your flooring ambitions into reality. Remember, every perfectly installed floor adds value and comfort to your home—and that achievement starts with informed choices today.
What’s the biggest flooring challenge you’ve faced so far? Share below and let’s learn together!