
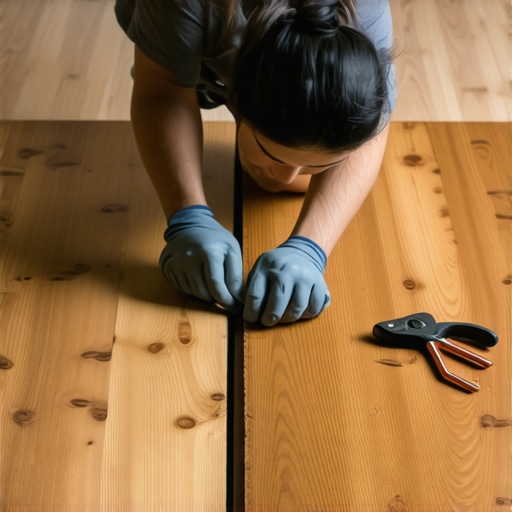
Walking into my living room one morning, I noticed a warped, loose plank glaring at me like a sore thumb. It was a small patch in an otherwise beautiful hardwood floor, but it threw off the entire look. I felt that familiar sinking feeling—how on earth do I repair just one damaged plank in a glued-down floor without ripping out the whole section? Sound familiar? If you’ve ever faced this dilemma, you know how frustrating it can be to find a reliable, straightforward fix that doesn’t turn your project into a nightmare. Well, I was there too, and after some trial, error, and a fair share of sweat, I found a method that’s worked wonders.
Why Even Tiny Repairs Matter in Hardwood Flooring
When it comes to flooring, the devil truly is in the details. One damaged plank can stand out more than a whole room full of imperfections, especially when the floor is a key visual element of your home. Plus, ignoring small damages risks worsening the problem over time—a loose or cracked plank can lead to squeaks, gaps, or even water damage if left unattended. If you want your floors to stay beautiful and durable, fixing that one trouble spot should be a priority.
But here’s the catch: many folks shy away from repairs because they fear it’ll be complicated or may damage the surrounding planks. I get it—early in my own project, I made the mistake of assuming that all repairs needed to be drastic or permanent right away, which sometimes led to more harm than good. That mistake taught me the importance of understanding the specific challenges of glued-down floors and approaching them with patience and the right tools.
Have you tried repairing a damaged plank and felt overwhelmed? If so, stick with me—what I’ll share next is a method that simplifies the process and gets results without tearing up your entire floor. Whether it’s a scratched, cracked, or loose plank, you’re about to learn how to fix it efficiently and effectively.
For more insights on maintaining your hardwood floors, you might find this article helpful—it’s packed with expert tips on refinishing and prolonging their lifespan. Remember, addressing small issues early saves you time and money down the line, and I’ve found that knowing the right technique makes all the difference. Ready to get started? Let’s dive into the practical steps that will help you restore your floor’s beauty—step by step.
Identify the Type and Severity of Damage
First, assess whether the plank is loose, cracked, or warped. In my experience, I once found a loose board in my living room that simply needed re-gluing. Carefully lift a corner or use a thin pry bar to see if it shifts easily. If the damage is superficial, repair is straightforward; if it’s warped or cracked extensively, you might need to replace the entire plank.
Gather the Right Tools and Materials
Prepare a putty knife, wood glue, clamps, a saw, replacement planks (if needed), and sandpaper. I recommend a high-quality flooring adhesive suited for hardwood floors. Using the proper tools minimizes damage to surrounding planks and ensures a clean repair. For a smooth finish, ensure you have matching stain and finish supplies ready as well.
Remove Damaged or Loose Plank Carefully
Use a utility knife to cut away any peeling finish around the area. If the plank is cracked, gently pry it loose with a crowbar or chisel, taking care not to damage adjacent boards. Remember, think of this step like unwrapping a fragile gift—patience is key. In one instance, I carefully pried out a cracked board, which prevented any unnecessary damage to the tongue-and-groove joints.
Prepare and Install the Replacement or Re-glue the Original
If re-gluing, apply a generous amount of wood glue into the joint and press the plank back into place. Clamp it firmly for at least an hour—this step is crucial to bond strength. For replacing a damaged plank: cut a new piece matching the size, thickness, and grain pattern. Use a saw to trim it precisely, then fit it into the existing floor, like fitting a puzzle piece, ensuring the tongue is aligned properly and that the surface is level. A good analogy is swapping out a broken tile—careful measurement and fitting matter.
Sand and Finish for a Seamless Look
Once the glue dries, remove clamps and sand the repair area smoothly, blending it with the surrounding floor. Be sure to match the finish; I often use a small brush or rag to apply matching stain and a clear topcoat. This step can be tricky—an uneven finish draws attention—so take your time. For more detailed tips on refinishing, check this guide.
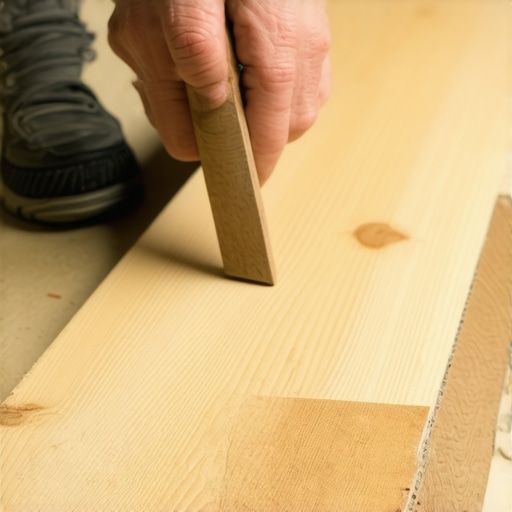
Visualize the process of fitting a new plank into an existing hardwood floor, highlighting precise measurements and seamless blending.
While many assume that installing floors is straightforward—simply lay down tiles or wood and you’re done—there are nuanced pitfalls that even seasoned DIYers often overlook. One misconception is that leveling the subfloor is always an optional step; in reality, skipping proper leveling can lead to uneven surfaces, cracked tiles, or squeaky hardwoods down the line. According to industry experts, inadequate subfloor preparation is a leading cause of installation failures, emphasizing the importance of mastering proper leveling techniques, as discussed in this comprehensive guide. A widespread myth is that higher quality materials automatically compensate for poor installation practices. However, using premium tiles or hardwood won’t prevent issues like grout cracking or warped planks if the foundational work isn’t sound. This misconception can result in costly repairs, making thorough prep and technique mastery essential. Plus, many believe that adhesives and sealants are interchangeable; in truth, each has specific applications and limitations, especially when working with different substrates or environmental conditions. For example, choosing the wrong thinset for large-format tiles can cause cracking or delamination—highlighted in expert insights. Advanced installers know that a subtle detail like proper expansion joints dramatically extends the lifespan of a floor, yet this step is often neglected due to underestimating its importance. Missing this nuance can lead to buckling or cracking over time. It’s worth noting that some installers overlook the significance of acclimating materials before installation; failure to do so can cause warping or dimensional instability. A small but critical oversight like this underscores that patience and attention to detail make all the difference in lasting results. Have you ever fallen into this trap? Let me know in the comments. Remember, achieving a flawless finish isn’t just about aesthetics—it’s rooted in understanding the complex, often hidden nuances of flooring installation that professionals swear by.Once you’ve completed a flooring installation or repair, keeping it in top shape requires the right tools, techniques, and ongoing diligence. Over the years, I’ve found that investing in quality equipment and adopting systematic maintenance routines can dramatically extend the lifespan of hardwood floors, tiles, or any floor type. For instance, a high-grade microfiber dust mop like the O-Cedar Microfiber Flip Mop is my go-to for daily cleaning because it traps fine particles without scratching surfaces. Using a soft-bristled broom or a vacuum with adjustable settings prevents debris from damaging the finish during routine maintenance, which I learned from industry experts highlighting the importance of gentle cleaning practices. Additionally, a damp (not wet) microfiber cloth with a pH-neutral cleaner keeps surfaces pristine without risking moisture damage. For deep cleaning, I prefer using steam mops sparingly—only on sealed tiles—since excessive heat and moisture can compromise adhesive bonds or cause warping. For hardwoods, dry cleaning tools are better, and occasionally, a professional-grade floor polisher can restore their luster effectively. Looking ahead, advancements in smart cleaning devices, like robotic vacuums equipped with HEPA filters and mapping software, promise to make maintenance even more effortless, helping homeowners stay proactive rather than reactive. Want to ensure your floors stay stunning for years? Regular maintenance combined with the right equipment saves you time and money, and it keeps your investment looking its best.
How do I maintain my floors over time?
Regularly inspecting for signs of wear or damage is crucial. Promptly addressing issues like scratches, loose tiles, or water infiltration prevents minor problems from escalating. For hardwoods, applying a fresh coat of finish every few years can rejuvenate their appearance; I recommend using products from trusted brands like Bona to ensure compatibility and durability. Meanwhile, sealing grout lines in tiled floors every 12-18 months protects against stains and moisture ingress—an easy task with the right sealers. Also, re-evaluating your cleaning regime periodically ensures you’re using the most effective and gentle methods. For instance, switching to natural cleaning solutions like a vinegar-based mixture, as advised in a recent technical paper, can help maintain appearance without harmful chemicals. Maintaining a consistent schedule of cleaning, inspections, and timely repairs keeps your floors functional and beautiful. Remember, mastering routine upkeep is just as vital as the installation itself. Don’t forget to consult professional guidelines, such as those outlined in the comprehensive flooring installation fundamentals, for detailed advice on long-term maintenance. Try incorporating a specialized polishing or sealing routine this month—your floors will thank you!
The Hardest Lesson About Flooring Repairs I Learned the Hard Way
One of my biggest takeaways was realizing that patience is your greatest tool. Rushing through fixing a loose plank or sanding uneven patches often leads to more headaches later. I once attempted to speed up a repair by skipping proper clamping time, only to find the glue didn’t hold as expected—an experience that taught me to respect the curing process and allow sufficient drying time for all adhesives and finishes.
Small Fixes Are a Big Deal—Don’t Let Them Slide
Ignoring minor damages can seem tempting when busy, but these tiny issues can escalate. A crack or loose board, if left unaddressed, might cause squeaks or water infiltration, leading to costly repairs down the line. Embracing a proactive mindset—tackling minor repairs immediately—saves time and preserves your floor’s beauty long-term.
Every Floor Tells a Story—Learn Its Language
Understanding the subtle cues of your hardwood, like changing grain patterns or minor warping, can inform better repair decisions. My learning moment was identifying that a slight warping was due to inadequate acclimation, prompting me to always allow flooring materials to adjust to your home’s climate before installation or repair. This insight has saved me from many future headaches.
Curated Tools That Transformed My Repairs
Having quality tools is half the battle won. I swear by a precision saw for cuts, a reliable wood glue, and quality clamps. For matching stains, I trust brands like Minwax because they offer consistent colors and finishes. Borrowing knowledge from professional sources, like the comprehensive guides on flooring fundamentals, has helped me develop a keen attention to detail.
Embrace the Challenge—Every Repair Is a Step Forward
The journey of fixing a damaged hardwood floor is as much about learning patience and precision as it is about restoring beauty. If I can do it, so can you. With each repair, you gain confidence and skills that make future projects easier and more rewarding. Remember, your floors are a living story of your home—every nail, stain, and board adds character.
What was the most surprising thing you learned while repairing your floors? Share below—I’d love to hear your stories and tips!