
I remember the first time I laid vinyl planks in my living room. Everything seemed perfect until I stepped back and saw those tiny, stubborn bubbles and uneven seams ruining what could have been a sleek, professional finish. It was a lightbulb moment for me—realizing that despite following all the instructions, something was missing. That’s when I discovered the game-changing technique known as the **Weighted Roller Trick**. If you’ve ever wrestled with vinyl planks that refuse to stick flat, you’re not alone. Many DIY enthusiasts and even seasoned pros overlook the power of proper weight distribution during installation, leading to premature lifting or uncomfortably uneven surfaces.
In today’s post, I’m going to share my journey and how applying a simple, yet effective, weighted roller during installation transformed my project. We’ll walk through the core principles, common pitfalls, and how this technique can salvage your flooring if things haven’t gone as planned. The goal? Achieve that perfectly adhered vinyl surface with no bubbles, gaps, or height discrepancies—saving you time, money, and frustration.
Why the Weighted Roller Trick Is a Game Changer for Vinyl Plank Adhesion
Many people underestimate the importance of consistent, firm pressure while installing vinyl planks. Early on, I made the mistake of relying solely on my weight or pressing manually, which isn’t enough to ensure the adhesive bonds evenly. That mistake led me to more rework and waste. According to experts, applying uniform pressure over the entire surface during adhesive setting is crucial for a strong, lasting bond (source: Flooring Installation Guide). This is especially true with vinyl planks, where flexible adhesion is key.
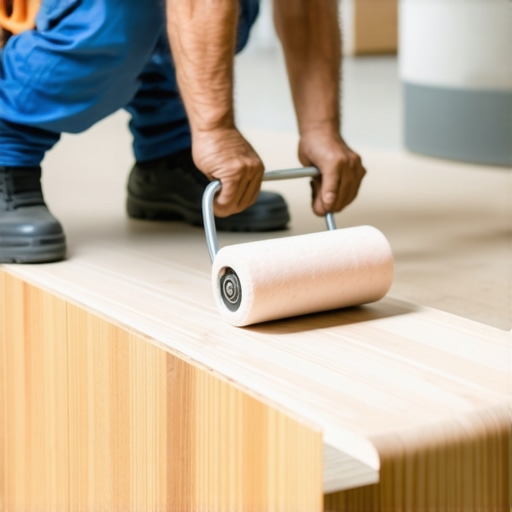
The real breakthrough came when I started using a weighted roller—imagine a sturdy, smooth, cylindrical tool that you roll back and forth over fresh adhesive. Not only does it help spread the adhesive uniformly, but it also presses the planks tightly into the subfloor, preventing those pesky bubbles or lifting edges. It’s a simple addition to your toolbox that elevates your installation from amateurish to professional-looking. Plus, it’s cheap, reusable, and easy to handle.
But here’s the catch: not all rollers are created equal, and applying the right amount of pressure is vital. Too light, and you won’t see the benefits; too heavy, and you risk damaging the planks or the subfloor. That’s why mastering the technique involves understanding how to control and evenly distribute your weight. Over time, I found that a roller with a comfortable grip and balanced weight works best. Furthermore, I always recommend reviewing professional floor leveling tips to optimize your preparation before adhering the vinyl.
So, if you’ve faced issues with uneven adhesion or stubborn bubbles in your vinyl plank project, chances are, a simple weighted roller could be the missing piece. Have you tried applying extra pressure during your last installation? If not, you might be leaving durability and aesthetics on the table. Next, let’s explore some of the most common doubts surrounding this technique and how to confidently integrate it into your workflow.
Prepare Your Workspace for Flawless Adhesion
Start by ensuring your subfloor is thoroughly cleaned and free of debris. Use a vacuum or a broom to remove dust and a damp cloth to wipe away any stubborn dirt. Moisture can interfere with adhesive bonding, so check the humidity levels—ideally below 60%. Position your vinyl planks beforehand to visualize the layout and determine the starting point, usually along the longest wall for balance. Proper planning prevents unnecessary adjustments during pressing.
Apply Adhesive Correctly for Optimal Bonding
Spread the recommended adhesive evenly across the subfloor using a notched trowel, matching the manufacturer’s specifications. Keep the application consistent to avoid thin spots or excess glue, which can cause bubbles or uneven surfaces. Work in manageable sections—small enough to complete before the adhesive sets—so that the planks can be installed while the adhesive is fresh, ensuring maximum bonding strength.
Position and Secure Your Vinyl Planks Carefully
Lay the planks according to your plan, ensuring tight seams and aligned edges. Avoid excessive sliding once the planks contact the adhesive, as it can smudge or weaken the bond. Use spacers along walls to maintain expansion gaps, preventing buckling as the floor expands. When aligning planks, double-check measurements and seams; accurate placement minimizes adjustments later and contributes to a seamless appearance.
Implement the Weighted Roller to Achieve Flat, Bubble-Free Surfaces
Once a section of planks is laid, immediately roll over the surface with a weighted roller—similar to a plumber’s pipe but with a comfortable grip for easy handling. Apply consistent pressure—imagine using a gentle but firm hand—across the entire area, moving the roller in slow, overlapping strokes. This presses the planks into the adhesive uniformly, pushing out air pockets and ensuring even contact. I recall a time I accidentally pressed too hard, causing slight indentations; understanding the right pressure level is key.
For best results, start from one side and work toward the opposite, maintaining steady pressure as you go. Overlapping your strokes prevents gaps and ensures continuous adhesion. If the roller is too light, it won’t effectively flatten the surface; if too heavy, it might damage the planks or subfloor. A balanced weight—about 10-15 pounds—is ideal, and you can adjust your grip or use a roller with adjustable weight settings. When I first tried this technique, I noticed the difference immediately—bubbles vanished, and the surface looked professionally finished.
Check and Correct as You Go
After rolling, inspect the surface for any remaining bubbles or uneven areas. If you spot a bubble, gently lift that section of planks and reapply pressure while the adhesive is still tacky. Use a rubber roller or a flat tool like a plank puller for stubborn spots. Don’t rush this step—taking the time ensures a long-lasting, smooth floor.
Allow Proper Curing Time Before Further Work
Finally, let the adhesive cure as per the manufacturer’s instructions—usually at least 24 hours—before walking on or installing baseboards. This waiting period allows the bond to fully set, preventing future lifting or bubbles. During this time, avoid heavy furniture or moisture exposure to preserve the integrity of your work.
Many experienced DIYers and contractors believe they know the essentials of tile and floor installation, but there are subtle nuances often overlooked that can sabotage even the most well-planned projects. For instance, a prevalent misconception is that leveling a subfloor once is sufficient. In reality, minor undulations can cause persistent issues, especially with large-format tiles or hardwood floors. Advanced practitioners understand that multiple leveling passes, combined with proper moisture management, create a stable foundation, reducing future cracks and unevenness, as detailed in this comprehensive guide. Another common myth is that all underlayments are created equal; however, the wrong choice can lead to squeaking, buckling, or moisture problems, particularly with engineered wood or laminate flooring. Selecting an underlayment tailored to your climate and floor type is crucial, as explained in expert advice here.
A hidden nuance that trips up many installers is the importance of controlling environmental factors during installation. Many overlook humidity and temperature levels, assuming they are secondary. Yet, improper conditions can cause wood planks or adhesives to shrink, swell, or fail prematurely. Professional flooring specialists actively monitor these parameters and adjust accordingly, leading to lasting results.
Have you ever fallen into this trap? Let me know in the comments.
Ever wonder why your hardwood floor develops gaps after a season of heating and cooling? The answer lies in the subtle interplay of expansion and contraction, which can be mitigated with intelligent installation techniques rather than just choosing the ‘best’ finish. For advanced insights on this, review these mastering secrets. Additionally, many believe that matching new materials visually is enough; however, the intricate details of grain, finish, and color can lead to mismatched looks over time if not carefully managed. Choosing the right tile or hardwood that complements existing decor isn’t simple—it requires understanding subtle differences, as outlined in design strategies.
Remember, the devil is in the details. Mastery in flooring is about more than just following steps—it’s about understanding the hidden factors that impact longevity and aesthetic harmony. Incorporate these insights into your next project, and you’ll notice the difference. Want to avoid common pitfalls? Check the detailed mistakes to dodge at this resource.Maintaining your hardwood and tile floors is essential to preserve their beauty and functionality over the years. The right tools can make this task more manageable and effective. For hardwood floors, a microfiber mop equipped with a soft, washable pad is invaluable. It gently lifts dust and debris without scratching the surface, extending the life of your finish. Additionally, investing in a high-quality vacuum designed for hard surfaces ensures thorough cleaning without causing damage. For tile and grout, a grout brush paired with a pH-neutral cleaner keeps your joints looking fresh and prevents staining. Regularly inspecting your flooring for issues like loose tiles or scratches allows for prompt repairs, saving costs and maintaining aesthetic appeal.
A versatile tool I’ve found indispensable is the electric steam mop. It offers deep cleaning with minimal chemicals, making it safe for most hardwood finishes when used properly. However, always follow manufacturer instructions to avoid moisture damage—a common concern with hardwoods. For long-term results, applying a safeguarding sealant or finish every few years is recommended, especially in high-traffic areas. Brands like Bona or Minwax provide durable options tailored to specific flooring types.
Looking ahead, the trend points toward smarter, more sustainable maintenance solutions. Innovations like IoT-connected vacuum cleaners integrated with AI can automatically detect areas needing attention and schedule cleaning sessions, reducing manual effort. Eco-friendly cleaning products are also gaining popularity, aligning with increased environmental awareness.
## How do I maintain my hardwood and tile floors over time?
Adopting consistent cleaning routines and using specialized tools are key. Regularly sweep or vacuum before mopping to prevent grit buildup. Use tools designed for your flooring material—such as soft-head mops for wood and grout brushes for tiles—to avoid scratches and discoloration. Scheduling professional inspections and refinishing every few years will keep your floors in top condition. For more detailed guidance on long-term care, check out this expert resource for hardwood floor care secrets to longevity and shine.
Secrets I Had to Learn the Hard Way About Flooring Mastery
- One of the most eye-opening lessons was realizing that even the smallest unevenness can compromise the entire look of your flooring. I once overlooked subtle dips in a subfloor, only to see them magnified after installation. It taught me that meticulous preparation and multiple leveling passes are essential for flawless results.
- Choosing the right tool can save you so much trouble. I used to rely on manual pressure alone, but integrating a quality weighted roller transformed my adhesion process, making bubbles and gaps a thing of the past. Personal experience proved that investing in proper equipment directly correlates with a professional finish.
- Environmental factors might seem secondary but are actually pivotal. I underestimated humidity’s effect, which led to expansion issues in my hardwood. Monitoring climate conditions during installation can prevent future problems and ensure longevity of your floor.
- Patience is a virtue—especially when it comes to curing times. Rushing the adhesive dry-out resulted in lifting and bubbling. Waiting the recommended time, even when eager to finalize, makes all the difference in achieving a durable, beautiful floor.
Tools, Reads, and Resources That Elevate Your Flooring Game
- The Ultimate Guide to Floor Leveling for a Perfect Finish: This comprehensive resource offers step-by-step techniques that I personally follow for every project, ensuring consistent success.
- Hardwood Floor Care Secrets to Longevity and Shine: Regular maintenance is key, and this book demystifies the process with insider tips that keep my floors looking brand new for years.
- Transform Your Living Space with Elegant Tile Designs: When planning upgrades, selecting tiles that complement hardwood is crucial. This site provided me with inspiring ideas and practical advice on combining materials seamlessly.
- Contact Us for Expert Support: Sometimes, having direct access to experts helps troubleshoot unexpected issues. Their insight has prevented costly mistakes and saved me time and frustration.