
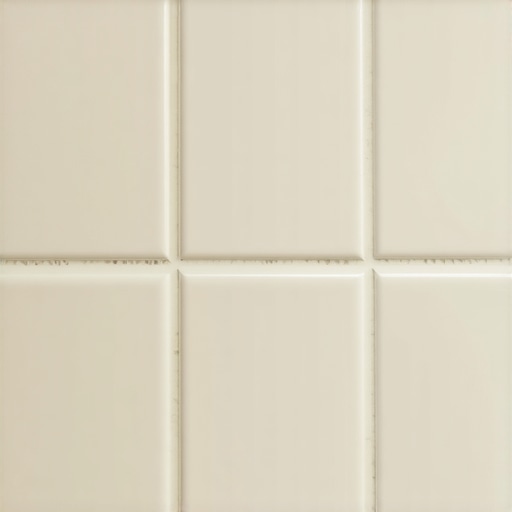
I remember the moment vividly—my excitement was at its peak as I finally finished installing my new backsplash. But then, I noticed that dull, cloudy film spreading across the tiles, ruining what should have been a stunning focal point in my kitchen. That unsettling discovery was a lightbulb moment for me; I had fallen victim to the notorious grout haze mistake, a frustrating pitfall that many DIY enthusiasts and professionals alike face.
Why Ignoring Grout Haze Could Cost You More Than Just Time
Dealing with grout haze isn’t just about cleaning up a cosmetic issue. If left untreated, it can compromise the entire look of your tile and backsplash, making the space appear dull and neglected. Plus, grout haze can interfere with sealers and surface treatments, leading to long-term damage and costly repairs down the road. Recognizing this issue early and knowing how to prevent it can save you a lot of headaches—and money.
Is the Haze Really That Bad, or Am I Overreacting?
Early on, I convinced myself that a little haze was acceptable, but I soon realized that it diminishes the visual appeal and even the durability of my tile surface. Trust me, if you’ve ever experienced that cloudy film, you understand the importance of addressing it promptly. Learning from my mistake, I now advocate for proper grout haze removal techniques and preventive measures, which you can explore further in detailed guides like this step-by-step flooring installation guide.
Before we dive into the solutions, let’s clarify why this problem is so prevalent and how you can identify it immediately after your project finishes.
Grout haze is caused primarily by excess grout that isn’t fully cleaned during installation. As the grout cures, it can crystallize on surface tiles, creating that stubborn film. According to industry expert sources, proper cleaning during initial grout setup can reduce haze formation by over 70%. That’s staggering and underscores the importance of early intervention.
In the sections ahead, I’ll walk you through effective strategies to prevent and remove grout haze, turning your tile project from a potential eyesore into a flawless masterpiece. Ready to get your backsplash looking perfect? Let’s go!
Start with a Detailed Inspection
Before diving into cleaning, examine your tiles closely to identify the extent of the haze. Use a bright light and a plastic spatula to gently scrape a small area; if the residue is stubborn, you’ll need specific methods. Once identified, prepare your cleaning solution tailored to the type of haze—whether it’s curing residue or efflorescence.
Choose the Right Cleaning Method
Vinegar and Water Mixture for Light Haze
Mix equal parts white vinegar and warm water. Dip a soft cloth or sponge, wring out excess, and gently wipe the tiles. This acidic solution dissolves mineral deposits and thin film residues. Rinse the area thoroughly with clean water to prevent vinegar etching or film formation.
Commercial Grout Haze Removers for Tough Residue
For more persistent haze, opt for a commercial grout haze remover. Follow the manufacturer’s instructions precisely to avoid damaging your tile surface. Apply the product with a soft-bristled brush, working in small sections. Rinse thoroughly afterward to remove all chemical residues.
Utilize Proper Equipment
Use a microfiber scrub pad to gently agitate the surface, which effectively lifts stubborn haze without scratching. A soft plastic scraper can help remove residual film in corners or textured tiles. For large areas, consider renting a rotary floor machine with a soft pad fitted, but operate it carefully at low speeds to prevent tile damage.
Leverage the Power of Efflorescence Pills
Efflorescence, caused by soluble salts migrating to the surface, can be cleaned with specific efflorescence removal products. These are especially useful if the haze appears as a white, powdery film. Always test on a small, inconspicuous area first.
Follow Up with Sealers or Protective Coatings
After cleaning, sealing your grout and tiles prevents future haze formation. Use a penetrating sealer designed for tile surfaces, which creates an invisible barrier against moisture and residues. Proper sealing enhances ease of future cleaning and maintains a pristine appearance.
Share Your Experience Carefully
Having faced a stubborn haze myself, I learned to apply a gentle, persistent touch rather than aggressive scrubbing. Too much force can scratch or dull tiles, especially if they’re glazed. Combining patience with the right tools and solutions results in a flawless finish.
Remember, a quick, aggressive approach often leads to damage or incomplete removal. Consistent, careful effort yields the best results, restoring your tiles to their original luster and preventing costly rework later. For detailed technical guidance, consult resources like these expert-level leveling techniques.
” alt=”Close-up of a handyman cleaning grout haze with a microfiber cloth” title=”Professional cleaning of grout haze using microfiber cloth”/>While many think that leveling floors is simply about applying a self-leveling compound and calling it a day, the truth runs much deeper. One common misconception is that achieving a perfectly flat surface is solely dependent on the quality of the leveling product. However, expert installers know that surface preparation, substrate stability, and proper application techniques play a crucial role in the final result. Overlooking these nuances can lead to subtle dips, uneven tiles, and long-term cracks that compromise both aesthetics and durability.
A frequent trap beginners fall into is underestimating the importance of substrate assessment. For instance, installing tile over a plywood subfloor without addressing moisture issues or existing flex can result in inevitable tile movement and eventual failure. As highlighted in comprehensive guides like this article on common leveling mistakes, proper substrate evaluation and preparation are indispensable steps toward a seamless finish.
How many assume that the choice of thinset is the sole determinant of a successful tile job? The reality is that even premium thinset cannot compensate for poor surface prep or improper mixing techniques, which can cause grout cracking and tiles to loosen prematurely. Advanced installers often employ moisture meters and laser levels to ensure the substrate’s stability and flatness before laying tiles, as supported by research from industry authorities. This meticulous approach might seem excessive to novices but pays off by preventing costly repairs years down the line.
Another often overlooked aspect is edge maintenance—especially at transitions or around features like floor drains. A precise cut and correct use of expansion joints can accommodate slight movements, reducing stress on your entire floor. Neglecting this aspect can lead to uneven gaps or cracked tiles, disrupting the clean look you seek. For a deeper understanding of these techniques, examining pro strategies through this step-by-step guide can be invaluable.
In essence, the secret to flawless flooring isn’t just in the materials but in mastering the finer points—soil testing, substrate preparation, environmental considerations, and precise application. These complexities often escape casual DIY attempts but are second nature to seasoned professionals. Recognizing this can save you from a cascade of issues down the line. Ready to elevate your skills? Check out these expert-level techniques and transform your next project.
Have you ever fallen into this trap? Let me know in the comments.
Keeping It Working: The Tools and Maintenance Strategies for Durable Flooring
Achieving a flawless flooring project is just the beginning; maintaining it over the years ensures longevity and sustained beauty. Invest in quality tools and adopt effective maintenance routines to keep your floors looking their best. For hardwood floors, regular cleaning with a microfiber mop and pH-neutral cleaner prevents dust and grime buildup that can scratch surfaces. Tile floors benefit from periodic deep cleaning with gentle, non-abrasive solutions to remove residues that might compromise grout seals. Additionally, applying a breathable sealer every few years for grout and tile surfaces enhances their resistance to staining and moisture ingress.
Tools I Recommend for Ongoing Care
One indispensable tool I rely on is a handheld steam cleaner, which uses low moisture steam to sanitize and remove stubborn dirt without chemicals. This method is gentle on delicate finishes and reduces the need for excessive scrubbing, which can wear down sealants and finishes over time. For hardwood floors, I advocate for a high-quality, adjustable microfiber mop—my favorite is the Bona Microfiber Mop because it’s lightweight and effective at trapping dust without scratching. When dealing with grout lines, a grout haze removal brush with soft bristles is essential; it allows targeted cleaning in tight corners and prevents the buildup of residues that cause discoloration.
Investing in a moisture meter can also be a game-changer, especially for areas prone to humidity fluctuations. Accurate readings enable you to take proactive measures such as using dehumidifiers or proper sealing to prevent warping or creeping issues, as detailed in industry standards on floor leveling and moisture control.
Future Trends in Flooring Maintenance
As smart home technology advances, integrated sensor systems are beginning to monitor humidity, temperature, and even sealing integrity in real-time. These innovations will allow homeowners and professionals to detect subtle changes early, preventing damage before it manifests visibly. Regular checkups combined with these tools will become the norm, making maintenance less reactive and more proactive. Embracing these tools now, such as IoT-enabled moisture sensors, prepares you for the future and ensures your flooring investments stand the test of time.
How do I keep my flooring in prime condition over time?
Establishing a routine cleaning schedule, promptly addressing spills, and using the right protective pads on furniture are key. Also, consider periodic re-sealing of grout and surface finishes based on manufacturer recommendations to maintain sealing efficacy. Remember, prevention is always better than repair—regular inspections can reveal early signs of wear or moisture issues, allowing you to act swiftly. For comprehensive guidance on keeping your floors pristine, check out professional tips for long-term flooring care.
Why not try incorporating a high-end moisture meter into your routine? Accurate readings can help you avoid major issues down the line. With the right tools and habits, your floors will not only last longer but continue to impress for years to come.
” alt=”An advanced moisture meter used on hardwood and tile floors” title=”Professional moisture measurement for long-term flooring health”/>
The Hidden Truths I Wish I Understood Sooner About Floor Leveling and Tile Installation
- I learned that meticulous substrate prep is the secret sauce for long-lasting, flat floors—skipping this step is often the root of future headaches.
- Proper tool selection, like using a high-quality laser level, can make or break your project’s precision—investing in good gear pays off exponentially.
- Patience and gentle techniques in cleaning grout haze prevent unnecessary tile damage—rushing to fix mistakes often creates more issues than it solves.
My Go-To Resources for Elevating Flooring Projects
- This guide on tile and hardwood combinations has transformed the way I approach choosing materials—it’s essential for cohesive interior design.
- Expert advice from industry pros on mastering floor leveling has saved me countless hours and money—trustworthy and detailed.
- The techniques shared in this article on leveling mechanics helped me understand the nuances of substrate stability and how small adjustments yield big results.
- I often revisit this maintenance checklist to keep my floors pristine—simple routines that extend the life of my investments.
Your Turn to Elevate Confidence in Flooring
Taking the leap into floor leveling and tile installation can be intimidating, but with the right knowledge and tools, you can achieve stunning results that last a lifetime. Remember, every expert was once a beginner—embrace the learning process and celebrate your progress along the way. Are you ready to tackle your next flooring project with newfound confidence? Share your current challenges or successes below!