
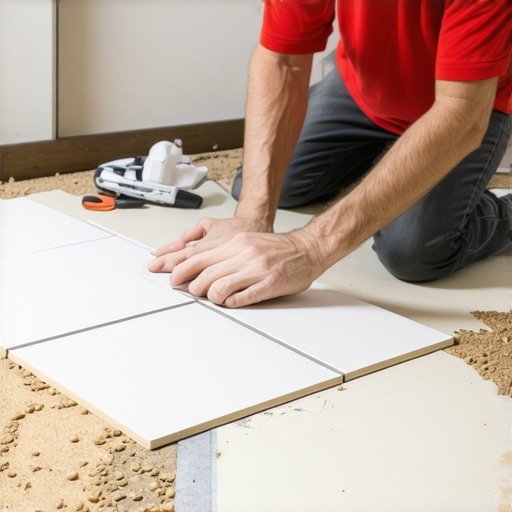
I remember the moment vividly—a close friend was excited to update her kitchen, eager to lay new tiles over her existing floor. Weeks later, I stepped into her home—and instantly sensed the unsettling squish beneath the tiles. It was then I realized she had installed tile over particle board, a choice I had once naively considered acceptable. That lightbulb moment highlighted a risky oversight that so many homeowners overlook until it’s too late.
Why Installing Tile Over Particle Board Can Be a Costly Mistake
Speakers at recent flooring seminars often emphasize the importance of proper subfloor preparation, yet the lure of quick fixes and lower costs leads many astray. Particle board, while affordable and easy to work with, isn’t designed to bear the weight and moisture associated with tile installation. Over time, this can lead to sagging, cracking, and even catastrophic failure of your new floor. According to industry experts, inadequate subfloor support is one of the top causes of flooring failures that require expensive repairs source.
Is Cutting Corners Really Worth the Risk?
Early in my own DIY journey, I made a rookie mistake: I assumed particle board would handle the weight of tile—a decision that cost me time, money, and peace of mind. If you’re contemplating a tile upgrade over an existing particle board subfloor, I urge you to consider whether saving a few dollars now might lead to costly repairs later. Don’t let my mistake be yours. Instead, learn how to create a sturdy, level foundation that ensures your tile project stands the test of time.
Ensure the Subfloor Foundation is Flat and Stable
Start by carefully inspecting your existing particle board. Look for any signs of sagging, warping, or loose panels. Use a long straightedge or a level to identify uneven spots. Sand down high spots and tighten loose panels with screws to prevent movement. Remember, a wobbly base is like trying to build a house on quicksand — it guarantees future problems. To achieve a perfectly level surface, apply a high-quality floor-leveler, following the manufacturer’s instructions closely. This process is critical for preventing tile cracking or hollow sounds after installation. For detailed techniques, see our comprehensive floor leveling guide.
Use the Right Underlayment Material
Since particle board isn’t suitable for tile, add a cement board or uncoupling membrane over it. This step isolates the tile from the unstable subfloor, reducing stress and movement. Secure the membrane with corrosion-resistant screws, ensuring they sit flush to prevent unevenness. This layer acts as a sturdy, moisture-resistant bed for your tiles, vastly reducing the risk of grout cracks. When selecting your underlayment, consider the tile material and room moisture levels. Explore our recommendations on best tile options for your space.
Achieve a Perfect Level Before Tiling
After installing your underlayment, double-check your work with a laser level or a long carpenter’s level. Spot and correct any dips, especially in high-traffic areas. If dips are present, use a patching compound or self-leveling underlayment to fill irregularities. I once worked on a bathroom remodel where I discovered a slight slope toward the drain during this step. Correcting that early ensured the tiles sloped correctly, preventing water pooling. For expert leveling secrets, refer to our floor leveling guide.
Seal the Subfloor to Prevent Moisture Intrusion
Particle board absorbs moisture like a sponge, which leads to swelling and warping over time. Apply a vapor barrier or primer designed for particle board before laying any underlayment. This extra layer guards your subfloor from moisture transmission, especially in bathrooms and kitchens. Missing this step is a common mistake that causes tile failure down the line. For moisture management tips, check out hardwood floor care secrets.
Final Checks Before Laying Tile
Once your subfloor is level, stable, and sealed, walk across it to detect any remaining soft spots. Mark these areas and reinforce them before proceeding. Use a construction adhesive if needed to bond loose panels. This meticulous preparation, although time-consuming, pays off by ensuring a durable, long-lasting tile installation that won’t develop cracks or squeaks. After completing these steps, proceed with confidence, knowing your base is truly solid.
Proper subfloor preparation is the cornerstone of successful tile installation over particle board. Skipping these core steps, from leveling to sealing, drastically increases the risk of costly repairs later. Invest the time now, and your tiled floor will reward you with decades of durability and beauty.
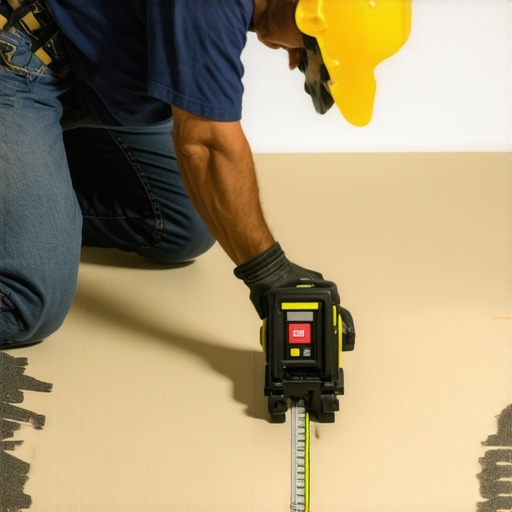 When it comes to flooring, many homeowners fall prey to common myths that can jeopardize the longevity and beauty of their floors. One widespread misconception is that perfect levelness isn’t crucial as long as the surface looks even. However, even minor undulations beneath your flooring can lead to cracks, squeaks, and uneven wear over time. Industry experts emphasize that meticulous floor leveling isn’t just about aesthetics — it’s about preventing costly repairs later. For seasoned tips on achieving flawless surfaces, visit our floor leveling guides.
A second misconception involves underestimating the importance of proper moisture management. Many assume that applying sealants or barriers suffices, but in reality, invisible moisture lurking in subfloors can cause irreversible damage to both hardwood and tile installations. Advanced moisture testing techniques can identify hidden issues before installation begins, saving you from future headaches. For detailed moisture control strategies, check out expert moisture testing tips.
Let’s address an often-overlooked detail: the role of substrate compatibility. Most people overlook the subtle interactions between different materials — for example, installing tile over flexible substrates like vinyl or traditional plywood without proper reinforcement can lead to failure. The key lies in understanding the building science behind substrate movement and selecting appropriate uncoupling membranes or cement boards. A study by the Tile Council of North America underscores the importance of material compatibility to prevent delamination and cracking.
Are You Missing Critical Details That Could Cost You?
Always remember, DIY projects may seem straightforward, but neglecting these nuanced factors can turn a simple upgrade into a costly nightmare. Proper preparation, understanding material behavior, and consulting expert resources like our design inspiration are your best defenses against common pitfalls. Have you ever fallen into this trap? Let me know in the comments.
Keeping It Working: Tools and Techniques for Longevity
Investing in the right tools is crucial for maintaining your flooring’s appearance and structural integrity over time. A high-quality laser level, for instance, is indispensable for periodic checks of floor flatness, especially after installation or significant changes. Personally, I rely on a laser level with a self-leveling feature like the Bosch GLL3-330C because it provides precise readings without the need for manual adjustments, saving me time and ensuring accuracy. Combining this with a good moisture meter allows you to detect hidden issues that could compromise your flooring later—especially important if you’re working over concrete slabs or basements. For ongoing maintenance, dedicated cleaning tools like a microfiber mop paired with pH-neutral detergents help preserve finish without etching or stripping protective sealers.
Regular inspections and minor touch-ups can extend your flooring’s lifespan. Replace worn caulking around edges and move furniture carefully to avoid scratches. For hardwood floors, a floor buffer equipped with a soft pad can remove light scratches and restore shine, but be cautious to avoid over-polishing or damaging the finish. Incorporate seasonal cleaning routines that include checking for trapped moisture or debris, which can accelerate wear if left unattended. In fact, adopting a sustainable maintenance schedule not only preserves your investment but keeps your floors looking stunning year after year.
How do I maintain flooring over time?
Consistent care involves more than just cleaning. It means understanding the specific needs of your flooring material. For example, engineered wood benefits from controlled humidity levels—ideally between 35-55%—to prevent expansion or contraction. Monitoring these conditions with a hygrometer can help prevent gaps or warping. Additionally, applying protective pads to furniture legs reduces destructive scratching, and re-sealing grout lines periodically can prevent moisture intrusion that would cause tiles to crack or loosen. Staying ahead of these issues with simple, targeted tools ensures your floors remain functional and beautiful long-term. Looking ahead, technological advancements like smart sensors embedded within flooring will offer real-time condition monitoring, making proactive maintenance even easier. To get started on your maintenance routine, try integrating a moisture meter and a high-quality microfiber mop into your regular upkeep schedule.
Remember, the longevity of your floors is tied directly to the tools you use and the care you take. Incorporate precision instruments like a laser level and moisture meter into your upkeep routine, and you’ll reap the benefits of a durable, visually appealing surface for years to come. For more detailed tips, check out our guide on floor leveling and maintenance. Don’t wait until problems arise—start your proactive maintenance today and enjoy floors that truly stand the test of time.
The Hidden Truths That Changed My Flooring Approach
- Realizing that a small initial investment in thorough subfloor prep prevented much larger future repairs was a lightbulb moment for me. Skipping critical steps might save time and money now, but it can cost you dearly later.
- Discovering that moisture barriers are essential even when everything looks dry taught me to never assume dryness equals safety. Hidden moisture can silently ruin your flooring if ignored.
- Understanding the importance of material compatibility made me reconsider my material choices, emphasizing that harmony between substrate and finishing layer is key to durability.
- My experience taught me that patience and precision during installation pay off. Rushing through leveling and sealing creates risks that aren’t worth taking.
- Finally, I learned that investing in the right tools like laser levels and moisture meters transforms a good project into a great one, ensuring every detail is accounted for.
Tools and Resources I Trust for Flooring Success
For top-notch flooring projects, I rely on the floor leveling guides to ensure a perfectly flat surface, which is fundamental for longevity. My favorite laser level is the Bosch GLL3-330C — its accuracy saves me hours during setup. When it comes to moisture management, a reliable moisture meter helps detect unseen issues that could compromise your floor. I also use high-quality cement boards recommended in our surface preparation tutorials. Lastly, continuous learning from industry experts and reading detailed installation tips keeps me ahead of common pitfalls and ensures lasting results.
Your Next Step Toward Perfect Floors
Embracing thorough preparation and using the right tools can dramatically elevate your flooring projects. Whether you’re tackling tile or hardwood, taking the time now to get the foundation right means you’ll enjoy beautiful, durable floors for decades. Don’t let small oversights turn into big problems — start your journey with confidence and commitment to quality. What’s one flooring step you’ve been hesitant to try but now feel ready to conquer? Share your thoughts below, and let’s elevate your space together!