
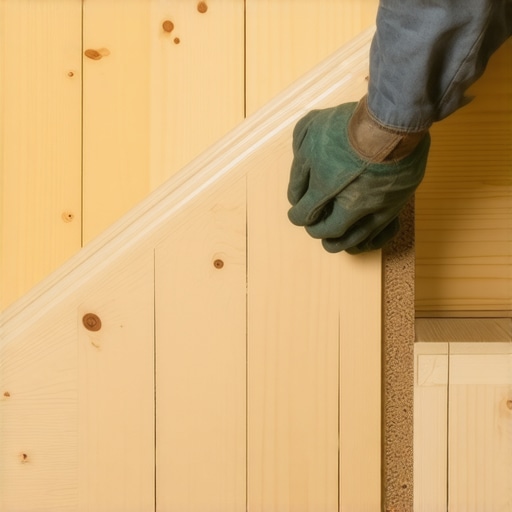
It was a quiet evening when I first realized the true noise in my home was coming from my stairs. As I stepped more carefully, every creak felt like an announcement of old, forgotten problems. That lightbulb moment hit hard—those squeaks and groans weren’t just an annoyance; they signaled underlying issues with how the stairs were installed or settled over time. If you’re tired of walking up and down shushing the squeal every step, you’re not alone—and I’ve been there too. Today, I want to share the simple but effective methods I’ve learned to silence those stubborn creaks and make my staircase quiet again.
How Squeaky Stair Treads Can Disrupt Your Peace of Mind
The syncopated symphony of creaks every time someone climbs the stairs isn’t just a minor nuisance. It can be a sign of loose components, wood-on-wood friction, or shifting subfloors. Left unattended, these issues can worsen, leading to more significant damage and costly repairs. Plus, the constant noise can disturb your peace, especially if you have a household that values quiet mornings or late-night relaxations. Knowing how to address these sounds promptly can save you money and preserve the integrity of your floors.
Ever Wondered If Fixing Squeaky Stairs Is Worth It?
Many homeowners worry that silencing the creaks requires a complete overhaul or expensive professional work. I admit, early in my DIY journey, I made the mistake of thinking a quick fix was enough—only to have the squeaks return after a few months. It turns out, proper diagnosis and the right materials make all the difference. From my experience, taking the time to assess the root cause and using proven techniques can reliably restore quiet and stability.
If you’re eager to put an end to those loud footsteps, keep reading. We’ll explore the top methods for tightening loose stair treads, adding soundproofing layers, and preventing future squeaks—so you can enjoy a peaceful, squeak-free home. Want to dive deeper into expert floor installation tips? Check out [Mastering Hardwood Floor Refinishing – Expert Tips for 2025](https://tiletrendshop.com/mastering-hardwood-floor-refinishing-expert-tips-for-2025) for comprehensive guidance.
Identify the Root Cause of Squeaks and Looseness
Before jumping into fixes, take a walk up and down the stairs to pinpoint where the squeaks originate. Use a flashlight to inspect for loose or damaged components, such as nail pops or gaps between treads and risers. In my case, I found that some nails had backed out over time, creating a rattling sound. Temporarily, I marked the noisy spots with chalk for targeted repair. Understanding whether the problem stems from loose nails, shifting subfloors, or wood expansion helps in choosing the most effective solution.
Secure Loose Treads and Risers
Remove and Reattach Loose Components
Start by carefully removing any trim or molding near the stairs to access the underside if possible. For loose treads, drill pilot holes through the stair nosing into the stringer or subfloor and drive in finish nails or deck screws. Use a level to ensure proper alignment. For instance, I used a cordless drill with a long bit to insert screws from beneath the stair, which provided a tight fit and reduced movement. Be cautious not to over-tighten, to prevent cracking the wood.
Replace or Add Nails and Screws
If nails are backing out, remove them and replace with longer nails or screws, pre-drilling to avoid splitting. When fixing risers or stringers, use construction adhesive along with fasteners for added stability. In my project, I applied a bead of lightweight wood glue under the treads before fastening, which increased adhesion and minimized future squeaks. Locking these components tightly in place cuts down on movement that creates noise.
Apply Soundproofing Solutions to Minimize Future Noise
Add Adhesive or Shim Layers
For persistent squeaks, consider inserting shims or soundproofing materials. Spray foam or elastomeric tile adhesive can be squished between the tread and riser, damping vibrations. I experimented with latex caulk squished into the gaps, which muffled the squeak temporarily. However, for longer-term silence, applying a flexible soundproofing mat or even a cork underlayment beneath the treads can absorb vibrations effectively. Cork underlayment proved to be a game-changer in my upstairs hall.
Use Lubricants for Friction Reduction
Sometimes, the squeak results from friction between wood surfaces. Applying a powdered graphite or silicone spray directly into the joint can ease the movement and eliminate noise. For example, I gently tapped graphite powder into the cracks around the nails and screw heads with a toothbrush, which silenced the squeaking without causing damage or mess. This quick fix is especially useful when access is limited or when a quick quieting is needed before a complete repair.
Secure the Subfloor to Prevent Shifts
If your stairs are built over a subfloor that’s loose or uneven, addressing this foundational issue is crucial. Use a long level to check for dips or high spots; then, reinforce the subfloor with screws or index clips. In my experience, adding shims beneath loose sections and re-anchoring the subfloor reduced movement and squeaks significantly. For extensive problems, consider professional leveling or structural reinforcement to ensure long-lasting quiet and stability.
Step Back and Test the Results
Once you’ve completed the repairs, walk up and down the stairs several times to confirm the noise is gone. Listen for remaining creaks, and if some persist, revisit those specific areas. Often, a combination of tightening, shimming, and lubrication provides the best results. Patience with each step ensures a thorough fix that lasts, so avoid rushing the process—a properly repaired stairway will reward you with peace and quiet for years to come.
While many DIY enthusiasts focus on the visible aspects of flooring, such as choosing the right hardwood or tile pattern, a significant number overlook the intricate details that determine long-term success. One pervasive myth is that Leveling compounds and subfloor preparations are interchangeable or optional; in reality, improper application can lead to uneven floors, cracks, or warping over time. For example, using a self-leveling underlayment without thorough surface prep often results in pinholes and bubble formations, which compromise the entire installation. Experts emphasize that understanding the underlying substrate and meticulously following manufacturer instructions—like those outlined in precise leveling techniques—can save you headaches later. Additionally, many think hardwood floors are inherently durable and require minimal preparation, but neglecting acclimation and moisture testing can cause buckling or gaps. For advanced installers, recognizing subtle subfloor imperfections is vital; even a slight slope can cause uneven wear or aesthetic issues. A common trap is assuming that the same thinset or adhesive works universally across different tile types; as tile installation pointers suggest, selecting appropriate products based on tile porosity and substrate compatibility is crucial. Moreover, misconceptions about the importance of expansion joints often lead to cracked tiles or buckled planks. Properly integrating these joints, especially in large or irregularly shaped areas, ensures flexibility and prevents structural stress. Recognizing these nuances allows seasoned professionals and DIYers alike to achieve flawless results that stand the test of time. If you’d like to avoid common pitfalls, reviewing installation mistakes and understanding the hidden complexities can elevate your project. Have you ever fallen into this trap? Let me know in the comments.When it comes to keeping your flooring looking professional and performing well over the years, having the right tools is crucial. Personally, I rely on a combination of high-quality equipment and specific techniques to ensure long-lasting results. One standout tool in my kit is the laser level, which I use to verify the flatness of subfloors before laying down hardwood, tile, or vinyl. A reliable laser level, like the DEWALT Cross Line Laser, provides precise horizontal and vertical alignment, reducing the risk of uneven surfaces that can cause squeaks or cracks later on.
Why Investing in a Laser Level Pays Off
Using a laser level ensures your foundation is perfectly level, which is vital for any flooring type. It prevents issues like uneven wear, creaks, and gaps in tiles. Over time, maintaining a flat subfloor minimizes the need for repairs and enhances the aesthetic appeal of your project. I recommend checking out this guide on mastering floor leveling to understand how to utilize these tools effectively.
Choosing the Right Adhesives and Sealants
Selecting high-quality adhesives, like flexible mortar for tile or polyurethane for hardwood, is equally important. I prefer products from reputable brands because they offer better longevity and ease of application. For example, using a polyurethane-based adhesive can accommodate wood expansion and contraction, preventing buckling or gaps over time. Proper application with the right trowel size, such as a 1/4-inch square-notch trowel, ensures an even coat and solid bond.
Preparing for Long-Term Success
To keep your floors performing well, routine inspections and minor touch-ups are essential. I regularly check for loose tiles or creaky hardwoods and address issues promptly. Using tools like a notch trowel, a rubber mallet, and shims can help in realigning or re-securing sections without costly removals. As the trend in flooring emphasizes sustainability and durability, staying updated with innovative materials and techniques is beneficial. For insights on future trends, I recommend reviewing this upcoming guide for 2025.
How do I maintain my floors over time?
Regular cleaning, like sweeping with a microfiber mop, and avoiding excessive moisture extends the lifespan of hardwood and tile alike. Additionally, applying protective pads to furniture legs and using cleaning products suited for your specific flooring material reduces surface wear and prevents scratches. Investing in a professional-grade vacuum or steam cleaner designed for hard surfaces can make routine upkeep more efficient and effective. Remember, the key is staying proactive—addressing small issues before they escalate guarantees your investment keeps shining for years. Don’t hesitate to try implementing a laser level in your next project—precision in foundation preparation sets the stage for flawless results and long-term satisfaction.
What I Wish I Knew When I Started Fixing Squeaky Stairs
One of the most valuable lessons I learned was that patience and accurate diagnosis trump quick fixes. Initially, I tried spraying lubricant or adding shims without fully understanding the root cause—this often resulted in temporary silence, only to be greeted by squeaks weeks later. It reminded me that taking the time to identify whether the noise stems from loose nails, shifting subfloors, or wood expansion allows for targeted, durable solutions. My biggest lightbulb moment was realizing that a systematic approach saves time and money in the long run.
Resources That Changed My Approach to Flooring Stability
Over the years, I have come to rely on specific tools and guides that elevate my craftsmanship. The Mastering Floor Leveling guide gave me a deeper understanding of subfloor preparation—an often overlooked aspect that significantly impacts squeak prevention. I also trust quality adhesives like flexible mortars from reputable brands because they accommodate wood movement, helping maintain a silent, stable surface. Investing in a good laser level, like the DEWALT Cross Line Laser, transformed my foundation inspections, making sure I started with a level, secure base for every project.
Embrace the Journey: Your Floors Deserve It
Remember, the pursuit of perfectly quiet stairs or stable flooring isn’t just about aesthetics; it’s about creating a sanctuary within your home. Every squeak you silence and every stable tread adds to the comfort of your space. If you’re ready to take on your next flooring project, approach it with patience, the right tools, and a mindset to learn as you go. Your efforts will be rewarded with peace of mind and a home that truly feels complete. Have you encountered a stubborn squeak you couldn’t fix? Share your story below and let’s troubleshoot together.