
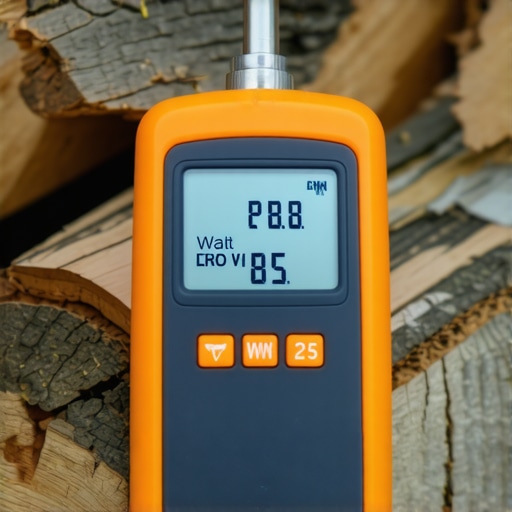
I remember the first time I used a moisture meter during a home renovation. I was eager to lay my new tiles, convinced I’d get quick results. But as I took the reading, I saw the numbers hover just below the recommended threshold—yet the device blinked at me with a flashing warning to wait. Frustration bubbled up. Why was this simple step turning into an anxiety-filled waiting game?
That moment was my lightbulb moment. I realized that understanding the intricacies of moisture meter readings—and, more importantly, the importance of waiting for the right moisture levels—is vital to a successful flooring project. Jumping the gun can lead to uneven tiles, cracking, or worse—costly repairs down the line.
Today, I want to share what I’ve learned through personal experience and research. We’ll focus on the crucial phase of waiting after a moisture test—why that pause is your best friend and how to ensure you don’t rush into installation prematurely.
Why Patience During Moisture Testing Keeps Floors Perfect
Waiting for the right moisture level isn’t just a bureaucratic step; it’s the difference between a flawless finish and a maintenance nightmare. Floors like hardwoods, tiles, and engineered wood react differently to humidity and moisture, but one thing they share is the need for stable moisture content before permanent installation. Ignoring this can result in buckling, cupping, or cracks that ruin the look and durability of your flooring.
From my early blunders, I learned that moisture levels fluctuate with weather, seasons, and even the type of subfloor. A misstep in this phase can undo hours of work and patience. Applying an accurate moisture meter and patiently waiting for readings to stabilize ensures your project’s longevity and reduces unexpected surprises. According to industry expert a trusted flooring resource, proper moisture management is one of the top factors affecting flooring success.
Have you ever faced a flooring issue that seemed to appear out of nowhere after installation? Chances are, moisture imbalance was part of the cause. Understanding when and how to interpret moisture readings can be a game-changer and save you from costly redo’s.
Next, let’s explore how to get an accurate reading and the common pitfalls to avoid—because rushing this step could cost more than you think. If you’re curious about the most common mistakes during installation and how to avoid them, you might want to check out this detailed guide.
Get Your Tools Ready and Understand the Reading Process
Start by selecting an accurate moisture meter suitable for your flooring type—pin-type for softwoods or pinless for maximum surface readings. Before testing, calibrate the device according to the manufacturer’s instructions. I recall a time I tested my subfloor and hardwood planks separately, ensuring each reading was accurate and consistent. This step is crucial to avoid discrepancies that could lead to uneven flooring or gaps.
Place the probe securely on the surface, applying gentle but firm pressure. Take multiple readings at different locations across the area—at least five for a small room and more for larger spaces—to get a representative assessment. Think of this like tasting soup at different spots to ensure uniform flavor; inconsistency can ruin the dish just as uneven moisture levels can ruin your floor.
Interpret the Moisture Readings Correctly
Compare your readings with the recommended levels for your specific flooring. For instance, hardwood floors typically require moisture content between 6% and 9%, while subfloors might be acceptable up to 3% higher. When readings are above these thresholds, it’s vital to pause and allow the moisture to dissipate naturally—don’t rush into installation, or you risk future buckling or cracking.
If you measured the subfloor first and found it dry but the wood indicates moisture, investigate further. Sometimes, moisture can linger in the framing or underfloor structures. Use a moisture barrier or vent the area, especially in humid climates, to facilitate drying. Remember, patience here pays off in the form of a durable, flawless floor.
Allow Adequate Drying and Stabilization Time
Once you have readings above the desired level, it’s time to wait. Use dehumidifiers, fans, or heating to accelerate drying, but avoid rapid drying methods that can cause uneven moisture distribution. For example, I once installed a hardwood floor without thorough drying, and within a few months, my floor cupped—an avoidable mistake that cost me time and money.
It’s advisable to check moisture levels daily—like keeping tabs on a simmering stew—until readings stabilize consistently within recommended ranges. This process can take days or even weeks, depending on humidity, temperature, and the materials involved. Think of it as waiting for dough to proof; rushing can compromise the end result.
Double-Check with Repeat Readings
Prior to installation, re-test the moisture levels to confirm they haven’t changed significantly. Consistent readings across time and different areas indicate that the moisture content has equalized, creating optimal conditions for flooring. Do not rely on a single test—think of it as verifying a key detail before proceeding with a crucial step.
In my experience, skipping this verification can lead to surprises after installation—gaps, buckles, or tiles cracking later on. For complex projects, consider consulting a professional or referencing detailed guides like this resource for precise techniques.
Many enthusiasts believe that perfect floor leveling is solely about leveling compounds and the right tools, but the reality is more nuanced. A widespread misconception is that applying self-leveling underlayment guarantees a flawlessly flat surface; however, expertise reveals that preparation and substrate assessment are equally critical. For example, if the subfloor has residual moisture or is improperly primed, even the most advanced compound will fail, leading to cracks or unevenness over time. Industry expert this resource emphasizes the importance of proper surface prep before pouring levelers. Rushing this step often results in trapped air bubbles or insufficient adhesion, causing remedial work and delays. Another myth suggests that tile installation is straightforward once you have the correct adhesive; in truth, the subtleties of tile spacing, substrate movement, and environmental conditions require experience. Failing to recognize these can produce lippage, cracking, or grout failure. Advanced installers account for these factors by using spacers, expansion joints, and climate control measures. Regarding hardwood floors, many assume that acclimation is merely a matter of waiting a few days; yet, neglecting the detailed analysis of humidity fluctuations can cause boards to swell or shrink later. Experts advocate for comprehensive environmental assessment and controlled acclimation, which prevent costly shifts and surface defects. In my experience, understanding these hidden factors elevates your craft from amateur to professional. Want to see how subtle differences impact your project? Check out this guide on tile trends for added inspiration. Keep in mind that catching these nuances avoids common pitfalls and ensures lasting beauty. Have you ever fallen into this trap? Let me know in the comments.
Keep Your Floors in Top Shape with Precision Tools
Maintaining perfect flooring over time demands the right equipment and a disciplined approach. Personally, I swear by my moisture meters—specifically, the Tramex MC-4 E. Its combination of pinless technology and the ability to measure moisture in a wide range of materials makes it invaluable. I use it to regularly check hardwoods, subfloors, and underlayment to catch issues early before they escalate.
Having a reliable, calibrated moisture meter helps prevent problems like cupping or buckling. I calibrate mine monthly, following the manufacturer’s guidelines, to ensure accuracy. Don’t underestimate the value of a multi-point pinless meter—especially when dealing with large areas. It speeds up assessments and reduces guesswork, saving time and money in the long run.
Invest in a High-Quality Laser Level for Precision
Achieving a flawlessly level floor is non-negotiable. I rely on my Bosch GLL 3-80 Cross Line Laser for this task. Its bright, adjustable lines allow me to set reference points across a room quickly, ensuring tiles or hardwood planks align perfectly. Regular use of laser levels minimizes lippage and uneven gaps, which can become glaring issues as the flooring ages.
Combine this with my laser distance measurer—like the Bosch GLM 50—to double-check measurements over larger spans. These tools aren’t just gadgets; they’re essential for long-term aesthetic and structural integrity. As technology advances, I predict that integrated smart levels with digital moisture mapping will become standard, making maintenance even more straightforward.
Consistent Checks and Preventative Actions
In my experience, scheduled inspections—say, every six months—help catch subtle shifts in moisture or levelness. Incorporate routine cleaning and sealing of grout and surface finishes to preserve the appearance. For hardwoods, periodic refinishings can restore gloss and seal minor scratches, extending the life of the floor.
Another tip is to use dehumidifiers smartly, especially in humid climates. I set mine on a timer during peak seasons. This helps keep moisture levels stable, preventing wood expansion or contraction.
How do I maintain flooring tools over time?
Cleaning your moisture meters and laser devices after each use keeps them accurate. Replace batteries annually or when low. Store the equipment in cool, dry places to prevent damage. Calibrating annually, or after any impact, ensures readings remain reliable. For more detailed guidance, check this expert advice on maintaining precision in your tools.
Looking ahead, integrating IoT sensors into your flooring setup could allow real-time monitoring of moisture and structural shifts—saving time and preventing costly repairs. Embracing these technologies might be the future of flooring maintenance, making it more proactive than reactive.
Ready to elevate your flooring maintenance game? Try calibrating your moisture meter with an expert technique I recently adopted—submerging the probe in a known-dry substance to verify accuracy—and see how it improves your assessments.
The Hidden Truths behind Patience and Precision
Over the years, I’ve come to realize that the true mastery of flooring installation isn’t just about tools and techniques—it’s about understanding the subtle dance of moisture and timing. One lesson that stood out was the importance of trusting your moisture meter readings over quick assumptions or gut feelings. The delay between testing and installation might feel like wasted time, but it’s actually an investment in the longevity of your floor. Recognizing that some moisture levels can fluctuate significantly during changing weather conditions reminds us that patience is a form of craftsmanship, not procrastination.
Furthermore, I’ve learned that not every moisture reading is black and white. Experience teaches us to interpret the nuances—what might seem fine in one environment could cause issues in another. Incorporating multi-location tests and rechecking after drying phases ensures you’re not just guessing, but basing decisions on solid data. This proactive approach saves countless headaches later, turning a potential flooring disaster into a showcase of expertise.
Ultimately, embracing a meticulous waiting process—paired with quality tools and a commitment to thoroughness—transforms a routine project into a durable, beautiful result that stands the test of time. Remember, in flooring, the most impressive looks are often built on the foundation of patience and informed decisions.