
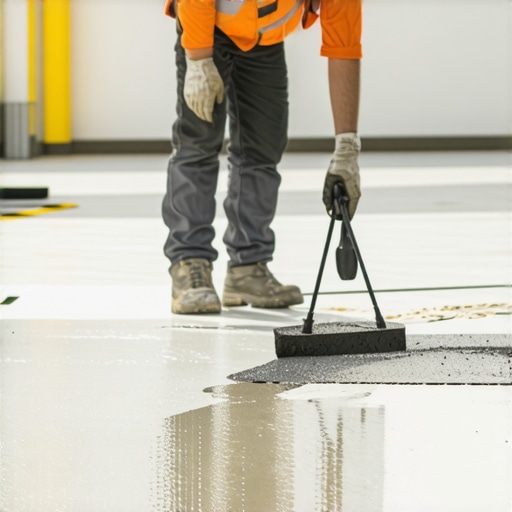
It was a frustrating moment: I stood in the middle of a freshly poured self-leveling compound, watching it stubbornly refuse to settle into those stubborn low spots in my concrete slab. No matter how much I tried to spread it out, it sat there, lumpy and uneven, like it had a mind of its own. Talk about a disheartening experience—especially after investing hours prepping and pouring it carefully. If you’ve ever faced this, you know the sinking feeling when your efforts don’t produce that smooth, even surface you envisioned.
Get That Smooth Finish You Need, Without the Headache
For many DIYers and professionals alike, uneven floors caused by self-leveler issues are a common, vexing problem. It’s not just about aesthetics; a properly leveled floor is the foundation for a successful tile or hardwood installation. Skimp on it, and you’ll soon face cracking tiles, squeaky floors, and ongoing frustrations. The good news? There are straightforward reasons why your self-leveler might not flow into those low spots—and simple solutions to ensure a flawless, seamless surface.
Is Your Self-Leveling Compound Actually Worth the Hype?
This common concern crops up when I see folks hesitate to invest in high-quality products or the right techniques. Early on, I made the mistake of rushing my pours with a generic product and neglecting proper preparation, which led to disappointing results. Trust me—it’s crucial to choose a reliable self-leveling compound, like those I discuss in my guide on [flawless floor leveling](https://tiletrendshop.com/how-to-achieve-flawless-floor-leveling-before-tile-laying). The right product, coupled with proper application, makes all the difference.
Remember, proper surface preparation is key. Ensuring your subfloor is clean, free of dust, and adequately primed can make or break the flow of the compound. Additionally, understanding the right mix and application techniques can help avoid those lumps and patches that ruin the job. If you’re unsure about any step, I recommend checking out [mastering floor leveling pro secrets](https://tiletrendshop.com/mastering-floor-leveling-pro-secrets-for-perfect-installations) that will walk you through every detail.
So, if you’ve faced the challenge of your self-leveler not settling into the low spots, don’t worry—you’re not alone. It’s a common issue with a straightforward fix. Next, I’ll share the insider tips that will turn your next leveling job into a smooth, trouble-free experience—so stay tuned to elevate your flooring game.
Prepare the Subfloor Like a Pro
Start by removing all debris, dust, and loose materials from the subfloor to ensure proper adhesion. Use a vacuum and a damp cloth to clean thoroughly, especially in corners and along edges. Verify the subfloor’s moisture level with a moisture meter—excessive moisture can hinder leveling compounds from curing properly. If you discover high spots or uneven areas, mark them with a pencil for targeted treatment.
Address Small Dips with Plywood Patches
For minor dips less than 1/4 inch, apply thin plywood patches instead of a full pour. Cut plywood to size, sand the edges smooth, and secure with construction adhesive and screws. This method is akin to placing a stepping stone over a pothole—simple yet effective. My own experience with this approach saved me from a messy full pour, resulting in a stable, level surface that supported my tiles seamlessly. Learn more about this trick here.
Mix and Pour with Precision
Use a clean mixing bucket and follow the manufacturer’s instructions meticulously. Mix in small batches to prevent premature setting. When pouring, start from one corner and work your way across, similar to sketching a continuous line. Utilize a spiked roller to eliminate air bubbles—this step is crucial for a smooth finish. Think of it as squeezing out air from a bubble gum bubble; removing trapped air prevents pockmarks and pimples in your surface.
Use Raking Techniques for Large Areas
Spread the compound evenly using a squeegee or a gauge rake, moving in a consistent back-and-forth motion. This technique helps control thickness and prevents pooling. During my last project, I used a raking method combined with a straightedge to level the compound, which resulted in a near-perfect surface. Fine-tune the process by periodically checking the level with a long straightedge or a laser level—think of it as using a plumber’s level for precise measurement. Discover more about raking for optimal results.
Smooth and Feather the Edges
Once the compound is leveled, feather the edges by gently troweling or squeegeeing the perimeter. This prevents abrupt transitions between the new layer and existing floor, which could cause unevenness or trip hazards. I remember smoothing out the edges of a large pour with a damp sponge, which created a seamless transition. For best results, work quickly before the compound begins to set. Monitoring the drying process ensures proper curing and reduces the risk of bubbles, cracks, or pinholes.
Double-Check Your Work
After the pour has cured for the recommended time, re-verify the levelness using a long spirit level or laser device. Mark any remaining high spots and sand them carefully or apply additional compound where needed. Repeated checks like this are akin to tuning a musical instrument—precision ensures harmony in your finished floor. If you notice any stubborn dips, consider applying a second thin layer after the first has fully cured, following safety and curing guidelines. Find out more about achieving flawless leveling.
Many DIY enthusiasts and even seasoned pros often fall into traps or hold misconceptions that can compromise the quality and longevity of their flooring projects. One prevalent myth is that choosing the cheapest materials guarantees savings, but in reality, cutting corners on products like self-leveling compounds can lead to uneven surfaces, cracks, and costly repairs. Always invest in reputable brands and understand the nuances of your materials, as explained in my guide on [achieving flawless floor leveling](https://tiletrendshop.com/how-to-achieve-flawless-floor-leveling-before-tile-laying).
A common oversight is neglecting the importance of surface prep. Skimping on cleaning, moisture testing, and identifying high spots can result in a layer of compound that doesn’t adhere properly, causing future issues. Remember, proper prep is the foundation of a successful installation.
One hidden nuance many overlook is the significance of proper mixing techniques. Over-mixing or under-mixing self-leveling compounds can alter flow and curing times, leading to lumps or pitting. Using a low-speed drill with a paddle attachment and following manufacturer instructions can make a notable difference.
Advanced installers know that the type of primer used significantly impacts bonding, especially on substrates like plywood or outdated concrete. Gypsum-based levelers, for example, often outperform traditional Portland cement ones on wooden subfloors, reducing the risk of delamination. For insights into this, see [why gypsum-based levelers are preferred for wood subfloors](https://tiletrendshop.com/why-gypsum-based-levelers-are-often-better-for-wood-subfloors).
Another misconception is that curing time can be rushed for quick turnaround, but attempting to accelerate drying often traps moisture, leading to bubbling or peeling. Patience, with proper environmental controls, ensures a durable finish. Additionally, “drying” the compound with fans or heat sources too early can cause cracks, so understanding the cure process is crucial.
The mistake of overlooking expansion joints or perimeter gaps may seem insignificant, but thermal expansion can cause tiles or floors to buckle, especially in large areas. Incorporating these features during planning can save headaches down the line.
A tip for advanced practitioners is to consider the substrate’s moisture vapor transmission rate (MVTR). High MVTR can lead to delamination and mold growth if not correctly managed. Using moisture barriers or specific primers tailored for your substrate type is vital—more on this is available in my detailed [floor leveling strategies](https://tiletrendshop.com/the-ultimate-guide-to-floor-leveling-for-a-perfect-finish).
In conclusion, mastering the fine points and understanding hidden nuances in flooring installation differentiates a professional job from a mediocre one. It’s about paying attention to small details—like correct mixing, surface prep, substrate compatibility, and cure times—that ensure your project stands the test of time. Have you ever fallen into this trap? Let me know in the comments, and happy installing! **Remember**, comprehensive preparation and a nuanced understanding are your best tools for flawless flooring.Maintaining your flooring work over the years requires the right tools and a disciplined approach. I personally rely on high-quality laser levels, like the Bosch GLL 3-330C, for ensuring precision in surface alignment, especially when dealing with large areas or multiple rooms. These tools eliminate guesswork, saving time and reducing errors that can compromise long-term durability. For measuring moisture content—a critical factor in preventing floor damage—I recommend the Tramex CM-600, which provides quick, reliable readings to help avoid issues like cupping or warping down the line. When it comes to mixing leveling compounds or adhesives, a heavy-duty variable-speed drill fitted with a paddle attachment is non-negotiable in my toolkit. Consistent mixing ensures optimal flow and curing, preventing lumps or weak spots that could lead to cracks over time. In addition, a quality notched trowel suitable for your chosen adhesive can make a significant difference in coverage and bond strength. Selecting the right tool for each task accelerates the process and enhances results, ultimately saving money on future repairs or replacements. Looking ahead, the trend points toward smart tools that incorporate IoT features, providing real-time data on environmental conditions and curing status, which could revolutionize how we approach flooring installations. For anyone serious about long-term results, I challenge you to implement a laser level check during your next project—it’s an advanced tip that pays off in perfect surface alignment and peace of mind. Remember, consistent maintenance and the right equipment are your best allies in ensuring your flooring looks great and performs well for decades. For detailed strategies, visit my guide on [mastering floor leveling pro secrets](https://tiletrendshop.com/mastering-floor-leveling-pro-secrets-for-perfect-installations). And don’t forget, regular inspections and cleaning can extend the life of your floors—see my post on [hardwood floor care secrets](https://tiletrendshop.com/hardwood-floor-care-secrets-to-longevity-and-shine) for tips. To keep everything running smoothly, schedule routine check-ups using your laser level and moisture meter, especially after major seasonal changes. Taking these steps now will ensure you won’t face costly surprises later, securing your investment in beautiful, durable floors for years to come.
Sometimes Experience Beats the Manuals
Early in my flooring journey, I believed that trusting the product labels was enough, but I quickly discovered that real success comes from personal trial, error, and observation. For example, I used a cheap leveling compound once, only to find it cracked after a few months—teaching me the importance of investing in quality materials and understanding their nuances.
The Power of Prep and Small Details
No matter how perfect your mixture or technique, neglecting surface prep can sabotage the best efforts. I learned this the hard way when overlooked dust and moisture led to uneven curing. Now, a thorough subfloor cleaning, moisture testing, and marking high spots are non-negotiable steps in my process.
Patience Is a Skill, Not a Waste of Time
Rushing the curing process might save a few hours but often results in future headaches like bubbling or cracking. Embracing patience, even if it means waiting overnight, drastically improves the durability and appearance of the finished floor. I’ve found that giving the compound enough time to cure is a gift you give to yourself and your space.
Applying Techniques with Intention
From raking to feathering edges, I realized that deliberate, practiced motions yield smoother surfaces. It’s not just about spreading material, but controlling its flow and ensuring even thickness. Using tools like gauges, laser levels, and even simple straightedges makes the difference between a good and a professional finish.
Learning from Others Isn’t Always in a Book
Spending time on online forums, tutorials, and consulting experienced pros opened my eyes to subtle tricks—like how primer choice on certain substrates can prevent delaminations or why the curing environment matters. Sharing experiences and asking questions accelerated my learning curve far more than reading alone.
Uncover My Favorite Resources for Flooring Success
Mastering floor leveling is a cornerstone guide that offers comprehensive strategies for flawless results. I also rely on top-tier tools like professional-level tools and trusted brands, which make the process more precise and less frustrating. To deepen my understanding, I turn to books such as “The Complete Guide to Flooring” that combine theory with practical insights, helping me anticipate challenges before they happen.
Your Next Step Toward Flooring Confidence
Building the perfect floor isn’t about luck but about understanding the intricate dance of materials, environment, and technique. Every project adds to your experience, so don’t be discouraged by setbacks—they’re your greatest teachers. Keep experimenting, remain patient, and invest in quality resources. Your beautiful, long-lasting floor awaits you.
What’s one mistake you’ve made in your flooring projects that turned into a valuable lesson? Share below, and let’s learn together!