
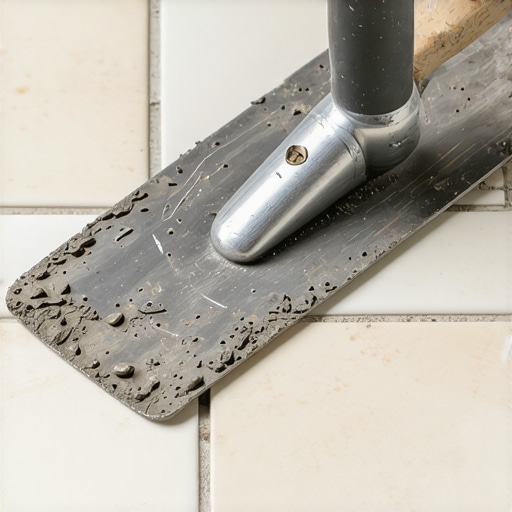
I remember the first time I laid tile in my bathroom—things looked good at first glance, but a few weeks later, I noticed grout cracking and tiles that seemed to barely stick, despite my efforts. The lightbulb moment? My trowel angle was starving my tile of crucial thinset. It felt like I had overlooked a detail that could make or break the entire project. Have you ever faced that frustrating experience?
Why Small Adjustments Make a Huge Difference in Tile Adhesion
Many DIY enthusiasts and even professionals overlook how pivotal their trowel angle really is. It’s not just about spreading thinset; it’s about ensuring every tile gets the proper bond, avoiding future disasters like cracking, loose tiles, or uneven surfaces. When your trowel isn’t at the right angle, you’re essentially starving your tile of the adhesive it needs to stay securely in place over time. Trust me, I learned this the hard way—early on, I made the mistake of assuming a shallow angle would suffice, only to realize that incomplete coverage causes weak spots.
According to industry experts, proper thinset coverage is crucial for a durable installation. In fact, a study by the Ceramic Tile Education Foundation emphasizes that achieving full coverage can reduce the risk of tile failures by up to 80% (source: Tile Trend Shop). That’s a staggering number and a clear call to pay attention to the details many overlook.
Will Adjusting My Trowel Angle Really Make a Difference?
Absolutely. I used to think that as long as I had enough thinset on the surface, I was good to go. But small tweaks, like changing my trowel angle from 45 degrees to 60 degrees when applying thinset, significantly improved adhesion and coverage. Once I started paying attention to my tool’s angle, everything changed. Tiles sat better, and I avoided the common pitfalls of uneven surfaces and cracked grout.
Now, do I always get it right on the first try? Not yet. But understanding the importance of that angle has made my tile projects much more successful and stress-free. If you’re tired of redoing your work or dealing with those pesky cracks, it might be time to revisit your technique.
If you’ve experienced problems similar to what I described, you’re not alone. Many homeowners and seasoned pros alike have benefited from refining their approach—starting with how they hold their trowel. Curious to see how mastering this simple yet overlooked detail can transform your projects? Keep reading, because we’re about to dive into practical tips and tricks that will elevate your tile game to professional standards.
Set Your Trowel at the Right Angle for Perfect Coverage
When applying thinset, hold your trowel at a consistent 45-degree angle, then tilt it slightly to about 60 degrees during spreading. This adjustment ensures that the mortar is neither too thick nor too thin, providing optimal adhesion. I vividly recall the first time I experimented with this tilt—my tiles went from wobbly to rock-solid, saving me hours of rework. Practice this small tweak on scrap pieces first; it’s a game-changer.
Use the Notch-Size in Sync with Tile Thickness
Choosing the correct notch size on your trowel matters. For standard ceramic tiles, a V-notch or square-notch trowel typically suffices. Larger tiles or stone require a bigger notch to maintain proper coverage. Think of it like spreading frosting evenly over a cake—more surface area for thicker tiles. I once tried to use a small notch on large slate tiles, and the thinset barely covered the edges, causing crack issues later. Matching your notch to your tile size prevents these headaches.
Apply Thinset with a Firm, Even Pressure
Consistent pressure ensures the mortar fills all voids and air pockets beneath the tile. Imagine you’re pressing down gently yet firmly, almost as if you’re trying to spread peanut butter evenly—this analogy helped me master the right grip. I once attempted to only swipe the thinset on lightly, resulting in voids and loose tiles. Applying steady pressure while moving the trowel creates a uniform bed, crucial for longevity.
Master the Raking Technique for Uniform Thinset
After spreading the mortar, use your notched trowel to rake through the thinset, creating uniform grooves. This action helps fill gaps under the tile entirely. Think of raking as creating tiny trenches; it improves adhesion by encouraging the mortar to ooze into every corner. During my first few projects, I neglected this step, leading to uneven tiles. Once I adopted this method, surface flatness improved dramatically.
Think of It Like Laying Tracks for a Train
Running the notched trowel: hold it at a 45-degree angle and drag it steadily across the surface, maintaining consistent pressure. This creates a pattern that allows trapped air to escape and ensures full mortar coverage. Precision here saves you from future cracks or loose tiles. Practice on scrap surfaces to perfect your rhythm—getting this right is vital for a professional finish.
Check Coverage Before Setting the Tile
Before pressing tiles into place, lift a corner to inspect thinset coverage. Ideally, you want at least 95% coverage—no air pockets or bare spots. If coverage is lacking, back out the tile, reapply mortar, and ensure your trowel angle is correct. I learned this the hard way when a tile later cracked because of incomplete adhesion. Regularly verifying coverage prevents issues down the line.
Use a Level and Straightedge to Confirm Flatness
Once tiles are placed, use a level or straightedge to check for high or low spots. Small adjustments can be made by tapping tiles gently with a rubber mallet. Think of it like tuning a guitar—each string (or tile) must be precisely aligned. This step guarantees a level floor that looks polished and functions well, especially in high-traffic areas.
Many homeowners and even seasoned professionals often fall into misconceptions when it comes to tile and flooring installation. One common myth is that simply laying tiles or hardwood planks is enough to guarantee longevity. However, the truth is that overlooking subtle details—like proper substrate preparation or understanding the specific needs of different materials—can lead to costly repairs down the line. For instance, assuming that all subfloors are equally suitable without assessing moisture levels or structural stability is a mistake that can cause tiles to crack or loosen prematurely. Advanced mistakes such as neglecting expansion joints or misjudging acclimation times for hardwood can also spell disaster in your project.
Let’s consider a nuanced point: the importance of precise floor leveling. Many think leveling is just about making the surface flat, but the reality is more complex. Uneven floors not only cause visual imperfections but also introduce stress points that compromise the bond integrity over time. According to a report by the National Tile Contractors Association, improper floor leveling accounts for nearly 30% of tile failures in residential installations (source: TileTrendShop). The hidden nuance here? Achieving a perfectly level substrate involves more than a quick skim with a level. It requires meticulous preparation, understanding the properties of your leveling compounds, and adjusting for specific subfloor conditions.
So, what do most people get wrong about floor leveling? A prevalent mistake is underestimating the significance of moisture content in subfloors. Moisture can cause leveling compounds to fail, leading to bubble-ups or cracks in the finished surface. Professional installers test moisture levels using specialized meters—something many DIYers skip, resulting in uneven floors and tile cracking over time. For advanced insights and techniques, I recommend exploring detailed resources like this guide.
Furthermore, some believe that the choice of adhesive is less critical than the material itself. In reality, selecting the appropriate adhesive, considering factors like flexibility, setting time, and compatibility with the tile substrate, can significantly improve the lifespan of your installation. Using the wrong adhesive on a moisture-prone slab or in a warm climate can lead to delamination or grout cracking. Advanced installers often conduct small adhesion tests before proceeding to ensure compatibility.
Another crucial yet often overlooked nuance is the role of expansion gaps and movement joints. These are not just decorative spaces; they are vital for accommodating thermal expansion and contraction. Ignoring this can result in tiles cracking or buckling, especially in variable climates. Properly planning for these gaps requires understanding the material’s expansion properties and the room’s specific conditions.
Finally, if you’re eager to sharpen your skills and avoid these pitfalls, check out expert-level tutorials or consult with experienced installers through reputable channels like TileTrendShop. Remember, understanding and respecting these subtle nuances is what separates a professional installation from a weekend hobby session.
Have you ever fallen into this trap? Let me know in the comments.
Keep Your Flooring in Peak Condition with Proper Maintenance
Maintaining your tile and hardwood floors isn’t just about cleaning; it involves a proactive approach to preserving their integrity over years. Regular inspections for cracks, loose tiles, or warping allow you to address issues before they escalate, saving time and money down the line. Applying protective treatments like grout sealers or hardwood floor finishes enhances durability and keeps your surfaces looking pristine. Establish a routine check-up schedule—quarterly for high-traffic areas—and use specialized tools to detect underlying problems early.
Tools I Trust for Floor Maintenance and Repairs
One of my go-to tools for maintaining floors is a high-quality pinpoint moisture meter. Moisture imbalance can cause hardwood warping or tile delamination over time. I personally use the Pinless Moisture Meter; it provides quick, non-invasive readings, helping me monitor subfloor conditions regularly. Additionally, a soft-bristle floor scrubber is invaluable for deep cleaning without damaging surface finishes, especially in textured tiles or distressed hardwoods. For minor repairs, I keep a precision grout razor and wood filler applicator handy to fix chips and cracks swiftly, preventing further deterioration.
Investing in these specialized tools simplifies maintenance routines, ensures early detection of issues, and extends the lifespan of your flooring investments. As floors adapt to environmental changes, periodic reapplication of sealants or finishes is recommended—think of it as a tune-up that keeps everything running smoothly.
Looking Ahead: The Future of Floor Upkeep
Advancements in sensor technology and smart home integration are set to revolutionize floor maintenance. Expect to see moisture sensors that communicate directly with your smartphone, alerting you instantly to potential problems. Such innovations will make proactive care more accessible, reducing the need for costly repairs. Incorporating these tools into your regular maintenance can transform your approach from reactive to preventative, extending your floors’ beauty and functionality for decades.
How do I maintain my floors over time to maximize their lifespan?
Consistent cleaning using appropriate equipment, routine inspections, timely resealing, and monitoring environmental conditions are key. Utilize tools like moisture meters and soft-bristle scrubbers for effective upkeep. Moreover, adhering to proper usage guidelines—like avoiding excess moisture and heavy impacts—preserves the integrity of tiles, hardwoods, and other flooring materials. For detailed strategies, check out this resource on advanced maintenance techniques.
To get started, try regularly testing subfloor moisture levels with your moisture meter; catching hidden issues early can prevent costly replacements. Remember, proactive care is the best investment for your flooring’s long-term beauty and durability.
What I Wish I Knew When I Started Tiling
One of the most valuable lessons I learned was the significance of consistent tool handling—especially the importance of maintaining the correct trowel angle. Initially, I overlooked how small adjustments could dramatically improve coverage, leading to stronger, longer-lasting tiles. Real-world experimentation taught me to tweak my approach, saving time and avoiding costly mistakes later.
Another insight was in the choice of notch size—matching it precisely to my tiles and substrate. Rushing this step often resulted in voids and cracked grout, but paying close attention makes a glaring difference in durability. It’s a simple change that offers huge benefits in the overall look and longevity of the installation.
Tools and Resources That Truly Changed My Game
My go-to reference is this comprehensive guide. It combines practical advice with expert insights, helping me avoid common pitfalls. I also rely on a high-quality moisture meter to monitor subfloor conditions—preventing future issues caused by unexpected moisture. Lastly, investing in a precision notched trowel has made a notable difference in achieving perfect thinset coverage every time.
Keep Moving Forward With Confidence
Your flooring project is a journey—one where attention to detail becomes your best ally. By refining your technique, choosing the right tools, and trusting expert guidance, you can elevate your installation skills. Remember, every perfect tile you lay is a step toward transforming your space into something truly exceptional. Take that leap today and start applying these insights—your dream floor is just a project away.