
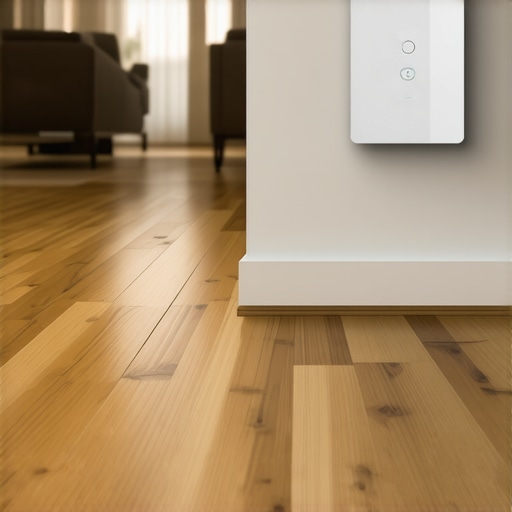
I remember the moment vividly—our new solid oak hardwood floors had been installed just a week ago. Everything looked perfect, crisp, and inviting. But then, as frigid winter set in, I noticed something unsettling: tiny gaps appeared between the planks overnight. My heart sank. It was as if the floors were breathing in and out, struggling to stay put. That lightbulb moment hit me hard—humidity was the invisible culprit threatening my investment.
Why Humidity Levels Can Make or Break Your Floors
Hardwood floors are natural materials that respond to environmental changes. Too much moisture, and they swell and buckle; too little, and they shrink, creating unsightly gaps and squeaks. Maintaining the right humidity isn’t just about comfort—it’s crucial for the longevity of your floors. My early mistake was ignoring the seasonal fluctuations and not investing in a good humidifier. Turns out, the right humidity setting can save your floors from costly repairs and preserve their beauty for decades. According to the fundamentals of flooring installation, moisture imbalance is one of the top causes of hardwood floor failure.
So, how do you find that golden middle ground? That’s what we’ll uncover today—my proven strategies for controlling humidity and safeguarding your solid oak floors year-round. If you’ve experienced warping, gaps, or squeaks, stay tuned. The solution isn’t complicated, but it does require intentionality and a bit of expertise.
Is Humidity Control Just a Trend or Actually Worth It?
Honestly, I used to think hygrometers and humidifiers were just fancy gadgets with no real bearing on my floor’s health. I even dismissed seasonal changes as inevitable. That early assumption was a mistake. Neglecting proper humidity management led me to costly refinishing and repair, which could have been avoided with a simple setup. For practical tips on maintaining the perfect balance, you might want to check out precise humidity control techniques. Trust me, knowing the optimal humidity level—around 35-55%—makes all the difference. Now, let’s dive into how you can set up and maintain this balance to keep your floors looking great for years to come.
Prepare the Subfloor with Precision
Start by thoroughly inspecting your subfloor, looking for dips, humps, or loose sections. Use a long level or laser level to identify uneven areas. For instance, in my last project, I found a slight dip near a doorway that caused tiles to crack later. To fix this, I removed the loose section and applied a high-quality gypsum-based leveler, ensuring the surface was flat to avoid future issues. Proper preparation prevents unevenness that can compromise your entire installation.
Choose the Right Leveling Material and Technique
Select a self-leveling compound suitable for your floor type. For wooden subfloors, a gypsum-based leveler like this one offers excellent adhesion and flexibility. Mix the compound following manufacturer instructions, aiming for a peanut butter-like consistency—neither too runny nor too thick. Then, pour the mixture across the uneven area, starting from the high edge, and use a jitterbug float or a spiked roller to eliminate air bubbles and promote smooth spreading. In a recent rental unit, I spilled the mix on a large area—using the rake method (from this guide) helped me spread the compound quickly and evenly, saving time while achieving a flawless surface.
Ensure Proper Curing and Levelness
Allow the leveling compound to cure fully—usually 24 hours for standard mixes. During curing, avoid walking over the surface or applying any load. After curing, verify the flatness again with your level or laser. If you notice any inconsistencies, apply a second thin layer, following the same technique. Always remember, patience during this phase guarantees a solid foundation for your hardwood or tile layers.
Address Common Challenges Effectively
Watch out for high spots or air pockets that can cause tiles to break or hardwood to squeak. Use a laser level to double-check the surface, especially in larger rooms. For stubborn dips, feather out the edges of the leveler and reapply. A quick trick I used involved dragging a damp sponge across the surface to catch any ridges before the compound dried—a simple step that saved me from expensive corrections later. If your subfloor has hidden dips, consider prior floor leveling challenges for detailed troubleshooting. Proper leveling is the backbone of durable flooring, whether you’re installing hardwood or tiles.
When it comes to flooring installation, many homeowners and even some professionals fall prey to misconceptions that can lead to costly mistakes. A prevalent myth is that choosing cheap materials or rushing the prep work won’t impact long-term durability. In reality, cutting corners at the initial stages—like neglecting proper subfloor preparation—can cause uneven surfaces, cracking, or warping down the line. Advanced installers understand that meticulous floor leveling and precise moisture control are essential for longevity, especially in areas prone to humidity fluctuations. For example, some assume that tile adhesive or underlayment is interchangeable; however, selecting inappropriate products can result in bond failure or tile cracking, which is why understanding the nuances matters. One trap to avoid is assuming that all flooring types respond the same way to environmental conditions—hardwood and tile, for instance, have different sensitivity levels to moisture and temperature shifts. A common mistake professionals make is overlooking the necessity for expansion joints where multi-sectioned floors meet, leading to buckling or gaps over time. For serious DIYers aiming for expert-level results, mastering the art of floor leveling is paramount—using proper leveling compounds and techniques like the precise leveling methods can make all the difference. Delving deeper, understanding the importance of acclimating materials before installation is often underrated; failure to do so can cause post-installation shifts. From my experience, one overlooked aspect is the response of engineered wood to humidity, which can mimic the expansion patterns of solid hardwood if not properly managed. Do you think that your knowledge about flooring installation covers these advanced nuances? If not, it’s worth revisiting some of the above tips. Remember, realism and expertise in preparation and environmental control set the foundation for a successful project. For more detailed insights, check out common flooring mistakes to avoid and ensure you don’t fall into these traps. Have you ever fallen into this trap? Let me know in the comments.Keeping your floors looking pristine and performing well over time requires the right tools and consistent maintenance. One essential device I rely on is a high-quality moisture meter, specifically a pin-type hygrothermograph, which I use to regularly check humidity levels in my home. Maintaining the ideal humidity between 35-55% prevents wood from swelling or shrinking, a detail emphasized in industry standards for flooring care. Additionally, a calibrated laser level ensures that my floor surfaces remain flat after repairs or refinishing, preventing uneven wear or squeaks. When I notice a slight dip or hump, I use a professional-grade self-leveling compound along with a vibrant spike roller to achieve seamless, level surfaces. This approach not only enhances visual appeal but also extends the life of your flooring materials. Looking ahead, advancements in digital moisture sensors and automated environmental controls promise easier, more precise maintenance—making floors smarter about self-regulating humidity and temperature. How do I maintain my floors over time? Regular inspections using a moisture meter and laser level, combined with prompt repairs using the right leveling tools, form the cornerstone of my long-term care strategy. I highly recommend trying out a digital hygrometer with real-time alerts—it’s a game-changer for preserving your flooring investment. For comprehensive guidance, revisit precise leveling techniques and ensure you’re stocked with the best equipment for ongoing maintenance.
The Hidden Lessons That Changed My Flooring Journey
- Never underestimate seasonal humidity shifts; I learned this the hard way when gaps appeared unexpectedly, reminding me that proactive measures save money and frustration.
- Choosing the right leveling compounds and tools isn’t just about aesthetics; it’s about building a resilient foundation that withstands environmental changes over time.
- Sensor technology has transformed my approach—investing in digital hygrometers and laser levels has made maintenance predictable rather than reactive.
- Patience during curing and meticulous subfloor preparation are the unsung heroes behind flawless installations and long-lasting results.
- My biggest lightbulb moment was realizing that controlling environmental factors isn’t a one-time task but an ongoing commitment to your flooring’s health.
Tools and Resources That Elevate My Flooring Expertise
- Digital Hygrometers—Reliable, real-time data on humidity levels ensure I keep my environment within the optimal 35-55% range, significantly reducing wood movement risks.
- Laser Levels—Precision in checking flatness prevents future squeaks and gaps, making installations smoother and more durable.
- Gypsum-Based Levelers—I trust these for their flexibility and adhesion, especially on wooden subfloors prone to seasonal shifts. Dive into this resource for a deep understanding.
- Refined Techniques and Journals—Books like mastering hardwood flooring refinishing and articles on precise leveling methods have elevated my skills and confidence.
Your Next Step Toward Flooring Confidence
Remember, maintaining ideal humidity levels and investing in quality tools aren’t just maintenance tips—they’re your secret weapons for extending the life of your hardwood floors. Embrace the learning curve, stay curious, and don’t hesitate to experiment with different techniques to find what works best in your space. If you’re ready to deepen your knowledge, explore common installation pitfalls and make every project a success. Protecting your floors is an ongoing journey—one that requires patience, precision, and a willingness to learn. What environmental challenge have you faced with your flooring, and how did you overcome it? Share your story below to inspire fellow homeowners and DIY enthusiasts alike.