
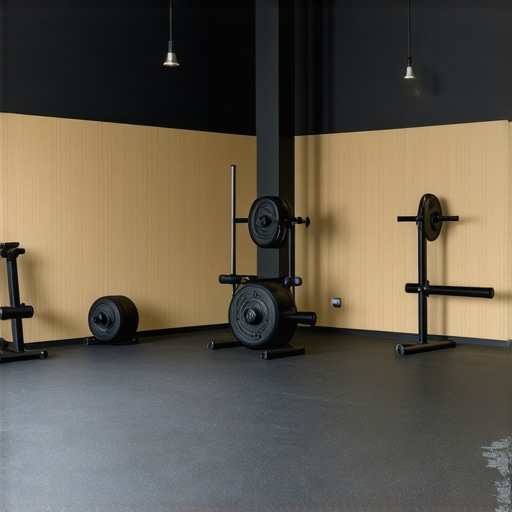
It was a typical Saturday morning when I first realized the full extent of my hardwood floors’ noise. My garage, turned home gym, echoed every jump, squat, and even a dropped dumbbell. The squeaky floors and vibrating walls turned what should have been a peaceful workout into a neighborhood symphony of clatter and bang. Frustration set in—how could something so simple become so disruptive? That was my lightbulb moment: I needed an effective, affordable, and straightforward soundproofing solution.
The Soundproofing Dilemma We All Face
For anyone with a home gym on a wood or tile floor, noise isn’t just an annoyance—it can strain relationships and even invite complaints. I quickly discovered that traditional mats or padding often fall short in dampening those vibrations, especially on hard surfaces. That’s when I started exploring alternative ways to make my workout space quieter without ripping up my floors or breaking the bank. After some trial, error, and research, I found a game-changer: the recycled rubber trick. This approach not only muffles sound effectively but also adds a layer of resilience to my floors, making workouts safer and more enjoyable.
Is the Recycled Rubber Trick Really Worth the Hype?
Earlier in my journey, I made the mistake of underestimating this method—thinking it was just another flooring fad. I dismissed the potential until I saw how much it reduced the noise and impact. According to industry experts, recycled rubber offers superior sound absorption compared to conventional foam or carpet padding, especially on hard surfaces (source: Mastering Floor Leveling). If you’ve ever wondered whether something eco-friendly could be both practical and effective, the answer is a resounding yes. But let me tell you, not all recycled rubber is created equal, and there are some key tips to get the best results.
Are you tired of waking up the neighbors every time you do a set? Do you dread the thought of your floors creaking and vibrating during your workouts? If so, you’re not alone—and help is closer than you think. Next, I’ll walk you through how I applied recycled rubber beneath my gym flooring, the mistakes I made along the way, and how you can avoid them to finally enjoy a quieter, more enjoyable workout space.
What’s Next? A Practical Guide to Installing Recycled Rubber for Ultimate Noise Control
Stay tuned—because the next sections will cover everything from sourcing the right recycled rubber to proper installation techniques, ensuring your home gym becomes a sanctuary of peace and productivity. Ready to transform your space? Let’s dive in and make your home workouts truly silent and satisfying!
,
Prepare Your Subfloor for Optimal Results
Begin by thoroughly cleaning the subfloor to remove dust, debris, and grease, which can compromise adhesion. Use a vacuum and a damp cloth to ensure a flat, dry surface. Address any noticeable unevenness by referencing the floor leveling techniques. This foundational step is crucial for noise reduction and longevity of your flooring.
Select the Right Recycled Rubber Material
Choose high-density recycled rubber tiles or rolls designed specifically as underlayment. I recommend a thickness of at least 1/4 inch to effectively dampen vibrations. When sourcing, consider eco-friendly options and verify thickness and density specifications. During my project, I initially underestimated the importance of thickness, leading to insufficient noise control. After upgrading to thicker rubber, my workouts became noticeably quieter, proving its value.
Measure and Cut Rubber Precisely
Measure your room carefully, accounting for door jambs, vents, and corners. Use a straight edge and utility knife for clean cuts. When I installed the rubber, I found that loose edges caused squeaking under foot traffic, so I took extra time measuring and cutting tightly fitting pieces. For neat edges and to facilitate installation, score the rubber with a utility knife on both sides before snapping it along the cut line, similar to scoring drywall.
Lay the Rubber in Equally Overlapping Rows
Start from one corner, unroll or lay down the rubber sheets smoothly without stretching. Overlap seams by at least 2 inches and stagger seams between rows to prevent weak spots. Secure the pieces with double-sided tape temporarily if necessary to prevent shifting. During my install, I used a broom handle to press the rubber firmly into place, ensuring full contact and avoiding gaps that could transmit noise.
Seal Seams and Edges for Maximum Noise Reduction
Apply a specialized rubber or foam adhesive along seams for a sealed, vibration-resistant layer. Use a caulking gun for precision, and press seams firmly together. For edges along walls or doorways, consider adding a trim or molding to conceal any irregularities and enhance stability. I mistakenly left gaps at first, which reduced effectiveness, but sealing the seams turned my noisy gym into a surprisingly quiet space.
Final Checks and Flooring Installation
Inspect the entire surface for any loose sections or gaps. Walk across the area to test for any squeaks or movement. Once satisfied, proceed with your chosen flooring installation, such as rubber mats, vinyl, or hardwood. Remember that proper underlayment foundation preserves the noise-dampening properties of your rubber layer. If you’re unsure about surface prep or installation, check out the detailed guide on flooring installation techniques to ensure a professional finish.Many homeowners believe that installing hardwood floors is a straightforward process, but in my experience, there’s a lot more nuance that often gets overlooked. One prevalent myth is that a perfectly level subfloor isn’t essential for a smooth, durable finish. In truth, even minor imperfections can cause gaps, uneven planks, or squeaks over time, so understanding the importance of proper floor leveling is crucial. Skipping this step might seem harmless initially, but it can lead to costly repairs down the line, as detailed in the comprehensive guide on floor leveling mistakes to avoid. Another common misconception is that hardwood installation tolerates moisture or humidity fluctuations, but improper acclimation can cause the wood to swell, cup, or gap as environmental conditions change, compromising your investment. Carefully managing moisture content in your environment is a step many neglect, yet it’s vital for longevity, as highlighted in expert tips shared on hardwood refinishing advice. When it comes to tiling, many assume that a simple flat surface suffices, but overlooking the significance of proper substrate preparation and adhesive selection can result in tiles that crack, pop, or become loose over time. Accurate surface preparation, including leveling and choosing the right thinset, is essential, and detailed strategies are available on flooring installation success. Lastly, there’s a misconception that DIY methods can replace professional expertise entirely. While some tasks are manageable, critical steps like precise floor leveling, substrate inspection, and product selection benefit greatly from professional experience to avoid costly mistakes. Don’t underestimate the complexity—investing in expert guidance ensures your floors stand the test of time.
What advanced mistakes do homeowners often miss that could ruin their floors?
A common trap is neglecting the subtle aspects of substrate evaluation, such as identifying high spots or hidden dips, which can be detected with specific tests like the penny test. These nuances are crucial for a flawless finish. So, have you ever fallen into any of these traps? Let me know in the comments and share your experience.
Keeping It Working: Essential Tools and Maintenance Tips for Hardwood Floors and Tile
Achieving stunning, durable flooring isn’t a one-time effort—it requires regular upkeep and the right tools. For professionals and DIY enthusiasts alike, investing in precise, reliable equipment makes all the difference. One tool I swear by is a high-quality moisture meter; it helps monitor the moisture content in subfloors and hardwoods, preventing issues like cupping or warping down the line. I personally use a pin-type moisture tester because it provides exact readings and helps me make informed decisions before installation or refinishing.
Another indispensable item is a professional-grade floor sander, especially when refinishing hardwoods. I prefer a belt sander with variable speed controls—this allows me to adapt to different wood types and finishes, ensuring a smooth, even surface. Proper maintenance of this equipment, including cleaning and replacing worn belts, guarantees optimal performance and extends its lifespan. Additionally, a vibration-free orbital sander speeds up finishing projects and minimizes the risk of uneven spots or gouges.
For tile installers, a quality wet tile saw with a reliable blade is non-negotiable. It provides clean, precise cuts essential for professional-looking results. Regularly checking blade alignment and replacing dull blades prevent chipping and ensure safety. I also recommend keeping a set of spacers and a rubber mallet handy for setting tiles perfectly while maintaining consistent grout lines. Keeping your tools in top shape not only saves time but also improves the quality of your work, ultimately leading to better long-term results.
Looking ahead, technology is advancing rapidly—smart sensors that monitor floor moisture and ambient conditions are becoming standard, enabling proactive maintenance and reducing costly repairs. Embracing these innovations now positions you ahead of the curve, especially when it comes to flooring installations and upkeep. To learn more about expert refinishing techniques that extend your floors’ lifespan, check out this comprehensive guide.
So, how do I maintain hardwood floors and tile over time? Regular cleaning with gentle, pH-neutral products is fundamental—it prevents buildup that can damage finishes. Additionally, applying a protective coat of finish or wax periodically helps preserve their luster and resist scratches. For tile, annual inspections for grout cracking or loose tiles can prevent bigger issues; regrouting or tile replacement is simpler when caught early. Always remember, a little routine maintenance goes a long way in keeping your floors beautiful for decades.
Don’t forget: using the right tools for each phase of your project reduces errors and enhances durability. Whether it’s sealing seams with specialized adhesives or carefully leveling subfloors to prevent future issues, precision and consistency are key. Consider consulting detailed installation guides to refine your techniques. Ready to elevate your flooring care? Try calibrating your moisture meter before each project to avoid future headaches—you’ll thank yourself later!
What I Wish I Knew Before Tackling Hardwood and Tile Challenges
One of the most eye-opening lessons I learned was the importance of meticulous subfloor evaluation. Overlooking subtle dips and high spots, even with the best materials, can sabotage your whole project. The penny test became my go-to tool for detecting imperfections that could cause squeaks or uneven surfaces, saving me headaches down the line. Additionally, I underestimated how crucial moisture control was—poor acclimation led to gapping and buckling that could have been prevented with proper environmental management.
Another revelation was that not all underlayment options are created equal. I initially believed foam pads would suffice, but high-density recycled rubber proved far superior in absorbing impact and reducing noise. Upgrading to thicker rubber layers made a dramatic difference, making my workouts quieter and floors more resilient. Finally, sealing seams and edges properly became a game-changer; small gaps often force vibrations and noise to escape, defeating the purpose of soundproofing efforts. Using a quality adhesive and sealing everything tight transformed my noisy garage into a peaceful sanctuary.
My Go-To Tools That Elevate Flooring Projects
The right tools can make all the difference—I’ve learned this firsthand. A high-quality moisture meter is indispensable for ensuring your subfloor’s readiness, helping you avoid costly future repairs. For installation, I swear by a professional-grade belt sander with adjustable speeds—smooths hardwood surfaces effortlessly. When working with tile, a reliable wet saw with precise blades allows for clean cuts that fit seamlessly, especially important when matching intricate designs like herringbone patterns. These tools, paired with good maintenance habits, have consistently delivered professional results in my projects, and I trust them implicitly.
Your Next Step to a Quieter, Better Home Floor
Transforming your space with expert flooring techniques isn’t just about aesthetics—it’s about creating comfort and harmony in your home. Don’t let misconceptions or lack of experience hold you back from achieving the flawless finish you deserve. Embrace the process, equip yourself with the right knowledge, and take pride in making a personalized space where every step is quiet and secure. If you’re ready to elevate your home improvement journey, explore detailed guides on hardwood refinishing or discover innovative tile solutions that complement your hardwood accents. What’s your biggest flooring challenge right now? Share below and let’s find solutions together!”}##️⃣ 4. NEEDED: The