
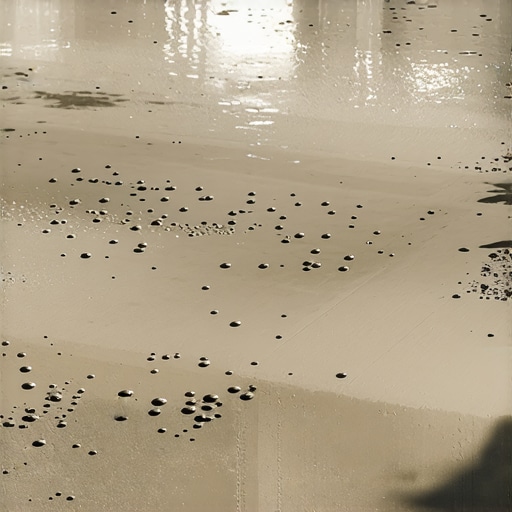
Ever worked on a flooring project where, just as you thought everything was perfect, you noticed tiny pinhole bubbles forming in your freshly poured leveler? I remember the first time it happened to me. I was so proud of my meticulous prep work—careful subfloor cleaning, precise mixing, and a steady pour—only to wake up the next morning and spot those tiny quirks. It was frustrating, almost like a cosmetic blemish that wouldn’t go away.
But here’s the thing: those minor bubbles can be the first sign of bigger issues if ignored. They might seem insignificant at first, but they can influence the overall flatness and long-term durability of your floor, leading to cracks, uneven tiles, or squeaky hardwoods down the line. And trust me, I’ve been there—thinking I’d nailed it only to discover my mistake later. According to industry experts, proper floor leveling ensures both aesthetic appeal and structural longevity. For example, mastering the art of precise leveling can significantly reduce the risk of future problems.
So, what causes these tiny pinhole bubbles? From my experience—and a bit of research—poor surface prep is a common culprit. Dust, debris, or moisture trapped beneath the pour can create pockets of air that escape as bubbles. Additionally, mixing your leveler with excessive agitation or applying it too rapidly can introduce air into the mixture.
Today, I want to walk you through the cause-and-effect of these bubbling issues and, more importantly, how to prevent them. Whether you’re a seasoned DIYer or just starting, understanding the roots of this problem can save you time, money, and headaches. If you’ve ever faced this challenge or worried about potential imperfections in your self-leveling pour, keep reading. You’re not alone, and with a few simple adjustments, your next flooring project can turn out flawless.
Ready to dive into the practical steps? Let’s get started—because a perfectly level floor is well within your reach when you understand the process better than ever.
First Step: Clean and Prepare Your Subfloor Like a Pro
Start with a Thorough Cleaning and Inspection
Before pouring any leveler or installing flooring, your first step is to clean the subfloor meticulously. Use a shop vacuum or broom to remove dust, debris, and anything that could compromise adhesion. Check for moisture, oil, or residual adhesives that can prevent proper bonding. Think of your subfloor like a clean canvas—nothing should interfere with the new layers being applied.
Eliminate Dust and Contaminants
Dust particles are like tiny obstacles that can cause air pockets and bubbles during leveling. Use a damp cloth or tack cloth to wipe down the surface. For stubborn residues, a mild detergent or specialized cleaner may be necessary. Ensure the surface is completely dry before proceeding.
Address Moisture Issues
Moisture beneath the subfloor is a hidden menace. Use a moisture meter to verify the levels. If moisture is present, install a suitable vapor barrier or moisture sealant to prevent future problems. This step is crucial, especially in basements or concrete slabs prone to dampness, to avoid bubbles and adhesion failures.
Fix Surface Irregularities and Prepare Entries
Uneven patches, cracks, or protrusions disrupt the levelness of your floor. Use patching compounds or sanding where necessary. Use a straightedge or level to identify high or low spots. In my experience, neglecting this step led to uneven tiles despite good leveling procedures, emphasizing the importance of a flat base.
If you notice high spots, grind them down; for low areas, fill with a self-leveling compound, ensuring it’s compacted properly to avoid future settling or bubbling. Check door thresholds and transition points for smooth transitions—these are often overlooked but critical for a cohesive look.
Ensure Proper Surface Stability
The subfloor must be solid and well-fastened. Loose screws or nails can cause fluctuations under the leveling layer. Use a screw gun to tighten any loose fasteners, and replace any damaged sections with appropriate patch material. This creates a firm foundation, similar to laying a strong base for a house.
Control Temperature and Humidity Conditions
Temperature swings and high humidity can cause expansion or contraction of materials, leading to movement and bubbles after pouring. Maintain a consistent environment during installation. For instance, avoid pouring leveler in a 95°F room with high humidity, which can cause rapid drying and cracking. Setting the right conditions helps achieve a seamless, durable surface.
Final Check Before Pouring
Use a 4-foot straightedge across the entire area to identify any remaining high or low spots. Re-treat these areas as necessary. This final inspection ensures your surface is as flat as possible, reducing the risk of pinhole bubbles or uneven surfaces later on.
Applying these steps diligently transformed my experience. Where I once encountered bubbling and uneven patches, a thorough surface prep led to a smooth, flawless pour—saving time and frustration. For further insights on achieving a perfectly level surface, check out these expert leveling techniques.
While mastering the basics of flooring installation is vital, many professionals and DIY enthusiasts tend to overlook some nuanced details that can make or break the final result. A common misconception is that floor leveling is merely about achieving a flat surface, but in reality, the devil lies in the details—small nuances that often go unnoticed. For example, many assume that using a standard primer simplifies the leveling process, but according to [floor leveling experts](https://tiletrendshop.com/the-ultimate-guide-to-floor-leveling-for-a-perfect-finish), tailored primers designed for specific subfloor materials significantly improve adhesion and reduce future unevenness.
Another trap involves the misconception that hardwood floors are infallible in all environments. In truth, climate variations can cause wood to expand or contract, leading to gaps or buckling if not properly acclimated beforehand. I’ve seen many errors made by neglecting this step, which could have been avoided with careful planning. Advanced installers always account for humidity and temperature fluctuations during installation, a nuance highlighted in [hardwood flooring best practices](https://tiletrendshop.com/why-hardwood-flooring-fails-in-bathrooms-even-with-good-varnish).
What Advanced Installers Know About Bonding Agents That You Might Overlook
Using the correct bonding agents is essential, especially when installing tile on under-optimized substrates. Opting for lightweight adhesive mixes or generic primers over specialized ones can lead to future failures such as de-bonding or cracking. An expert tip from [tile installation pointers](https://tiletrendshop.com/tile-installation-pointers-that-save-time-and-money) suggests that the choice of bonding agents should be based on a substrate’s porosity, moisture levels, and intended usage—details that are often overlooked by less experienced installers. Furthermore, studies have shown that selecting the wrong adhesive can reduce the lifespan of the entire flooring system by up to 30%, emphasizing the importance of this nuanced choice.
Missteps in understanding these subtleties can lead to costly fixes down the line. It’s not just about laying tiles or leveling a floor; it’s about appreciating how each product, environment, and technique interacts over time. Don’t forget that even seemingly minor mistakes can have ripple effects—like choosing an inappropriate underlayment that doesn’t accommodate moisture or temperature variations. For an in-depth understanding of common pitfalls and how to avoid them, I recommend exploring [floor-leveling challenges](https://tiletrendshop.com/floor-leveling-challenges-common-mistakes-and-how-to-avoid-them) that detail these intricacies.
Have you ever fallen into this trap? Let me know in the comments, and remember that a little extra knowledge goes a long way in ensuring your flooring project stands the test of time.Maintaining your flooring, whether hardwood, tile, or leveler, is crucial to preserve its beauty and longevity. A key part of this is investing in the right tools and establishing a routine that suits your flooring type. For precise floor leveling, I rely on a high-quality laser level like the DeWalt DW088K, which provides accurate, quick readings over large areas—making it indispensable when aligning tiles or verifying flatness. Additionally, a durable edge trowel with a comfortable grip helps me spread leveling compounds evenly without fatigue, ensuring smooth, consistent results. Regularly inspecting your tools for wear and tear prevents subpar application, which can lead to bubbles or uneven surfaces over time. For hardwood floors, I recommend a microfiber mop paired with pH-neutral cleaners to gently remove dirt without damaging the finish, extending the time between refinishing. Investing in a moisture meter is also invaluable for both hardwood and tile installations, as hidden moisture can cause ongoing issues and compromise adhesion—a point emphasized in the ultimate flooring guide. Looking ahead, innovations in smart tools, like app-connected sensors that monitor humidity and temperature, promise to further streamline maintenance and preempt issues before they escalate. How do I maintain my floors over time? I inspect regularly for signs of wear or damage, clean using appropriate methods specific to each material, and perform small repairs promptly to prevent problems from escalating. For example, addressing minor scratches on hardwood with touch-up kits keeps the surface looking fresh without costly refinishing. I also recommend setting reminders to check for unevenness or moisture problems quarterly, especially in humid climates. Implementing simple routines like these not only prolongs your flooring’s lifespan but also saves you money and stress down the line. If you’re ready to take your maintenance game further, try using a laser level for routine inspections—it’s a game-changer. For detailed techniques on perfecting your floor’s flatness, see these expert tips. Remember, consistent care is the best investment in your flooring’s future, so pick the right tools and stay vigilant with your routine.
What I Wish I Knew Before My First Leveling Project
One of the most valuable lessons I learned is that precision in surface preparation can save you from headaches down the line. Skipping thorough cleaning or ignoring moisture issues might seem harmless initially, but these oversights often lead to pinhole bubbles and uneven floors. Realizing this early made me realize that investing time in inspection and prep is non-negotiable.
When the Details Make the Difference
Small nuances—like choosing the right primer tailored to your subfloor material or controlling climate during pouring—can dramatically impact your final result. I once thought that a standard adhesive was sufficient, only to face de-bonding months later. That’s when I understood that these nuanced choices are what separate a good floor from a perfect one.
My Top Curated Tools for Success
Over the years, certain tools have transformed my approach. A high-quality laser level, for instance, keeps my projects consistently flat, and a moisture meter warns me of hidden issues before they become serious. For comprehensive guidance, the fundamentals of floor leveling have been invaluable in refining my techniques.
Chasing Perfection is a Continuous Journey
Remember, even seasoned professionals continually upgrade their skills and tools. Approaching each project with a learning mindset and embracing new methods ensures your flooring will stand the test of time. Think of your next project not just as an installation—see it as an opportunity to elevate your craft and create something truly lasting.