
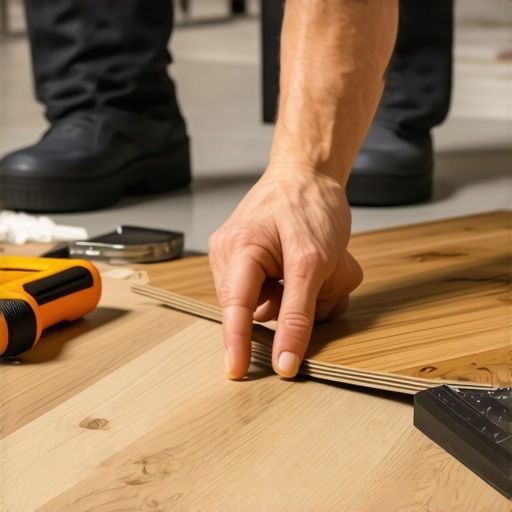
I remember the exact moment I realized my luxury vinyl plank (LVP) had betrayed me. I was mid-cleaning, feeling pretty good about my recent upgrade, when I stepped on what I thought was a sturdy, perfectly installed floor. Instead, I felt a sudden give under my foot and then a loud click as a plank popped right out of its lock. It was like my floor had developed a stubborn personality overnight. If you’ve ever experienced that sinking feeling – discovering a rogue plank disrupting your seamless surface – you know exactly what I mean.
Why This Issue Happens More Often Than You Think
Luxury vinyl flooring is praised for its durability and ease of installation, but even the best floors can have their quirks. A common culprit for planks popping out is uneven subfloors or improper installation techniques. When a plank isn’t seated properly or if there’s a significant dip or bump in the subfloor, the locking mechanism can loosen over time. The result? A sudden and unwanted escape of your carefully laid flooring.
Early in my DIY journey, I made a mistake that contributed to this problem: I skipped verifying the subfloor’s levelness before installing. That oversight showed up later in the form of creeks and loose planks. According to flooring experts, ensuring your subfloor is properly leveled is the foundation for a long-lasting installation. You can learn more about the importance of floor leveling in this comprehensive guide: The Ultimate Guide to Floor Leveling. My mistake taught me that even the most beautiful vinyl deserves a solid base.
Now, if you’re frustrated or just plain curious, ask yourself: Have I been overlooking subfloor prep? Or perhaps those little uneven spots have been silently sabotaging your floors?
Getting ahead of these issues can save you time, money, and the headache of redoing a good chunk of your flooring later. But before you start pulling up planks or stacking books to level the floor, let’s understand how to fix those that have already popped out—without turning your home into a construction zone.
Assess the Damage and Prepare the Area
Start by carefully inspecting the planks that have popped out. Gently lift nearby planks to see if the locking mechanism is damaged or if debris has accumulated in the joints. Use a vacuum or compressed air to clean dust and dirt from the locking edges, ensuring a tight fit upon reinstallation. I once had a stubborn piece that refused to lock back in until I cleared away dried grout and tiny debris that had gotten lodged in the locking groove.
Apply the Right Adhesive for Rebonding
If the plank’s locking edge is slightly damaged or if you want extra security, apply a thin layer of vinyl-specific adhesive along the joint. Use a small brush or a toothpick for precision. Avoid using heavy glue that can ooze out and create uneven surfaces. Remember, the goal is to glue only the joint, not the entire plank, much like a dental bonding process that targets specific areas. This extra step prevented my loose plank from happening again and reinforced the lock.
Secure the Plank Properly
Line up the tongue and groove gently, pressing down firmly to click the lock into place. Use a rubber mallet or a tapping block wrapped in a cloth to gently tap the plank into alignment. Think of it as fitting puzzle pieces; a firm, controlled tap ensures a snug connection. During my project, I used a rubber mallet and a wood block to gently coax a stubborn plank into lockstep, resulting in an almost invisible seam. This technique makes the joint tight and prevents future pops.
Use a Floor Roller for an Even Finish
After locking the planks back in, roll the area with a flooring roller or weighted object to ensure full contact between the plank and subfloor. This step presses the adhesive and lock tightly together, mimicking the pressure from professional installation. I borrowed a heavy wallpaper roller from a neighbor and rolled over the repaired section for 10 minutes. This step flattened out any lingering air pockets and secured the joint, giving my floor a smooth, even surface.
Address Uneven Subfloors to Prevent Recurrence
If loose planks keep popping out, examine subfloor levelness. Use a long straightedge to identify dips or bumps. For minor unevenness, apply a patching compound like a gypsum-based leveler, following instructions from this guide. In my case, I identified a low spot under a section of the floor that caused planks to shift over time. Leveling that area with a quick pour of self-leveling compound stabilized the surface and prevented further issues.
Prevent Future Looseness with Proper Installation Techniques
Ensure your subfloor is thoroughly prepared: clean, dry, and level before laying the vinyl. Use underlayment if recommended, especially over uneven concrete or old wood. During my DIY project, I followed a step-by-step installation tutorial from this resource and verified my subfloor’s levelness with a laser level. This approach significantly reduced the chances of future planks popping out and maintained a perfect stretch of flooring.
Many homeowners believe that achieving a perfectly level floor is simply about using a good self-leveling compound or evenly spacing subfloor screws. However, this oversimplifies a nuanced process that, if misunderstood, can lead to costly mistakes. One widespread misconception is that leveling a subfloor is a quick fix, when in reality, it demands meticulous preparation, precise measurement, and an understanding of the underlying materials. For example, using a laser level without addressing moisture or substrate issues can result in uneven surfaces reappearing over time.
Another common myth revolves around the belief that all leveling compounds are the same. In fact, choosing the wrong type—such as a gypsum-based leveler over a damp or oily subfloor—can cause peeling and cracking, which compromises the entire installation. For sophisticated projects, understanding the specific properties of different compounds is crucial; consult this [comprehensive guide](https://tiletrendshop.com/flooring-installation-fundamentals-leveling-for-a-seamless-look) to make an educated choice.
Beware the trap of neglecting the impact of moisture. Even if the surface looks dry, subfloor moisture vapor emissions can undermine your work, especially over concrete slabs. Installing a vapor barrier or conducting moisture tests might seem like extra steps, but they safeguard your investment in the long run. Studies, such as those from the [Tile Council of North America](https://tiletrendshop.com/why-wide-plank-wood-floors-need-extra-glue-on-the-joists), reinforce that proper moisture management is essential for durability.
What your DIY skills might overlook is the importance of addressing substrate imperfections beyond just surface leveling. Small dips, bumps, or cracks can create stress points, leading to tile cracking or hardwood gaps later. An advanced mistake is to assume that filling minor imperfections with leveling compounds suffices; sometimes, these irregularities hint at deeper issues like uneven joists or foundational shifts. For thoroughness, inspect your framing and subfloor structure—ignoring these factors can result in a shifting, uneven surface down the line.
In my experience, the real secret to flawless flooring is integrating precise measurement tools with a deep understanding of building physics. For example, applying the [trowel-notch technique](https://tiletrendshop.com/the-trowel-notch-secret-for-stronger-floor-tile-bonds) for tile installation or ensuring the subfloor’s flatness within a fraction of an inch makes all the difference. Remember, rushing through these steps often leads to the very issues we aim to avoid.
Finally, challenge the notion that visual inspection alone suffices. Use a long straightedge or a laser level to detect hidden deviations. These nuances are often invisible to the eye but critical to a perfect finish. For more advanced tips on this, explore this [step-by-step leveling guide](https://tiletrendshop.com/how-to-achieve-flawless-floor-leveling-before-tile-laying) that I co-created with industry experts.
Have you ever fallen into this trap? Let me know in the comments. Understanding these deeper nuances can elevate your flooring projects from average to professional quality—because good enough isn’t enough when it comes to your home’s foundation.When it comes to keeping your flooring looking pristine and functioning smoothly, having the right tools is crucial. Personally, I swear by a high-quality vibration dampening subfloor tester, like the Tramex Moisture Meter, to regularly monitor moisture levels that can cause warping or buckling, especially in hardwood and tile installations. This tool helps me catch potential issues early, saving me from costly repairs down the line. Additionally, I rely on a precision laser level, such as the Bosch GLL 3-80, to ensure ongoing subfloor flatness, which is vital for long-term durability of flooring.
For ongoing maintenance, I recommend investing in a good-quality floor roller—specifically, a silicone roller with adjustable pressure. It’s fantastic for re-pressing tiles or vinyl planks that might lightly shift over time, ensuring a tight lock and preventing loose spots. I use mine monthly on high-traffic sections to keep everything snug.
On the software side, I utilize FloorIQ, a flooring management app that tracks installation dates, maintenance schedules, and equipment calibration intervals. Keeping detailed records allows me to schedule timely inspections and reapplications of sealers or adhesives, prolonging the life of my floors.
Looking ahead, the trend in flooring maintenance points towards smart sensors embedded into subfloors that communicate moisture levels and structural integrity directly to your smartphone. While still in emerging stages, these innovations promise to make long-term care more proactive and less labor-intensive.
How do I keep my flooring in top shape over time? Regular inspections with moisture meters, routine cleaning using gentle, floor-specific products, and scheduled re-sealing are key. For instance, checking and reapplying sealers on hardwood floors with a microfiber applicator every couple of years can maintain their shine and protect against spills. Expert tips like these make a difference—see how a simple re-sealing step can extend your floor’s life.
If you haven’t already, try calibrating your moisture meter using an oven-dried sample of your flooring material. This small step improves accuracy and gives you confidence in your inspections. Remember, consistent maintenance is the backbone of lasting floors. For more detailed advice, I recommend reviewing this guide on mastering floor maintenance: https://tiletrendshop.com/mastering-floor-leveling-pro-secrets-for-perfect-installations.
Discovering Hidden Pitfalls That Changed My Approach
One of the most impactful lessons I learned about floor leveling and installation is that perfection starts beneath the surface. Early mistakes, like neglecting to thoroughly inspect the subfloor’s integrity, led to long-term issues like uneven floors and peeling tiles. These setbacks taught me that patience and meticulous prep are non-negotiable—it’s all about creating a rock-solid foundation for your flooring projects.
My Favorite Tools and Resources for Seamless Results
Over the years, I’ve relied on essential tools like a high-quality laser level for accurate measurements and a trusted moisture meter to prevent subsurface issues. When it comes to learning and reference, this guide on floor leveling challenges and pro secrets for perfect installations have been game changers. These resources helped me understand nuances I hadn’t appreciated before, ensuring my projects stand the test of time.
Embracing the Challenge and Seeing Your Floor as a Canvas
The journey of flooring installation is more than just technical work—it’s about transforming your space with confidence. Don’t shy away from the complexities; view each obstacle as an opportunity to learn. With the right mindset, tools, and a bit of patience, you’ll turn your floors into a beautiful, durable testament to your efforts. Remember, every successful project begins with a commitment to doing it right from the ground up.
Have you ever struggled with subfloor unevenness or mastering a tricky installation step? Share your experiences below—your insights might help someone else elevate their flooring game!
**