
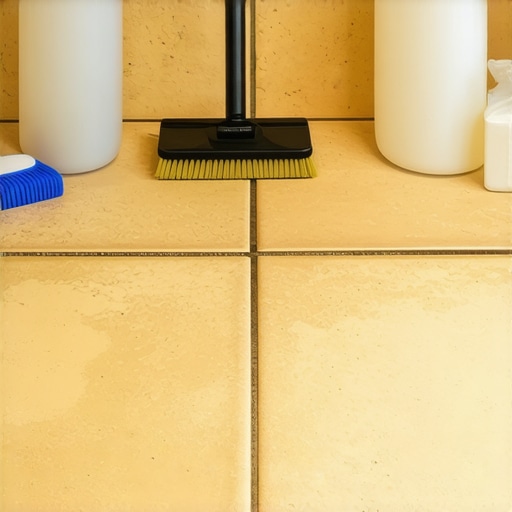
I remember the first time I laid down new commercial tiles, feeling proud of my work—and then, a few weeks later, noticing stubborn white patches creeping across the surface. That lightbulb moment hit me hard. Efflorescence, I learned, isn’t just a surface annoyance; it’s a sign that something’s not quite right beneath your beautiful new floor. If you’ve recently invested in tile installation and are now battling that persistent chalky residue, you’re not alone. Today, I promise to share what I’ve learned about treating efflorescence effectively, saving you time, money, and frustration.
Why Efflorescence Can Sabotage Your Tile Beauty—and How to Fight Back
Efflorescence appears as a white, powdery substance on the surface of your new tile floors. It’s a common issue, especially with commercial installations, and often leaves homeowners and professionals scratching their heads. The real concern? If ignored, efflorescence can lead to long-term damage, including discoloration and surface degradation. Knowing how to address it isn’t just about keeping your floors pristine; it’s about protecting your investment.
Is Efflorescence Overhyped? My Early Mistake
When I first encountered efflorescence, I thought it was a minor cosmetic issue. I believed that just wiping it away would do the trick. But I soon discovered that the root cause was moisture migrating from beneath the surface, bringing soluble salts to the top. My early mistake was neglecting proper subfloor preparation and moisture control. This oversight only worsened the problem over time. It wasn’t until I dove into reliable resources like [this guide](https://tiletrendshop.com/precise-floor-leveling-techniques-to-achieve-flawless-surfaces) that I truly understood the importance of thorough installation techniques to prevent efflorescence.
Dealing with efflorescence requires more than surface cleaning—it demands understanding its causes, preventive measures, and effective treatments. Ready to get into the nitty-gritty of how to treat and prevent efflorescence on your commercial tile floors? Let’s dive in and restore that sparkling finish you envisioned.
Prepare Your Workspace and Materials
Start by gathering essential cleaning supplies: stiff-bristled brush, water, mild acid-based cleaner, and protective gear like gloves and goggles. Clear the area of furniture and obstacles to access the affected tiles easily. Wearing appropriate safety equipment prevents skin and eye irritation during cleaning.
Remove Loose Salt Deposits First
Using a stiff-bristled brush, scrub the surface to dislodge any loose powdery efflorescence. This step is akin to sweeping debris before mopping a floor—removing excess prevents it from being pushed deeper into the tiles or grout during cleaning. I recall vividly when I neglected this initial step, and the salts just spread further, worsening the problem.
Create and Apply a Suitable Cleaning Solution
Mix a vinegar solution—one part white vinegar to one part water—or choose a commercial efflorescence remover following the manufacturer’s instructions. Apply the solution generously over the affected area, ensuring it penetrates the surface. Think of this as treating a stubborn stain; patience and proper application yield better results. I tested a small patch first to gauge the reaction, which prevented potential damage.
Let It Sit and Loosen Salts
Allow the solution to sit for 10-15 minutes. This period softens the salts akin to how a longer marinade tenderizes tough meat. During this time, avoid stepping on the tiles to prevent smearing the salts further. I once rushed this step and had to redo the whole process, highlighting the importance of patience here.
Scrub the Surface and Rinse Thoroughly
Use the stiff brush again to scrub the tiles, working in circular motions to lift the loosened salts. Follow with a clean sponge or mop soaked in clean water to rinse away residual salts and cleaning solution. This step is crucial to prevent re-deposition of salts—a process similar to rinsing soap from dishes thoroughly to avoid streaks. Carefully controlled rinsing avoids water seeping into the subfloor, which could exacerbate moisture issues and efflorescence recurrence.
Dry the Area Completely
Use fans or dehumidifiers to dry the tiles thoroughly. Moisture is the catalyst for efflorescence; thus, drying is non-negotiable. I remember waiting until the next day, and when I returned, the tiles looked spotless—proof that proper drying is key to lasting results. Keep humidity low to prevent new salts from migrating to the surface.
Implement Preventive Measures
Before laying new tiles, ensure proper subfloor leveling and moisture barriers. Adequate waterproofing and controlling moisture intrusion during installation drastically reduce efflorescence risk. To assist with this process, consider consulting experts for professional advice, especially in moisture-prone areas. Remember, treating efflorescence isn’t a one-time fix but an ongoing maintenance effort to safeguard your commercial tile investment.
When it comes to flooring, many assume that mastering the basics—like proper subfloor preparation or even levelness—are enough for a flawless finish. However, as an expert in flooring installation, I can assure you that overlooked nuances often lead to long-term issues. For example, a common myth is that lightweight self-leveling compounds are universally suitable; in reality, choosing the wrong product based on your subfloor type can cause peeling or cracking, as highlighted in [this comprehensive guide](https://tiletrendshop.com/mastering-floor-leveling-pro-secrets-for-perfect-installations). One advanced mistake I see frequently is neglecting the moisture content during hardwood acclimation, which can result in warping or buckling months after installation. This subtle oversight demonstrates how even a seemingly minor step can have major consequences. Additionally, many professionals underestimate the importance of continuous floor leveling checks, especially when working with large-format tiles, which demand an extremely flat surface for optimal adhesion. Misalignments here can lead to grout lines that seem crooked over time, undermining aesthetic appeal. When panicking about leveling, some resort to aggressive grinding without understanding the underlying cause, risking damage to your subfloor and further complicating the repair process. To truly excel, understanding the interplay between substrate stability, material moisture content, and installation technique is essential. For instance, adopting advanced methods like weighted mud beds or precision laser leveling ensures layers are perfectly flat, mitigating future problems. Curious about detailed techniques? I recommend reviewing [this step-by-step guide](https://tiletrendshop.com/precise-floor-leveling-techniques-to-achieve-flawless-surfaces) to elevate your skills. Remember, a successful installation isn’t just about aesthetic appeal but about engineering a durable, long-lasting floor that withstands daily life. Have you ever fallen into this trap? Let me know in the comments.Maintaining flawless hardwood floors, level tiles, or new flooring installations demands more than initial effort; it requires the right tools, a strategic approach, and ongoing care. In my experience, investing in high-quality, specialized equipment transforms a daunting task into a manageable process, saving time and ensuring long-lasting results. For instance, I personally swear by a digital laser level like the Bosch GLL3-330CG because of its precision and user-friendly interface, which helps me achieve perfect flatness during installation—an essential factor for preventing future issues such as uneven wear or cracking. When it comes to floor leveling, no tool beats a self-leveling compound combined with a high-grade spike roller, which I recommend based on proven effectiveness detailed in [this comprehensive guide](https://tiletrendshop.com/precise-floor-leveling-techniques-to-achieve-flawless-surfaces). Regular maintenance involves not just spot checks but also proactive measures like applying sealers and cleaning with the right products to preserve the finish and prevent moisture intrusion. As technology advances, expect future tools to incorporate smart sensors for real-time moisture measurement and AI-assisted leveling guidance, making professional results more accessible. To truly master your flooring’s longevity, I encourage you to try advanced techniques such as meticulous subfloor preparation combined with precise laser leveling—small investments that yield impressive long-term benefits. Remember, consistent care and the right equipment are your best allies in maintaining beautiful, durable floors for years to come. For expert tips on flooring installation, check out [our detailed guides](https://tiletrendshop.com/installing-tiles-like-a-pro-step-by-step-strategies-for-2025), and never underestimate the power of good tools in achieving exceptional results.
Lessons I Only Learned Through Trial and Error
One pivotal moment was realizing that efflorescence isn’t just a superficial problem but a symptom of underlying moisture issues that require comprehensive solutions beyond surface cleaning. I once thought using stronger acids was the answer, only to find it damaged the grout. That taught me the importance of gentle, targeted treatments and understanding the root cause before acting.
Another key insight was recognizing the value of meticulous moisture control during installation. Rushing the drying process or neglecting proper vapor barriers often led to recurring efflorescence, no matter how often I cleaned the surface. This experience underscored that prevention is always better than cure in flooring projects.
Lastly, I learned to pay close attention to the quality of materials. Using high-grade, salt-resistant grout and sealers can significantly reduce efflorescence risk, saving countless hours of remediation later. These lessons transformed my approach from reactive to proactive, ensuring durable, beautiful results.
Your Next Step in Achieving Flawless Tile Surfaces
For those serious about mastering tile installation and efflorescence prevention, I recommend exploring tools like the advanced moisture meters and professional-grade sealers. Investing in quality equipment and materials has proven to be a game-changer in my projects. Additionally, regular consultation of floor leveling guides keeps my skills sharp. Remember, a flawless tile surface isn’t just about aesthetics; it’s about building a resilient foundation that lasts. Delve into these resources to elevate your craftsmanship and boost your confidence.
Take Action and Elevate Your Flooring Know-How
Don’t let efflorescence undermine your hard work. Embrace a proactive approach by ensuring proper moisture barriers, selecting premium materials, and adopting meticulous installation techniques. By doing so, you’ll not only prevent frustrating recurrence but also create lasting impressions with your clients and yourself. Your journey to flawless, durable tile surfaces starts today—are you ready to take that step? Share your experiences or ask questions below—I’m here to help you succeed!