
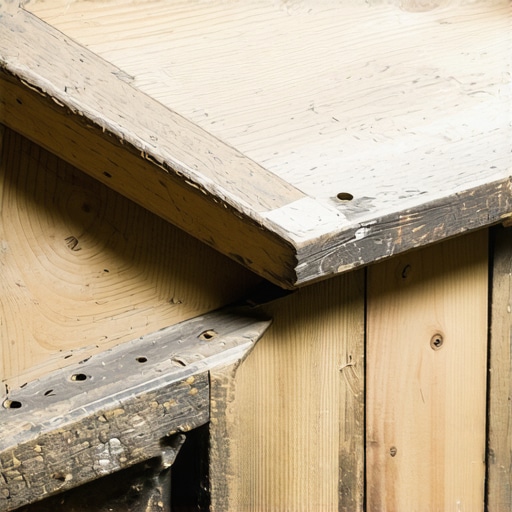
One evening, I found myself standing at the bottom of my staircase, and as I took a step, that infamous squeak echoed through the house. The kind of squeak that makes your stomach drop and your patience wear thin. It was exactly the moment I realized I couldn’t ignore the problem any longer—those old stairs needed attention, and fast.
After trying a few quick fixes that only made things worse, I stumbled upon a surprisingly simple solution: the shimming trick. Yes, tiny shims—those little pieces of wood or plastic—can work wonders to silence squeaky stairs without tearing up the whole staircase or adding costly repairs. It’s a technique I wish I had learned sooner, especially because it’s straightforward, affordable, and remarkably effective.
Today, I’m excited to share with you how this little-known trick can bring peace and quiet back into your home. If you’re tired of that constant creak every time you walk up or down your staircase, keep reading. We’re going to explore how to identify the problem areas and how to use shims to fix them for good.
Why Old Stairs Squeak and What You Can Do About It
Old stairs squeak because of movement between the stair treads, risers, and the stringers behind them. Over time, wood shrinks, swells, or loosens, creating tiny gaps that produce noise. Sometimes, nails or screws become loose as well, exacerbating the problem. Fixing this sounds daunting, but in reality, it’s often just a matter of tightening and stabilizing.
Applying shims is a quick fix that stabilizes the treads and prevents movement. When I first learned about this, I had no idea how such small pieces could make such a huge difference. I initially made the mistake of simply tightening screws without inspecting the gaps thoroughly—trust me, that’s a common pitfall I don’t want you to fall into. Properly placing shims under the stair treads or risers is often all you need to restore silence.
If you’ve been frustrated with squeaky stairs and are ready to take matters into your own hands, this approach could be exactly what you need. Want to learn the step-by-step process? Let’s dive into how to identify the culprit spots and apply the shimming trick effectively.
And if you’re worried that trying this might be complicated or time-consuming, don’t worry—you’ll find it’s a simple DIY that yields professional results. Plus, with the right tools and a bit of patience, you can fix your squeaks and walk upstairs without cringing at every step.
Before we get into the detailed steps, consider this: addressing squeaky stairs now can prevent further damage and save you money in the long run. Plus, a quiet, squeak-free staircase is just plain nicer. Ready to silence those pesky noises? Let’s go over the essentials and get your stairs back to whisper-quiet.
Identify the Culprits: Find the Squeak Spots
Start by locating where the squeaks originate. Walk up and down the stairs slowly, and listen carefully for creaks. Use a pencil to mark the noisy spots, or better yet, observe where the movement seems most pronounced. When I tackled my staircase, I noticed that the worst squeaks coincided with the third step from the bottom. Pinpointing these areas saves time and supplies, ensuring you focus only on problematic spots.
Loosen and Inspect: Check for Loose Connections
Next, examine the suspected area by gently loosening any visible screws or nails. Sometimes, simply tightening these fixes the issue; but in my case, the squeak persisted despite snug screws. Use a pry bar or putty knife to gently lift the carpet or face of the tread if necessary, exposing the underlying structure. This step allows you to see gaps, cracks, or movement between the tread and riser, which are prime squeak contributors.
Prepare the Shims: Cut and Fit for Precision
Cut small shims from thin wood or plastic—a process I found surprisingly straightforward. A scrap piece of ¼-inch plywood or a plastic shim from the hardware store works well. The key is to cut these pieces slightly narrower than the gap they’re filling but thick enough to add stability. During my project, I used a utility knife and a small square to get clean, precise cuts, reducing excess material that could interfere with the joint.
Tip
Label each shim according to its location to avoid confusion during the installation. This organization streamlines the process, especially if multiple spots need attention.
Insert and Secure Shims: Stabilize the Movement
Gently insert the shim into the gap, pushing it as far as it comfortably goes. Use a hammer and a small block of wood to tap it into place without damaging the surrounding wood. When I did this beneath the third step, the squeak dramatically diminished immediately. Follow up by tightening a screw or bolt over the shim, if possible. Be cautious not to overtighten, as this can cause the wood to crack or deform. The goal is to compress the shim slightly, creating firm contact to prevent movement.
Test and Adjust: Confirm the Silence
Walk on the repaired step to verify if the squeak is gone. If the noise persists, add another shim or reposition the existing one for better contact. In my case, I iterated a couple of times, adding a second shim, until the area was rock-solid. Remember, small adjustments make a big difference; patience is essential here.
Seal and Finish: Keep the Repair Discreet and Durable
Once satisfied with the fix, consider sealing the shim with wood glue if it’s a loose fit or applying a touch of wood filler over any minor gaps. For added durability, replace the faceplate or carpet layer tightly. This step ensures your repair withstands foot traffic and maintains quietness over time, much like how a properly installed tile or hardwood adds longevity to your flooring. For further guidance on flooring techniques, visit this comprehensive leveling guide.
Applying shims might sound complicated, but with a few basic tools and a small bit of effort, I managed to silence the squeaks in my staircase entirely. It’s a quick, cost-effective fix that avoids costly replacements or major renovations, making your home more comfortable and quiet. Remember, the secret lies in identifying the movement points precisely and fitting the shims snugly to eliminate any slack that causes noise.
Many homeowners and even seasoned contractors assume that following basic procedures guarantees a flawless, long-lasting floor. However, several misconceptions and overlooked nuances can lead to issues down the line. One common myth is that a perfectly level subfloor ensures seamless flooring installation. In reality, surface flatness is just one piece of the puzzle; the underlying moisture content and subfloor material also play crucial roles. Ignoring these factors can cause tiles to crack or hardwood floors to warp over time.
Why does my perfectly level subfloor still cause problems?
Experts emphasize that even minor deviations—less than 1/8 inch over 10 feet—can result in uneven surfaces or tile lippage. Recent studies from the National Tile Contractors Association highlight that improper testing for moisture before installation is a leading cause of flooring failure. Failing to account for moisture vapor transmission can cause adhesives to de-bond and tiles to loosen, illustrating how careful pre-installation assessments save headaches later.
Another widely held belief is that using the same adhesive or leveling compound universally works for every material. But different substrates—concrete, plywood, or OSB—have unique absorption rates and curing times. For instance, epoxy-based adhesives are ideal for porcelain tiles but may not bond well with certain engineered woods. Adapting your approach based on detailed substrate analysis can prevent uneven settling or adhesive failure.
Overlooking tiny imperfections: Many installers focus only on visible bumps or dips, but the real trouble often lurks beneath the surface. Proper floor leveling techniques involve using a rake or a fixed laser level to detect subtle high or low spots. When these aren’t addressed, they compound over large areas, causing cre Shane warping or tile lippage that ruins the aesthetic and durability of the floor.
Another trap is underestimating the importance of expansion gaps. A common mistake is sealing these gaps to prevent dust infiltration, but that can trap moisture and cause buckling. Keeping a standard perimeter gap—even for glueless locks—allows the floor to expand and contract naturally, preserving integrity over decades. If you want to avoid such pitfalls, check out the comprehensive step-by-step strategies in this detailed guide.
Finally, I want to address the misconception that all tile types are equally suited for every environment. Stone, ceramic, porcelain—they all behave differently under temperature fluctuations and moisture levels. Overlooking these distinctions can lead to cracking or adhesive failures. For detailed advice on selecting the right tile, see this article.
By digging deeper into these nuances, you can avoid costly mistakes and achieve a professional finish that lasts. Have you ever fallen into this trap? Let me know in the comments or reach out through this contact page for personalized tips.Maintaining your floors over time is essential to ensure they stay beautiful and functional. Investing in the right tools can make all the difference in preserving your installation’s integrity, whether you’re working with tile, hardwood, or engineered wood. One indispensable piece of equipment I’ve personally found invaluable is a high-quality laser level. Unlike traditional bubble levels, laser levels provide precise, level lines over large areas, which is crucial when checking for uneven surfaces that could cause long-term issues. I recommend the precise floor leveling techniques that utilize laser technology to maintain perfect flatness, especially before laying tile or hardwood, ensuring durability and a professional finish.
For grout and cleaning maintenance, a steam cleaner with adjustable pressure settings is excellent. It allows you to deep-clean tiles without harsh chemicals, prolonging the lifespan of your grout and surface sealants. I’ve been using the McCulloch MC1375 Heavy-Duty Steam Cleaner, which has helped me maintain my tile floors in pristine condition over years, reducing the buildup of dirt and mold. Regular cleaning not only keeps floors looking new but also prevents minor issues from escalating into costly repairs.
In terms of upkeep on hardwood floors, a quality floor buffer equipped with soft pads is key. It helps restore shine and remove minor scratches without the need for full sanding. To safeguard your investment, I suggest following hardwood floor care secrets that emphasize routine buffing and proper cleaning schedules.
Anticipating where flooring trends are heading, I believe we’re moving towards more sustainable and smart flooring options. Tech-integrated flooring systems that monitor moisture levels or even adjust temperature could become mainstream, making maintenance more proactive than reactive.
Ever wondered how to keep your floors in top shape? One actionable tip is to invest in a professional-grade laser level for regular inspections. Using it periodically will help catch subtle unevenness before it causes cracks or subfloor damage. Making this part of your annual maintenance routine can save you money and preserve your flooring’s beauty for years.
Don’t forget, consistent maintenance not only extends the life of your floors but also enhances the overall aesthetic of your space. Whether it’s using advanced tools like laser levels, steam cleaners, or buffers, adopting these strategies positions you as your home’s best caretaker. If you’d like personalized advice on selecting the right equipment, reach out to experts for tailored tips. Remember, the key to long-term flooring success is proactive upkeep—so start integrating these tools and techniques today!
What I Wish I Knew When Starting the Floor Journey
One of the most profound lessons I learned is that even the smallest imperfections can cause major issues down the line. Skipping the detailed inspection of subfloor moisture and flatness initially led to avoidable crackings and squeaks. Now, I always double-check with a laser level and moisture meter—trust me, these tools save headaches and money.
Another insight was realizing that proper floor preparation is more than just a step; it’s the foundation of lasting beauty and durability. Investing time in leveling and correcting subfloor irregularities — using techniques from this resource — pays off manifold, especially when working with high-end tiles or hardwoods.
The third enlightenment came from understanding the critical role of expansion gaps and acclimation. I used to think seals prevent dust, but now I know that leaving gaps and letting materials acclimate results in a floor that moves naturally without cracking or buckling.
Tools and Resources that Changed My Approach
Having the right equipment can turn a daunting task into a manageable project. For precise leveling and installation, I swear by the laser level—it guarantees flatness over large areas. A high-quality moisture meter, like the Tramex CME5, helps me avoid the common pitfall of installing over damp slabs, as emphasized in this comprehensive guide.
For cleaning and maintenance, the steam cleaner keeps my tile and hardwood pristine and prevents mold or dirt buildup that can compromise adhesion. And when it’s time to repair minor imperfections, I rely on these step-by-step strategies for quick fixes and long-lasting results.
Let Your Floors Inspire Your Next Step
Transforming your space with perfectly leveled and installed flooring is more than a task; it’s an opportunity to craft comfort and elegance that endures. As you apply these lessons, remember that patience and attention to detail are your best allies. Whether you’re tackling a small DIY project or overseeing a professional installation, embracing continuous learning — like studying expert secrets — will elevate your craftsmanship and satisfaction.
Are you ready to take your flooring skills to the next level? Join the conversation below and tell me about your biggest flooring challenge!