
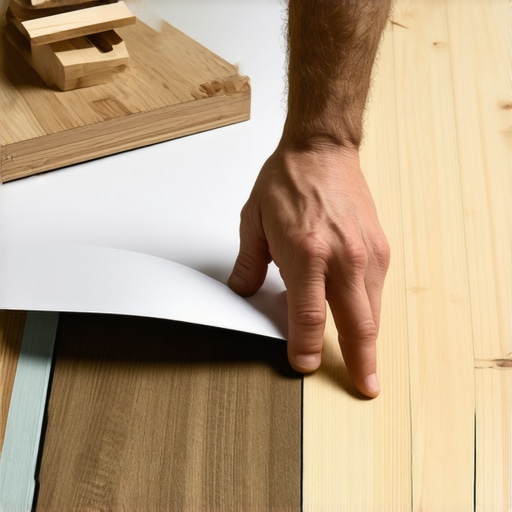
I vividly remember sweating over my first vinyl flooring installation, only to realize I couldn’t quite finish that last row without a butchered cut or unsightly gap. That frustrating moment hit me hard—you’re so close, yet that stubborn final row seems like an insurmountable challenge. Sound familiar? If you’ve ever been there, battling with awkward angles or uneven cuts, then you know the common struggle of achieving a seamless finish. But what if I told you there’s a simple, surprisingly effective hack that turned my entire flooring game around?
Why the Last Row Often Feels Impossible
Swearing Off Vinyl? Nope, Just Beating the Odds
Many DIYers and even seasoned pros hit a snag when trying to snap the final row of vinyl in place. The problem? As you get to the end, space becomes tight, and maneuvering that last strip can turn into a frustrating puzzle. Not to mention the risk of damaging already installed planks or creating uneven gaps that ruin the whole look.
In my early days, I made the mistake of forcing those tricky pieces into place with brute force, which only led to cracked tiles or crooked seams. I learned the hard way that patience and precision are key—and that a little psychological trick using scrap wood can save time and hassle. According to flooring experts, using scrap wood to aid in snapping stubborn vinyl rows is not just a tip; it’s almost an art form that ensures a clean, perfect finish without additional cuts or damage. For more insights on flooring fundamentals, check out this comprehensive guide.
So, if you’ve faced the frustration of trying to jam that last vinyl strip into place, stay with me. I’ll walk you through a tried-and-true method that’s as neighborly as it is effective. We’re going to turn that daunting project into a satisfying success, all with a simple scrap wood trick that I wish I had discovered earlier.
Now, let’s get ready to make that final row your proudest achievement with a method rooted in real experience and practical wisdom.
Prep the Area and Gather Your Materials
Before tackling the last row, clear the workspace and ensure you have your vinyl planks, a straight edge, utility knife, pry bar, measuring tape, and scrap wood pieces. Having everything within reach prevents interruptions and mistakes during installation.
Measure and Mark for a Precise Fit
Use your measuring tape to determine the exact length needed for the final row. Mark the plank with pencil, accounting for the expansion gap required by your flooring type. This step is crucial to avoid forcing a plank that is too long or too short, which can cause gaps or buckling. I once thought I could eyeball the cut, but an inaccurate measure led to uneven seams — now I always double-check!
Make the Cut with Confidence
Score along your mark with a utility knife and snap the plank, or use a saw for a cleaner edge. Remember, precision here saves time during fitting. For tricky cuts around uneven walls or irregular spaces, a jigsaw provides better control. I once tried to cut with scissors — needless to say, the result was jagged, and I ended up redoing the cut, wasting time and material.
Position the Plank and Use Scrap Wood Leverage
Place the cut plank close to its final position. To snap it into place, align it against the previously installed planks. Now, here’s the hack that saved me countless headaches: take a scrap piece of wood, about 2×4 inches, and position it behind the plank. Gently tap the scrap with a hammer to help the plank click into place without exerting excessive force on the vinyl, preventing damage. I vividly recall a time I forced the final plank, which cracked. Using scrap wood and a light tap saved my project from becoming useless.
Secure the Final Row Carefully
Once the plank snaps into place, press down firmly along its length to ensure full engagement of the locking mechanism. Use the pry bar with a padded end to gently coax tight spots, especially around irregular spaces. This approach prevents gaps and uneven joints, resulting in a seamless finish.
Final Check for Level and Gaps
After placement, check the entire row with a straightedge or level. Small unevenness can often be corrected with minor tapping or by inserting shims behind the planks. I recommend doing the check before fully sealing the edges, so adjustments are easier.
Applying this scrap wood hack consistently transformed my approach to vinyl flooring. No more stubborn final rows, no more cracked planks—just a smooth, professional look. For more detailed tips on flooring fundamentals and avoiding common pitfalls, visit flooring installation fundamentals.
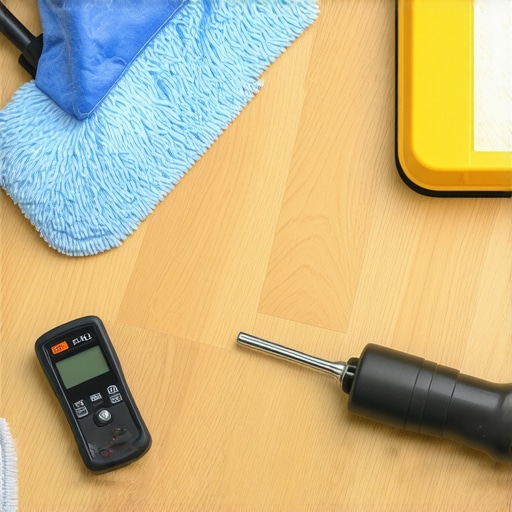
Many homeowners and DIY enthusiasts believe that achieving a perfectly level subfloor is as simple as pouring a quick self-leveling compound and smoothing it out. However, this common misconception overlooks the intricate nuances that can make or break your flooring project. In reality, the devil is in the details, and understanding these can save you time, money, and costly mistakes. For instance, many assume that all subfloors behave the same, but materials like plywood, concrete, or OSB each have unique properties that influence how they should be prepared (learn more about leveling challenges). A prevalent myth is that a perfectly flat surface guarantees a flawless finish. While crucial, it’s equally important to address high spots, low spots, and moisture issues beforehand. Overlooking these aspects can result in uneven tiles, squeaks, or even future cracks. Advanced installers employ tools like laser levels or the mirror test to detect subtle imperfections that are invisible to the naked eye—trust me, a simple bubble level isn’t enough for meticulous work (see the mirror test technique). What many overlook is the importance of a consistent trowel angle and proper substrate preparation to ensure adhesive bonds that last. One common mistake is underestimating the impact of moisture migration from concrete slabs, which can cause tiles to pop or grout to deteriorate prematurely. Experts recommend moisture testing and, if needed, using waterproof membranes or decoupling layers before installation. Interested in mastering these advanced techniques? Visit their comprehensive guide for expert leveling tips. Ultimately, good flooring installation hinges on your ability to see beyond surface-level fixes and address micro-issues that only seasoned pros notice. So, next time you plan your project, ask yourself: Am I truly understanding the nuances that can elevate a good job to a perfect one? Partner with the right knowledge, tools, and techniques, and your floors will not only look stunning but stand the test of time. Remember, mistakes in leveling are often invisible until they develop into bigger problems down the line. Have you ever fallen into this trap? Let me know in the comments.Maintaining your flooring over time is crucial to preserving its beauty and functionality. One of the most effective ways to ensure longevity is investing in high-quality, specialized tools. For instance, a flooring puller sets the perfect tension to lift and reposition planks without damage, while a digital moisture meter helps you detect hidden moisture issues that could compromise your installation. Regular inspections using these tools can save you from costly repairs later on.
To keep hardwood floors shining, I recommend using a microfiber mop combined with a pH-neutral cleaner. This duo gently lifts dirt without scratching the surface or dulling the finish, extending the interval between deep cleanings. Additionally, applying a commercial-grade floor polish once or twice a year can restore gloss and fill micro-scratches, rejuvenating the wood’s appearance. When dealing with tiles, a grout sealer application preserves color and prevents staining, making maintenance easier over the long term.
What tools are you using to keep your floors in prime condition?
In my experience, upgrading to a pneumatic buffer equipped with a soft pad for delicate surfaces has made a huge difference. This machine buffs out minor scratches and restores luster without removing layers of finish. For tile installers, a high-precision wet saw with a diamond blade provides cleaner cuts and minimizes chipping, saving both time and material. Remember, investing in the right tools isn’t just about making the job easier—it’s about achieving professional results that last.
Looking ahead, the future of flooring maintenance is leaning toward automation and smart technology. IoT-connected sensors can monitor environmental conditions like humidity and temperature, alerting you before issues develop. For example, integrating a moisture sensor system beneath your subfloor can prevent costly warping or mold growth, aligning with innovations discussed in modern home automation literature. Stay tuned for these advancements to keep your floors pristine without constant manual effort.
How do I maintain my flooring over time?
Establishing a regular maintenance routine tailored to your flooring type is key. For hardwood, cleaning spills immediately, avoiding excess water, and refinishing every few years are essential practices. Tile floors benefit from periodic grout sealing and careful cleaning with non-abrasive tools. Moreover, inspecting for loose tiles or creaking boards early can prevent catastrophic damage. Remember, prevention is always better than repair. To streamline your upkeep, consider scheduling quarterly inspections and deep cleanings, leveraging tools like microfiber mops and moisture meters to catch issues early. For detailed guidance, check out this comprehensive maintenance guide.
Lessons that Changed My View on Flooring
- Never assume the subfloor is perfect—small imperfections can turn into big headaches later. Use a laser level early to detect micro-level issues and save effort down the line. I wish I had learned this sooner!
- The real magic isn’t just in the tools but in the patience and precision during measurements and cuts. Rushing often leads to mismatched seams and uneven surfaces, which no DIY hack can fix after the fact.
- Understanding moisture levels in concrete slabs might seem trivial but is a game-changer. Ignoring this step can result in tiles lifting or cracking prematurely. Testing with a moisture meter is a small investment that pays off.
- Using quality materials and proper techniques for leveling compounds is essential. Skimping here might seem tempting but can cause the entire floor to deteriorate over time. Partners who prioritize the right products tend to achieve lasting results.
- Finally, embracing continuous learning through expert resources accelerates growth. I often revisit guides and tutorials, like those on common leveling challenges, to refine my craft.