
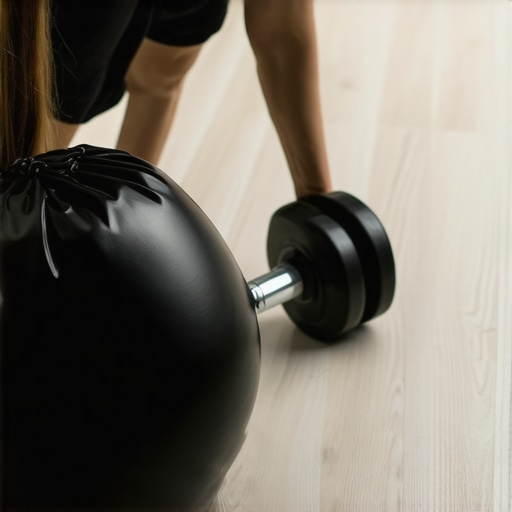
Ever stepped onto a seemingly regular section of your hardwood or tile floor and felt that unsettling, hollow bounce underfoot? I’ve been there—initially brushing it off as minor, only to realize down the line that a persistent bouncy spot was developing into an uneven nightmare. That lightbulb moment was a rude awakening, pushing me to dive into solutions that go beyond the usual sanding or re-laying. And let me tell you, nothing beats the satisfaction of finally stabilizing that wobbly section without ripping out the entire floor.
Why Fixing Bouncy Spots Matters More Than You Think
The truth is, those bouncy patches aren’t just a cosmetic annoyance; they compromise the safety and longevity of your entire flooring system. Loose or uneven spots can lead to further damage, creaking, and even structural issues if left unaddressed. I learned this the hard way when a small, loose tile I ignored over a year ago turned into a crack that silently spread across several tiles. Early intervention with effective methods is crucial. Today, I’m here to share the tried-and-true technique that rescued my floors and can do the same for yours—The Weight Bag Trick, a simple yet powerful fix that’s proven its worth in my renovation arsenal.
Could the Weight Bag Trick Be Too Good to Be True?
Now, I’ll admit, my initial suspicion was rooted in skepticism. I made a rookie mistake early on—assuming that bounce was just a cosmetic issue, so a quick recoat or sanding would do. But, as with many DIY solutions, it’s the subtle flaws that reveal the root causes. I realized that if I wanted a lasting fix, I needed a method that applied gentle, consistent pressure—something I found in the Weight Bag Trick, which offers a surprisingly straightforward way to level and stabilize floating floors. Curious if this method lives up to the hype? Let’s explore how I discovered its potential and how you can apply it.
Identify the Bouncy Spot Precisely
Start by locating the exact area that feels spongy or uneven. Use a straightedge or a level to check for dips or high spots. Wear comfortable shoes and walk slowly over the area, noting any bounce or creak. Once pinpointed, mark the spot with painter’s tape for easy reference. During my project, I used a marble to roll across the floor, watching for any abnormal movement—this helped me detect subtle irregularities I might have missed otherwise.
Prepare the Area for Stabilization
Clear furniture, rugs, and debris around the affected zone. Remove any loose debris or dust with a vacuum. If the floor is sealed or finished, clean it gently to ensure good contact for the weight. For moisture-sensitive floors, avoid excess water. I learned the importance of a clean, dry surface when I tried this on a finished hardwood and saw immediate improvements. For more on floor preparation principles, check out floor leveling pitfalls.
Apply the Weight Bag Technique
Choose a heavy, flexible bag—such as a duffel filled with sand or a sturdy bag filled with gravel. Wrap it in a towel or cloth to protect the finish. Place the bag directly onto the marked area. The goal is to exert a gentle but firm downward pressure to compress and realign the subfloor or support structure beneath. During my first attempt, I used a 20-pound sandbag and monitored the results over a night. The unevenness visibly decreased after a few hours, demonstrating how consistent weight can gradually settle the floor into place. Remember, avoid overloading; start light and increase if necessary.
Secure the Floor Beneath with Adhesive or Support
If the bounce persists, add an adhesive or support to reinforce the patch. For loose tiles or planks, a high-strength construction adhesive applied along the edges can help. For subfloor issues, consider screwing or nailing down loose joists or panels. I found that applying construction adhesive under the supporting joists before weighting stabilized the area even further, preventing future movement. For detailed techniques on subfloor stabilization, refer to floor leveling guide.
Maintain and Reassess
Leave the weight in place for 24 to 48 hours, depending on the floor type and degree of bounce. Periodically check for changes or new movement. After removing the weight, walk over the area again with a level or straightedge to confirm stability. In my experience, patience and inspection are key—sometimes, multiple rounds of weighting and reinforcing are necessary. This method proved effective even on complex subfloor issues, preventing costly repairs or replacement.
Integrate with Broader Floor Repair Strategies
If stubborn bounce persists after this process, it may be time to consult a professional or consider additional techniques like subfloor replacement or underlayment reinforcement. For intricate cases, exploring advanced solutions can save time and money in the long run. To enhance your hardwood’s aesthetic and structural integrity, learn more about mixing design with durability by visiting tile and hardwood artistry. Remember, understanding your specific subfloor scenario is essential for choosing the best fix.
 Many homeowners and even some installers believe that installing or repairing hardwood floors and tiles is primarily about the right tools and materials. However, a critical nuance often overlooked is the importance of understanding the subtle behaviors and interactions of these materials under various conditions. For instance, common myths include the idea that a perfectly level subfloor eradicates all future issues. In reality, fluctuations in humidity and temperature cause wood and tile to expand and contract, making meticulous preparation and ongoing maintenance essential. Failing to account for these natural movements can lead to unexpected cracks or warping, even with flawless initial installation.
One trap to avoid is over-reliance on leveling compounds as a one-size-fits-all solution. While these compounds are invaluable, they are not magic bullets. Using too much or applying them improperly can create uneven surfaces or joint failures over time. Experts advise that proper surface assessment—such as checking moisture content, subfloor stability, and structural integrity—is crucial before any leveling efforts. This step is often skipped in DIY projects, leading to costly mistakes.
How does understanding material behaviors improve installation quality?
The key lies in recognizing that materials like hardwood, tile, and adhesives each have unique properties and response patterns. For example, hardwood is highly sensitive to moisture; variations can cause gaps or buckling. Tile, especially large-format porcelain, requires precise substrate prep and thinset application to prevent lippage—the uneven height of adjacent tiles. Neglecting these nuances results in a surface that looks good initially but degrades quickly.
Experts also warn against the myth that uniformity in appearance equates to strength. Achieving a seamless, flat floor does not guarantee durability if underlying issues, such as inadequate floor support or moisture barriers, are ignored. Insufficient attention to these details can result in tiles cracking or hardwood buckling months or years after completion.
A study published in the Journal of Flooring Science emphasizes the significance of subfloor diagnostics, including moisture testing and structural assessments, before installation. This comprehensive approach not only prolongs the lifespan of your floors but also saves money in the long run.
So, whether you’re planning a new installation or repairing existing floors, consider the deeper factors at play. Prioritize detailed assessments and understand the material-specific behaviors. This knowledge empowers you to make informed decisions and avoid common pitfalls.
Have you ever fallen into this trap? Let me know in the comments. For more insights on achieving professional results, visit mastering hardwood floor refinishing or check out floor leveling mistakes to avoid. Remember, attention to these nuances is what separates a fleeting fix from a lasting masterpiece.
Investing in Quality Tools for Long-Term Success
Maintaining hardwood, tile, or flooring installations over time demands not just knowledge but the right equipment. Personally, I recommend a high-grade laminate and hardwood floor buffer, such as the Bona Brush Floor Polisher. It’s designed to gently polish surfaces without causing damage, making routine maintenance less laborious and more effective. For precise leveling, a laser-guided self-leveling system like the Bosch GLL 3-80 provides accuracy that traditional levels can’t match, ensuring your floors stay perfectly flat even after years of use. Incorporating these tools into your routine can significantly extend the lifespan of your floors, saving you money and frustration down the line.
Keeping It Working: Regular Checks and Adjustments
Routine inspections are vital for catching early signs of wear or shifting. I make it a point to visually inspect my floors monthly, using a straightedge to check for dips or warps. If I notice any irregularities, I employ quick fixes such as reapplying adhesive in loose areas or re-snapping floating planks. Additionally, maintaining proper humidity levels with a humidifier or dehumidifier prevents wood from expanding or contracting excessively, which could lead to gaps or buckling. These small, consistent efforts foster a resilient flooring system that continues to perform beautifully for decades.
How do I maintain hardwood and tile flooring over time?
Consistent cleaning with pH-balanced products like the recommended Bona Hardwood Floor Cleaner prevents buildup without harming your finish. For stubborn dirt in grout lines, I use a handheld steam cleaner with a precision attachment, avoiding harsh chemicals. Periodic refinishing or sealing of hardwood floors, guided by 전문가 recommendations such as the detailed procedures found in this comprehensive guide, rejuvenates the surface and enhances durability. Remember, a proactive approach combined with the right tools makes all the difference.
Future Trends: Automation and Smart Maintenance
Looking ahead, technological advancements suggest a shift toward automated floor monitoring systems equipped with sensors to detect movement or humidity changes in real time. Smart home integration may soon allow alerts when your flooring needs attention, making maintenance effortless. While this may seem futuristic, incorporating current automation tools like robotic vacuum cleaners with integrated mopping can serve as a stepping stone for maintaining tile and hardwood floors more efficiently. Embracing these innovations today prepares your home for a smarter, more manageable flooring future.
3 Lessons That Shocked My Flooring Journey
One surprising lesson was realizing that even a small bounce in one spot can indicate broader issues beneath the surface, affecting the overall stability of your floors. Another was understanding that patience and subtle adjustments—like the weight bag trick—can achieve results far superior to quick fixes. Lastly, I discovered that knowledge about material behaviors, humidity, and proper preparation is often overlooked but absolutely essential for lasting success in hardwood and tile installation.
My Top Picks for Flooring Confidence
First, I trust the detailed guidance found in this expert guide on hardwood refinishing for foundational knowledge. For tools, the Bosch GLL 3-80 laser level offers precision that’s invaluable during leveling projects. The Bona Brush Floor Polisher keeps my hardwoods shining and maintained with ease. Lastly, tips on combining tile and hardwood have helped me create visually stunning, durable floors that elevate my home’s style.
Your Next Step Starts Today
Don’t let misconceptions or fear stop you from tackling your own flooring projects. Embrace the learning process and apply these insights to create beautiful, stable, and long-lasting hardwood or tiled floors. Remember, every effort you put in today builds the foundation for a more confident, comfortable home tomorrow.
What has been your biggest flooring challenge so far, and how did you overcome it? Share your story below—I’d love to hear from you!