
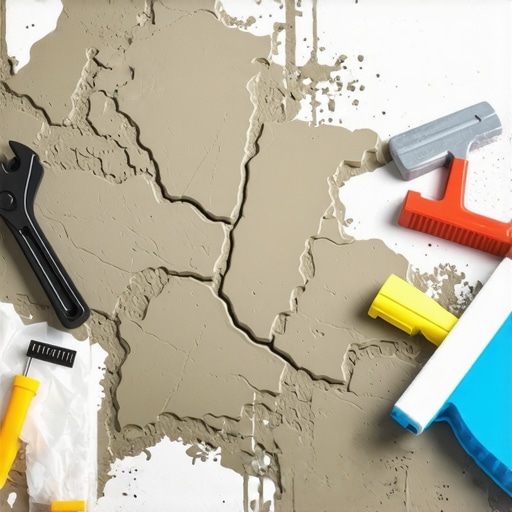
Ever stepped onto a freshly poured self-leveling compound only to be greeted by a bumpy, uneven surface? I remember the frustration from my first attempt—it looked more like a poorly cooked pancake than a smooth foundation. That lightbulb moment hit me hard: I had rushed the process, ignoring crucial preparation steps, and paid the price with a lumpy, unprofessional-looking floor.
Today, I’m here to share not just my mistakes, but the proven techniques that transformed my approach. If you’ve ever poured self-leveler only to end up with a bumpy surface, you’re not alone. It turns out, achieving a flawlessly level floor isn’t about luck—it’s about understanding the right methods, materials, and techniques. And guess what? With a bit of patience and knowledge, you can avoid those unsightly lumps and create a perfect base for your tile or hardwood installation.
The Hidden Secrets to a Smooth Self-Leveling Pour
Why Your First Pour Might Be Your Last
In my early days, I thought I could just mix and pour, like making instant pudding. Boy, was I wrong. A key mistake was using the wrong mix ratio or insufficient surface preparation. I didn’t realize that surface moisture, subfloor cleanliness, and proper mixing are all critical to success. In fact, technical experts emphasize that proper substrate preparation combined with correct mixing ratios dramatically reduce the risk of lumps (source).
By skipping these vital steps, I faced uneven patches and even the need to redo my entire pour. Don’t make the same mistake I did; a little extra effort beforehand can save you a whole lot of frustration later. To ensure you’re on the right track, check out detailed guides like step-by-step installation guides that outline precise surface preparation and mixing techniques.
Time to Get Hands-On and Master the Art of Leveling
Now that I’ve shared my experience, it’s time to get into the nitty-gritty of making your self-leveling pour look perfect. But first—do you worry that your inexperience will doom your project? Trust me, even the pros had early day blunders. The key is understanding the common pitfalls and how to avoid them. Ready to take your flooring project from wavy to wow? Let’s delve into the expert secrets that will turn your next pour into a flawless finish.
Prepare Your Subfloor Like a Pro
Think of your subfloor as the canvas for a masterpiece; if it’s uneven or dirty, the final picture will be flawed. Start by thoroughly cleaning the surface, removing dust, grease, and loose debris. Use a vacuum and a damp cloth to ensure no particles are left behind. Next, inspect for moisture or cracks; these can sabotage your pour. Repair cracks with appropriate patching compounds, and if moisture issues are present, address them before proceeding (learn more here). This initial step is crucial to prevent lumps and ensure a smooth pour.
Select and Mix Your Self-Leveling Compound Carefully
Choosing the right product is akin to selecting the perfect batter—too thick, and lumps appear; too thin, and you risk sagging or cracking. Follow the manufacturer’s instructions precisely for mixing ratios. Use a high-quality drill with a mixing paddle and set it to a slow speed to avoid introducing air bubbles. Gradually add the powder to the water, not the other way around, to prevent clumping. Mix until the compound reaches a homogenous, pancake-batter consistency without lumps. Before pouring, give it a few minutes to allow any entrapped air to escape, which reduces surface bubbles and smooths out the finish. My first attempt with improper mixing resulted in a bumpy surface that took twice to correct, reminding me how critical this step is.
Master the Pouring Technique for Smooth Results
Pouring self-leveling compound is like pouring honey—steady, even, and confident. Start at the farthest corner of your room and work towards the exit to avoid stepping on freshly poured material. Use a gauge rake or a trowel to spread the compound uniformly, especially along edges or high spots. Don’t just pour and walk away; actively guide the flow to prevent pooling or thin spots. Vibrations help settle the mixture and release trapped air. A trick I learned was to gently tap the floor with a long-handled tool after pouring—this encourages air bubbles to rise and escape, creating a smoother surface.
Use Proper Techniques to Avoid Lumps and Bumps
Achieving a perfectly flat surface isn’t accidental—it’s deliberate. Work swiftly but carefully; the compound starts to set within the manufacturer’s specified time. For large areas, work in sections to prevent uneven setting. Keep a straightedge or a longer level handy to check the level as you go. If you notice uneven spots, feather them out quickly with a trowel or extra compound before it hardens. Remember, patience is key—rushing can introduce lumps or cause the compound to dry prematurely, leading to an uneven finish. When I applied this method, I ended up with a flawlessly smooth surface ready for tile adhesion (more tips here).Many homeowners and even seasoned DIY enthusiasts believe that laying a floor is simply about following instructions—measuring, cutting, and securing. However, the real secret to a flawless finish lies in understanding the nuances that often get overlooked. One common misconception is that surface preparation ends with cleaning; in reality, subtle surface irregularities can drastically impact the final result. For instance, minor imperfections like high spots or slight dips can cause uneven tile or hardwood installation, leading to cracks, lippage, or unsightly gaps. Experts emphasize that meticulous attention to the subfloor’s flatness and moisture levels is critical; studies show that even small deviations exceeding 1/8 inch over 10 feet can compromise the integrity of the entire flooring (source: [TileTrend Shop](https://tiletrendshop.com/flooring-installation-fundamentals-leveling-for-a-seamless-look)). Another hidden nuance involves the curing environment for adhesives and leveling compounds. Many ignore that temperature and humidity directly influence curing times and adhesion strength, inadvertently creating weak spots that manifest as bumps or delamination over time. A frequent myth is that thicker coats or more aggressive troweling speed hasten installation, but in reality, over-application can trap air bubbles, leading to surface imperfections. Mastering techniques like proper trowel angle, consistent pressure, and appropriate curing conditions ensures a sleek, durable floor. Do you often encounter lumps or unevenness? The key may be in the finer details of your approach. For a comprehensive understanding of these advanced points, check out our full guide on [floor leveling techniques](https://tiletrendshop.com/how-to-achieve-flawless-floor-leveling-before-tile-laying). Remember, perfection is in the details—don’t let hidden pitfalls ruin your project. Have you ever fallen into this trap? Let me know in the comments.
Keeping Your Flooring Projects in Top Shape
Achieving a flawless floor isn’t just about the initial installation; ongoing maintenance and having the right tools are crucial for long-term success. When working with tiles or hardwoods, investing in quality equipment ensures consistent results and reduces the need for costly repairs later. For example, I always rely on a high-quality oscillating multi-tool for precise cuts and repairs, especially when dealing with tricky corners or under door jambs. Its versatility allows me to perform tasks efficiently without switching between multiple devices, saving time and maintaining accuracy.
Additionally, a reliable straightedge and laser level are indispensable for checking surface flatness regularly. Unlike traditional bubble levels, laser levels provide a quick and precise way to identify high or low spots across large surfaces, making it easier to maintain those perfect, long-lasting results. I prefer models with self-leveling features because they eliminate guesswork and ensure your surfaces stay true over time. Proper tools make upkeep easier and can even help you spot issues—like shifting subfloors or settling cracks—before they become major problems.
How do I maintain my flooring tools over time?
Maintenance starts with routine cleaning; after each project, wipe down tools with a damp cloth to remove dust and debris that can cause wear. Proper storage is also key—keep power tools in a dry, organized space to prevent rust and damage. For equipment like drills, regularly check and replace worn brushes or blades. Lubricating moving parts as recommended in the user manual extends their lifespan and keeps performance smooth. Additionally, calibrate laser levels periodically to ensure ongoing accuracy, especially if used repeatedly over months or years.
Using the right tools and maintaining them properly ensures your flooring projects are both durable and aesthetically pleasing. To refine your skills further, check out our comprehensive guides that delve into advanced installation techniques.
Plan for the Future: Scaling and Longevity
As your experience grows, so should your toolkit. Investing in professional-grade equipment from brands like Bosch or Makita provides enhanced precision and durability, enabling you to handle larger projects or more complex designs. For instance, a high-capacity wet tile saw with adjustable diamond blades allows for cleaner cuts and reduces waste, especially when working with large-format tiles. This scalability not only improves efficiency but also ensures your flooring remains flawless over years of use.
Predicting future trends, I believe that smart tools embedded with connectivity features—like app-controlled laser levels—will become more accessible, making project monitoring even more seamless. Embracing these innovations early can keep you ahead in the DIY game and further improve your results.
Remember, even the most skilled installers rely on both excellent tools and diligent maintenance. Now’s a perfect time to test out that high-quality laser level you’ve been eyeing—it could be the game-changer for your next project!
What I Wish I’d Known Before My First Leveling Attempt
One of the biggest lessons I learned was that even small surface imperfections can wreak havoc on your final floor, leading to cracks or uneven tiles. Patience in preparing your subfloor and never rushing the curing process are non-negotiable for truly flawless results. I also discovered that investing in quality tools isn’t just about efficiency—it’s about eliminating preventable errors that cause lumps and bumps. Finally, the importance of environment control—temperature and humidity—cannot be overstated; neglecting these can sabotage even the best planning.
Tools and Resources That Changed My Approach
My essential toolkit now includes a laser level for precision, a quality mixing paddle to prevent lumps, and a hygrometer to monitor moisture levels. For comprehensive guidance, I trust this detailed step-by-step guide that breaks down every stage, helping me avoid common pitfalls. Also, books like The Art of Floor Leveling have deepened my understanding of subfloor dynamics and curing techniques, elevating my craftsmanship.
Harness Your Inner Artisan and Elevate Your Flooring Game
Every project is a chance to hone your skills and add value to your home. Remember, the journey from uneven surfaces to a beautifully level floor is filled with learning and pride. Take your time, embrace the process, and celebrate your progress along the way. Your future self will thank you for the effort. Ready to turn those rough patches into perfect plains? Dive deeper into expert techniques and start your transformation today.
What’s been your biggest challenge in floor leveling, and how did you overcome it? Share your story below!