
It was a morning like any other in my renovation projects—until I stepped onto the new vinyl plank flooring only to hear that maddening click-clack every time I walked across it. That symphony of squeaks and unevenness hit me like a ton of bricks. I realized I had skipped a crucial step: addressing the seams of my plywood subfloor. That oversight cost me time, extra materials, and a lot of frustration.
The Hidden Culprit Behind Uneven Flooring: Not Sanding Plywood Seams
Imagine laying down your beautiful, brand-new LVP flooring, only to notice it wobbles and creaks. Turns out, those tiny seams and gaps in the plywood subfloor are the root of the problem. When I first installed my subfloor, I thought the seams were insignificant. I believed that if the surface looked smooth, the finish would turn out perfect. Wrong. Those un-sanded seams can telegraph imperfections through your entire flooring, leading to unevenness, squeaks, and even premature failure.
Professional flooring installers know that sanding seams ensures a seamless foundation. The tiny, often overlooked gaps can cause the underlayment and final flooring to settle unevenly. According to experts, neglecting these seams can result in voids and flexing, which compromise the stability and longevity of your floor. If you’re planning to install LVP or any floating floor over plywood, making sure your subfloor is perfectly smooth and level isn’t just a good idea—it’s a necessity.
Have you ever faced issues with uneven flooring after installation? If so, you’re not alone. Many DIYers and even seasoned pros miss this crucial step, thinking they can skip it. But from my own mistakes, I learned that taking the time to sand those seams pays off big time in the long run.
Now that we understand why this step is so vital, let’s dive into how to properly sand and prepare your plywood subfloor for a flawless finish. For more guidance on achieving perfectly level floors, you might find this [floor leveling guide](https://tiletrendshop.com/the-ultimate-guide-to-floor-leveling-for-a-perfect-finish) invaluable. Ready to create a solid foundation for your beautiful new floor? Let’s get into the practical steps.
Sanding Seams for a Flawless Foundation
Begin by removing any dust or loose debris from your plywood surface. Use a high-quality orbital sander equipped with 120-grit sandpaper. Think of this step as smoothing out all wrinkles in a fabric; the more even your surface, the better your finished floor will look and perform. Pay special attention to the seams—these tiny gaps are like tiny hills and valleys that can cause your flooring to settle unevenly. Sand across the seams thoroughly to ensure they are flush with the surrounding plywood.
Eliminating High and Low Spots
Next, check for any uneven areas using a long level or straightedge. For spots that are higher or lower than the main plane, mark them clearly. Use a belt sander or hand planer for high spots, removing just enough material to achieve a flat, level surface—imagine shaving a rough edge to make it fit perfectly. For depressions, fill with a setting compound or floor patch, then sand smooth once cured. This step helps prevent the quot;bouncyquot; feeling that can ruin a floating floor.
Ensuring a Clean, Dust-Free Surface
After sanding, vacuum thoroughly to remove all dust particles. Dust can compromise adhesion if you’re installing glue-down flooring, or create bumps under laminate or vinyl. Follow up with a damp cloth or tack cloth to pick up residual fine particles. Think of this as preparing a canvas before painting—cleanliness is key to a smooth, long-lasting finish.
Checking Levelness and Adjusting
Use a laser level or a long straightedge to scan the entire subfloor. Look for any high or low areas that might have been missed. If you detect unevenness over a larger span, consider adding shims or underlayment to fill gaps or level the surface. This is akin to laying bricks: each must sit perfectly flat for the entire structure to be sound. For complex leveling issues, consult a professional or refer to resources like this guide.
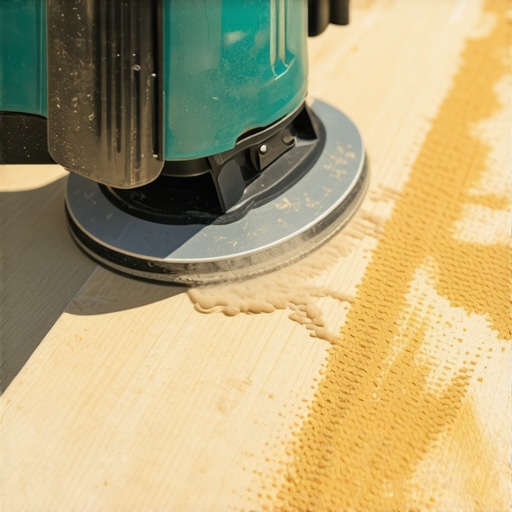
To visualize the sanding process, imagine chiseling away subtle imperfections in a sculpture to reveal a smooth, perfect surface. Proper sanding and prep are crucial steps that define the success of your flooring project, minimizing squeaks, bounce, and future repairs. By dedicating time now, you set the stage for a flawless, durable, and aesthetically pleasing finish that lasts for years.
When it comes to flooring, many homeowners and even seasoned DIY enthusiasts believe they have the process down, but in reality, some misconceptions can lead to costly mistakes. One prevalent myth is that balancing the surface alone guarantees a long-lasting floor. While a smooth top layer is essential, the real trick lies beneath—specifically, the nuances of subfloor preparation and leveling. Overlooking these details often results in squeaks, bounciness, or premature wear, revealing the importance of meticulous groundwork. Experts emphasize that proper subfloor assessment, including checking for moisture issues and structural stability, is crucial before any surface installation. According to a study by the National Wood Flooring Association, inadequate subfloor prep accounts for over 65% of flooring failures, underscoring this often-ignored aspect.Achieving a durable and flawless flooring project requires more than just skill—you need the right tools that guarantee precision and efficiency. Over the years, I’ve developed a toolkit tailored for different flooring types, from tile to hardwood, focusing on quality and durability. One of my go-to items is a high-accuracy laser level; unlike traditional bubble levels, laser levels project a consistent plane across large areas, making it easier to spot deviations and ensure your subfloor is truly flat. This tool alone has saved me countless redo hours and associated costs. For smoothing out plywood seams, I rely on a variable-speed orbital sander paired with 120-grit sandpaper, which provides a gentle yet effective finish—crucial for preventing squeaks and uneven wear down the line. The versatility of a good adhesive spreader, especially a notched trowel with consistent notch depth, is indispensable for installing tiles or applying self-leveling compounds; it helps you achieve uniform coverage, which experts say is critical for longevity. When it comes to checking the levelness of your subfloor, I trust a long, straight 4-foot self-repairing straightedge. Unlike shorter or rigid tools, this allows for hands-on detection of major dips or rises, which might be missed otherwise. Maintaining your tools is just as vital—after every project, I thoroughly clean and oil my equipment, especially power tools, to prevent corrosion and maintain precision. Looking ahead, the trend seems to be leaning toward smart measurement devices that connect via Bluetooth to your phone, streamlining the calibration process. Embracing these innovations can improve your efficiency and the quality of your finished floor.
How do I keep my flooring tools in top condition over time?
Regularly inspect your tools for wear and tear, clean mechanical parts promptly, and store them in a dry environment. Using high-quality blades and sanding pads not only makes the job easier but also extends the lifespan of your tools—according to technical guides from flooring manufacturers. For instance, the proper maintenance of a notched trowel, as outlined in the [installation guide](https://tiletrendshop.com/installing-tiles-like-a-pro-step-by-step-strategies-for-2025), can lead to a more uniform adhesive layer, ensuring your tile installation lasts decades. So, try honing your toolkit today—invest in a laser level or a quality straightedge—and see how much smoother your next project becomes. Staying equipped with the best tools and maintaining them rigorously ensures your flooring endures, saving you time and money in the long run.
Over the years, I’ve discovered that the smallest details often make the biggest difference in flooring projects. One of the most overlooked but crucial aspects is the preparation of the subfloor, especially sanding those tiny seams to prevent future squeaks and unevenness. Skipping this step can turn a beautiful space into a nightmare of creaks and bounce, costing time and money down the line. Embracing meticulous preparation not only saves headaches but also elevates your craftsmanship, turning a good installation into an exceptional one. Remember, a flawless finish starts with a solid foundation—don’t underestimate the power of sanding seams and smoothing out imperfections. For complex leveling challenges or professional tricks, check out this guide and upgrade your skills today. Your future self will thank you for the extra effort that pays off in durability and beauty.