
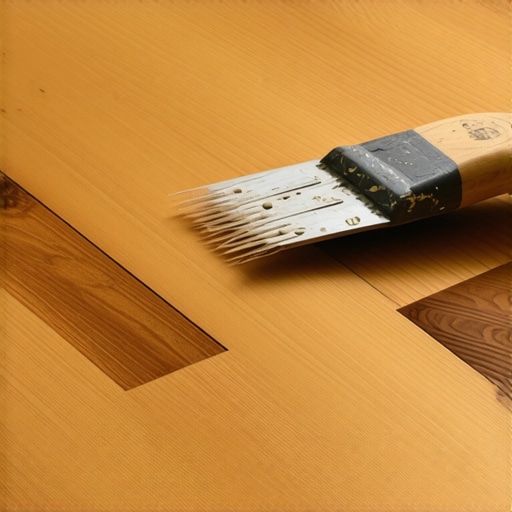
I remember the day I discovered a gaping hole in my hardwood floor right in the middle of my living room—just when I thought I was finally settling into a peaceful weekend. Instead of the serene space I envisioned, I faced a tiny disaster that threatened to turn my entire floor into a patchwork of mismatched planks. That moment was a lightbulb moment for me. I realized that not every flaw requires ripping up and sanding down the whole floor; sometimes, a clever patch is all you need to restore both beauty and stability.
Why Fixing Small Holes Without Full Sand is a Game Changer
If you’ve ever wrestled with the idea of ripping up your entire hardwood floor just because of a small hole or dent, you’re not alone. It’s tempting to believe that only professional sanding and refinishing can save the day, but that’s not always necessary. Trust me, I’ve been there—early on, I made the mistake of thinking that a patch would look obvious or that shortcuts wouldn’t last. Turns out, with the right approach, you can effectively hide and repair minor damage without the hassle or expense of a full sanding job.
This is especially relevant now because hardwood floors are a significant investment. They add warmth and elegance to your home, but they’re also susceptible to everyday mishaps—dropping a heavy object, worn-out nails from furniture, or even minor accidents in high-traffic zones. The good news is, with a few techniques, you can keep your floors looking pristine and save yourself plenty of time, money, and stress.
According to industry experts, addressing small repairs promptly can extend the lifespan of your flooring and prevent minor issues from escalating into costly replacements. Did you know that unattended holes and dents can lead to moisture problems and structural weaknesses over time? That’s why learning how to patch effectively is vital—not just for aesthetics but also for your home’s integrity.
Have you faced a similar dilemma where you thought a professional repair was the only solution? If so, I encourage you to keep reading. I’ll walk you through proven methods to patch a hole in hardwood floors seamlessly, even if you’re not a DIY expert. We’ll explore step-by-step techniques that have worked for me—and countless others—to restore their floors without a full sand.
By the end of this guide, you’ll feel confident tackling those unsightly spots yourself, avoiding unnecessary costs, and maintaining the warmth and charm your hardwood floors bring to your space. Ready to dive into the practical side of things? Let’s get started with understanding the best materials and tools for patching a small hole.
Prepare the Area for Repair
Begin by removing any loose debris, chipped wood, or splinters around the hole using a utility knife and a small brush. This creates a clean surface, ensuring the patch adheres properly. I once worked on a narrow hallway where dust and debris made patching tricky, but thorough cleaning made all the difference.
Match the Right Wood Filler or Patch Material
Choose a high-quality wood filler that matches your hardwood color. For larger holes, consider cutting a small piece of matching hardwood from a hidden area or scrap, shaping it to fit snugly into the hole. I had a small dent in my oak floor and used a matching filler that blended perfectly after staining.
Color Matching and Tinting
If you can’t find an exact color, tint the filler with stain or dye to blend seamlessly. I used a few drops of darker stain to color the filler, which after drying and sealing, became virtually invisible.
Applying the Patch
Using a putty knife, press the filler into the hole, ensuring no air pockets remain. For wooden patches, apply glue to the back and press firmly into the hole, then secure with painter’s tape until set. To avoid overfilling, slightly underfill the hole; you’ll sand it flush later.
Sand and Level the Surface
Once the filler is dry—usually after a few hours—use fine-grit sandpaper (220 grit) to smooth the patched area. Hold the sandpaper flat and sand lightly, blending the patch with the surrounding floor. I once had trouble keeping the patch level, but using a sanding block made a huge difference. For precise control, consider the techniques for flawless leveling.
Stain and Seal
If your floor isn’t already stained, match the dye to the existing finish. Lightly apply stain with a cloth or brush, blending into the surrounding area. Finish with a clear sealant or lacquer to protect the repair, ensuring the patch withstands daily wear. I recommend using a quality finish to match the original sheen and durability, as described in installation fundamentals.
Final Inspection and Touch-Ups
After sealing, wait for the finish to cure, then inspect the patch’s flatness and color match. Lightly buff if needed to eliminate any gloss differences. Remember, patience during drying and curing stages guarantees a professional-looking result.
Many homeowners assume that achieving a perfectly level floor or flawless installation is simply about following basic steps, but this mindset overlooks several subtle yet critical factors. For instance, a common myth is that larger tiles or wide planks make leveling less important—that’s false. In fact, improper attention to subfloor prep and leveling can cause cracks, lippage, and uneven wear over time, even with premium materials. According to expert flooring specialists from Mastering Floor Leveling, small deviations in subfloor flatness often lead to major issues down the line.
One trap to avoid is underestimating the importance of moisture control before and during installation. Moisture seeping through concrete slabs or wood subfloors can cause tiles to lift or wood floors to swell, especially when using adhesives or finishes that trap humidity. This oversight is a common reason for floor failure within the first few years. To sidestep this pitfall, it’s wise to conduct thorough moisture testing and consider barrier membranes—something I emphasize in moisture barriers.
For advanced installers, mastering the finesse of floor leveling requires understanding the precise application and curing times of leveling compounds. An often overlooked nuance is the mixing speed and paddle selection—batching a self-leveler incorrectly can cause brittle or uneven surfaces. The professional secret lies in slow, consistent mixing to prevent air bubbles that compromise strength.
What most people don’t realize is that the choice of adhesives and grouts also impacts the long-term success of your installation. Using the wrong formulation—like thinset with too high slake or grout with incompatible shrinkage properties—can lead to cracks or unsealed joints. Experts recommend consulting product data sheets meticulously and matching materials to your specific environment, as outlined in tile installation pointers.
Finally, incorporating proper transition strips and expansion joints isn’t just for aesthetics—they’re essential for accommodating natural floor movements. Neglecting these details can cause buckling, especially in hardwood floors that expand with humidity fluctuations. This is why understanding building science principles, like those discussed in common mistakes in leveling, is crucial.
Have you ever fallen into this trap? Let me know in the comments, and share your experience. Recognizing these subtle pitfalls can save you time, money, and frustration, leading to a truly professional finish that stands the test of time.Maintaining flawless flooring over time requires the right tools and consistent effort. I rely heavily on a high-quality orbital sander for subtle touch-ups, especially around edges and hard-to-reach spots where scanning with a standard sander leaves imperfections. This tool consistently delivers smooth, even surfaces, which is crucial for seamless repairs and refinishing. For detailed inspections—checking for unevenness or hidden damage—I use a 3D laser level. Its precision allows me to identify high and low spots that could cause future problems, enabling me to address issues proactively before they escalate, ensuring long-term durability. To keep the subfloor in check, I employ moisture meters from reputable brands like Wagner. Accurate moisture readings are essential to prevent future warping or mold growth, especially in environments prone to humidity fluctuations. When it comes to adhesives and leveling compounds, I prefer products with fast curing times and strong bonding properties, such as those from Laticrete, because they minimize downtime and maximize bond integrity. Over the years, I’ve seen that investing in professional-grade tools pays off by reducing errors, saving time, and extending the life of your flooring. Prediction-wise, advancements in laser-guided tools and smart sensors are set to revolutionize how homeowners and professionals maintain and monitor their floors—think real-time moisture tracking and automated leveling indicators.
How do I maintain flooring over time?
The key to long-term flooring success lies in routine inspections, timely repairs, and employing the right tools for each task. Regularly checking for uneven spots with a laser level or moisture meter helps catch issues early, preventing costly repairs later. Implementing a scheduled cleaning routine—using gentle, pH-neutral cleaners—preserves the finish and prevents dirt buildup that can cause scratches. When minor damage occurs, don’t rush to replace large sections; instead, use a high-quality orbital sander for spot refinishing, which avoids unnecessary disruption and maintains the consistent look of your floor. Staying proactive about moisture control, especially in areas prone to humidity, is vital, and I recommend consulting industry standards like those outlined in the Mastering Floor Leveling guide to understand the nuances of subfloor preparation and moisture barriers. Finally, staying informed about emerging tools—such as smart moisture sensors or AI-assisted leveling systems—will keep your maintenance routine effective and efficient. Why not try calibrating your moisture meter with a known control sample this month? It’s a simple step that can save you headaches down the line and ensure your floors stay beautiful for years to come.
The Hidden Truths About Floor Leveling I Wish I Knew Sooner
One of the biggest revelations I had was realizing that most of my struggles with tile lippage and uneven hardwood was rooted in overlooked subfloor imperfections. Perfect flooring starts beneath your feet, not just on the surface. I used to spend hours sanding and refinishing, only to find that hidden high spots would ruin the entire look. Now, I understand that investing in proper moisture testing and meticulous subfloor prep is a game-changer, saving me time and frustration in the long run.
Tools that Transformed My Flooring Journey
Over the years, I’ve come to trust essential tools like a precise laser level for identifying uneven areas, moisture meters for preventing future warping, and a quality orbital sander for spot refinishing. These tools make all the difference, enabling me to achieve professional results without hiring expensive contractors. If you’re serious about hardwood or tile installation, check out Mastering Floor Leveling for expert insights on optimal tool use and techniques.
Your Floor, Your Canvas: Take Action Now
Remember, the secret to lasting, beautiful flooring isn’t just about choosing the right materials — it’s about mastering the process and paying attention to the subtle details that most overlook. Whether it’s a small patch or a full installation, approaching your project with patience and professionalism will elevate your space and your confidence. Don’t wait until a tiny flaw turns into a costly disaster; start today, and watch your home transform into a showcase of craftsmanship.
What’s Your Next Step Towards Perfect Flooring?
Have you ever been surprised by how a small mistake during leveling caused big issues later? Share your experiences below, and let’s learn from each other’s flooring adventures!