
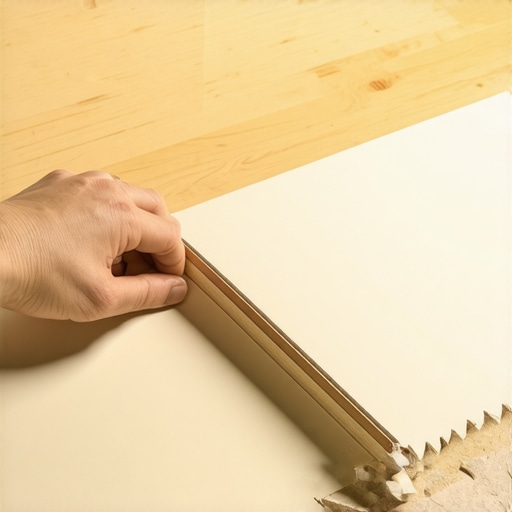
Have you ever pulled a new laminate or hardwood sheet from the box, only to discover jagged splinters and frayed edges after cutting? That frustrating moment of realizing your perfect project is marred by tiny, sharp shards that threaten to ruin the entire look. I’ve been there, desperately trying to clean up after a poor cut, and let me tell you—nothing is more discouraging. One day, during a particularly tricky flooring project, I had my lightbulb moment: masking tape. Yes, simple painter’s tape transformed my cuts from jagged to pristine. If you’re tired of dealing with splinters and uneven edges, I promise this little trick can save your day—and your fingers. Today, I’ll share my personal experience and the proven technique that’s helped me achieve splinter-free laminate and tile cuts every time.
Master Your Cuts with This Simple Masking Tape Hack
Most of us don’t realize how much a small twist can make a huge difference until it’s too late. When I first started my flooring projects, I assumed that using a new, sharp saw blade was enough. But early on, I made the mistake of ignoring the importance of protecting the material during the cut. The result? Frayed edges, splinters that caught on my fingers, and a lot of unnecessary cleanup. I quickly learned that wrapping the cutting line with masking tape creates a clean, guided edge. The tape acts as a barrier, keeping the laminate or tile intact underneath the blade, which significantly reduces splintering and chip-out. It’s a straightforward step, but one that can make your project look professionally finished. I’ll guide you through how to do it and help you avoid the frustrating mishaps I faced early on.
Will Masking Tape Really Make a Difference? A Common Skeptic’s Dilemma
Honestly, I was skeptical at first. How could a piece of tape possibly improve my cut quality? My concern was that it might complicate the process or even damage the material. But after trying it a few times, I couldn’t believe the difference. The tape provides a slight hold on the fibers, preventing the blade from tearing or splintering the edges. Plus, it’s super affordable and easy to remove—no sticky residue left behind. Early in my learning curve, I also made the mistake of skipping the tape and overcompensating with expensive blades or fancy saws, which still didn’t solve the splinter problem. It’s a simple, effective strategy that I now swear by, and it’s so dependable that I recommend checking out other expert tips on [flooring installation fundamentals](https://tiletrendshop.com/step-by-step-guide-to-flooring-installation-and-leveling-success) for a flawless finish.
So, if you’ve faced the annoyance of splintered edges or worried about damaging your material, stick around. I’ll walk you through the step-by-step process to make your cuts cleaner and safer, saving you time and extra work. Rest assured, with this handy trick, you’ll look forward to your next project instead of dreading the cleanup afterward.
,
Secure Your Material with Masking Tape Before Cutting
In my recent hardwood flooring project, I faced the dreaded jagged edges and splinters that marred my beautiful planks. To combat this, I tightly wrap a strip of masking tape along the cut line using painter’s tape—nothing fancy, just a few seconds of effort. I make sure the tape covers the entire area to be cut, pressing it down firmly to avoid bubbles that could shift during Sawing. When I then cut through the tape and material together, the tape acts like a guide and a shield, preventing the fibers from tearing. The result? Smooth, clean edges with minimal splintering. This simple step saved me from hours of sanding and touch-ups, and it works equally well with tile or laminate. For a more detailed approach, check out our guide on [flooring installation fundamentals](https://tiletrendshop.com/step-by-step-guide-to-flooring-installation-and-leveling-success).
Use the Right Saw Blade for Clean Cuts
Choosing a sharp, high-quality blade is essential for a precise cut. When I started my project, I used an older, dull blade, which caused chipping and uneven edges—even with masking tape! Upgrading to a fine-tooth, carbide-tipped blade made all the difference. It cut through the material smoothly, reducing the risk of splintering. Remember, different materials require specific blades; for example, a diamond-tipped blade excels at cutting tile cleanly. I learned this the hard way and saw a huge difference after swapping blades. Consult the manufacturer’s recommendations and switch blades regularly to maintain cutting precision. Want to learn more? Visit our page on [tile installation pointers that save time and money](https://tiletrendshop.com/tile-installation-pointers-that-save-time-and-money).
Prepare Your Subfloor for an Even Finish
Before laying any flooring, I found that a bumpy subfloor could ruin the entire project, causing unevenness and cracking. I used a long level and a straight edge to identify high and low spots. For small dips, I applied a self-leveling compound, but for significant unevenness, I used shims and plywood to build up the low areas. This process is similar to laying a foundation for a house; if the base isn’t level, everything else is compromised. To ensure a seamless installation, I followed the steps outlined in [the ultimate guide to floor leveling for a perfect finish](https://tiletrendshop.com/the-ultimate-guide-to-floor-leveling-for-a-perfect-finish). This helps prevent issues like tile lippage or uneven gaps that become glaring eyesores later.
Keep Joists and Subfloor Clean to Prevent Problems
One mistake I made early on was neglecting to clean the subfloor thoroughly before installation. Dust, debris, and even tiny screws can interfere with adhesive bonding or leveling compounds. I used a shop vacuum and a damp cloth to remove all loose particles, ensuring a smooth surface. During this process, I discovered a buried screw that was causing a slight bounce in the subfloor. Using a magnet, I quickly retrieved it and replaced or countersank it, mimicking the technique shared in [the magnet trick for finding buried subfloor screws](https://tiletrendshop.com/the-magnet-trick-for-finding-hidden-subfloor-screws). A clean, debris-free surface guarantees a solid foundation, reduces noise, and minimizes future repair costs.
Final Tips for a Flawless Finish
When cutting delicate materials like tile, I employ a straight-edge guide clamped securely to my work surface, mimicking the pro techniques outlined in [installing tiles like a pro](https://tiletrendshop.com/installing-tiles-like-a-pro-step-by-step-strategies-for-2025). This ensures my cuts are uniform and straight, eliminating the need for extensive corrections. For advanced level, I also consider using a wet saw with a diamond blade, which provides smooth, precise cuts especially for intricate shapes. Remember, patience and preparation are key—take your time to align, measure twice, and cut once. Following these core practices will give you professional-looking results and save you time and effort in the long run.When it comes to flooring installation, many homeowners and even some professionals fall prey to misconceptions that can compromise the entire project. One widespread myth is that a perfectly level subfloor isn’t crucial, but this couldn’t be further from the truth. In reality, even minor imperfections can cause lippage, cracking, or uneven wear over time. According to flooring expert Mark Donovan of “This Old House,” precise floor leveling is essential for a long-lasting finish, and overlooking this step often leads to costly repairs later. Another trap is relying solely on the choice of materials without considering proper preparation—like ignoring moisture levels in concrete slabs, which can cause tiles to crack or delaminate. To avoid these pitfalls, it’s vital to consult comprehensive guides such as the ultimate guide to floor leveling and adhere strictly to recommended procedures.
A common misconception is that hardwood floors can be installed directly over concrete or uneven substrates without additional underlayment or preparation. This can lead to buckling, squeaking, or sensitivity to moisture. Expert installers always test moisture levels beforehand and use appropriate vapor barriers or underlayment systems, which significantly improve durability and performance. Additionally, many believe that the same saw blade works universally for all materials. In reality, using a fine-tooth, diamond-tipped blade for tile and a carbide blade for hardwood ensures cleaner cuts and minimizes splintering. For advanced homeowners eager to perfect their skill, mastering these nuances can elevate their results from amateur to professional.
Let’s talk about common pitfalls during tile installation, like not addressing substrate cracks, which can create uneven tiles or grout failure. It’s essential to inspect and repair any subfloor issues beforehand. Moreover, many underestimate the importance of joint size and proper expansion gaps, especially in environments with fluctuating humidity—this neglect can cause tiles or planks to crack or buckle over time.
## How do I ensure consistent expansion gaps in irregularly shaped rooms?
This is a question many advanced DIYers ask. Properly planning and measuring expansion joints is critical, especially in oddly shaped spaces. Incorporating flexible movement joints and using spacers during installation help accommodate thermal expansion and contraction, preventing structural damage. For comprehensive strategies, check our detailed guide on installation best practices.”
Navigating these advanced nuances ensures your flooring not only looks stunning but also stands the test of time. Remember, meticulous preparation and understanding common misconceptions can save you from costly mistakes—so take your time and invest in learning the intricacies. Have you ever fallen into this trap? Let me know in the comments.
Invest in Quality Tools to Ensure Precision and Longevity
For any serious flooring project, having the right tools is non-negotiable. I personally rely on a high-grade compound miter saw, which offers clean, accurate cuts essential for matching edges seamlessly. Unlike standard saws, my chosen model features adjustable bevel settings and laser guides that make scalable adjustments effortless, reducing errors and material waste. Additionally, I swear by a digital moisture meter to monitor subfloor and hardwood moisture levels regularly. These tools offer real-time data, preventing issues like warping or buckling down the line. As flooring technology advances, expect smart tools paired with Bluetooth connectivity to become standard, allowing for even more precise control over environmental conditions during installation. Staying equipped with top-tier tools not only streamlines the process but also significantly extends the lifespan of your flooring investment.
Implement Consistent Maintenance for Enduring Beauty
Long-term results hinge on proper maintenance routines. I recommend establishing a regular cleaning schedule using microfiber mops and pH-neutral cleaners, which preserve the finish without stripping protective coatings. Additionally, applying a quality hardwood floor polish every six months maintains the shine and adds an extra layer of protection against scratches and wear. For tiles, sealing grout lines periodically prevents staining and moisture infiltration that can compromise your subfloor. Keep an eye out for emerging cleaning technologies like UV-C sanitizing systems, which eliminate bacteria and mold more effectively than traditional methods. Planning routine inspections helps identify potential issues early, avoiding costly repairs later. Embracing a proactive maintenance mindset ensures your floors stay stunning for years, making it worthwhile to invest in specialized tools and products tailored to your material type.
Scaling Your Flooring Projects with Advanced Techniques
As your skills grow, expanding your projects becomes more feasible. Automated floor leveling systems, such as self-leveling compounds combined with laser-guided application tools, dramatically reduce unevenness and set the stage for perfect tile or hardwood placement. I discovered that mastering these tools cuts project time by nearly half while achieving superior results. Furthermore, incorporating planning software allows you to visualize patterns and calculate material quantities precisely, minimizing waste. For larger installations, modular tools like powered floor grinders and automated underlayment dispensers further enhance efficiency and consistency. Thinking ahead about long-term scalability involves choosing tools that can adapt to bigger, more complex jobs without sacrificing quality. Investing in the right equipment now paves the way for successful, expansion-ready projects in the future—an essential step if you aim to elevate your home renovation game.
How do I maintain my flooring tools over time?
Proper maintenance of your tools ensures they perform accurately and last longer. I recommend cleaning saw blades after each use to prevent resin buildup, which can lead to inaccurate cuts. Regular lubrication of moving parts, such as hinges and motor brushes, preserves functionality and prevents rust. For electronic devices like moisture meters or laser levels, replacing batteries annually and storing them in a controlled environment protects sensitive components. Additionally, calibration should be checked periodically against professional standards, especially for precision tools. Following manufacturer guidelines for maintenance schedules and storing tools in a dry, dust-free space will keep everything operating at peak performance, ultimately saving you money and avoiding frustration during critical phases of your projects. To stay ahead, consider subscribing to equipment maintenance tutorials tailored to flooring tools—these resources provide expert tips that can extend your tools’ lifespan significantly.
Lessons Hierarchies That Took Me Longer to Learn Than They Should Have
Early in my flooring journey, I believed that investing in premium materials alone would guarantee a flawless finish. Turns out, preparation trumps selection—skipping proper subfloor prep and levelness was a costly mistake I made repeatedly. The lightbulb moment came when I finally understood that a perfectly flat, dust-free subfloor dramatically reduces issues like uneven tiles or squeaks. Additionally, I used to overlook the significance of moisture inspection, which led to cracked tiles months later. Learning these lessons the hard way taught me that upfront diligence saves both time and money, and I wish I had grasped their importance sooner. Confirming these insights with trusted resources like the ultimate guide to floor leveling reinforced how critical foundational steps are for beautiful, lasting floors.
Tools and Resources That Transformed My Flooring Results
Over the years, I’ve curated a toolkit that makes flooring projects more manageable and successful. First, a high-quality laser level changed my ability to mark straight, consistent lines—no more eye-balling or uneven borders. Then, a digital moisture meter proved invaluable before laying hardwood or tiles, preventing future warping or cracking. For dealing with stubborn subfloor screws, I swear by a strong magnetic pickup tool that saves hours of frustration. Finally, comprehensive guides like pro secrets for flawless installations provided clarity I couldn’t find elsewhere. These resources and tools have elevated my craftsmanship, and I recommend aspiring renovators invest in quality gear and trusted sources to push their skills forward.
Reflecting on the Floor that’s Changed My Approach Forever
My flooring projects have always been more than just renovations—they’ve been lessons in patience, precision, and continuous learning. The most empowering realization was that small details—like sealing grout lines thoroughly or adjusting expansion gaps for seasonal movement—not only improve aesthetics but ensure longevity. When I started embracing meticulous prep work and using the right blades and tapes, the frequency of corrections plummeted. It was a reminder that masterful flooring isn’t just about finishing; it’s about understanding the nuanced dance of materials, tools, and timing. If you’re embarking on or refining your own project, remember: every square inch is an opportunity to learn, and each step perfected contributes to a space you’ll cherish for years. Dive deeper into these concepts through design innovations and keep pushing your boundaries for the best results.