
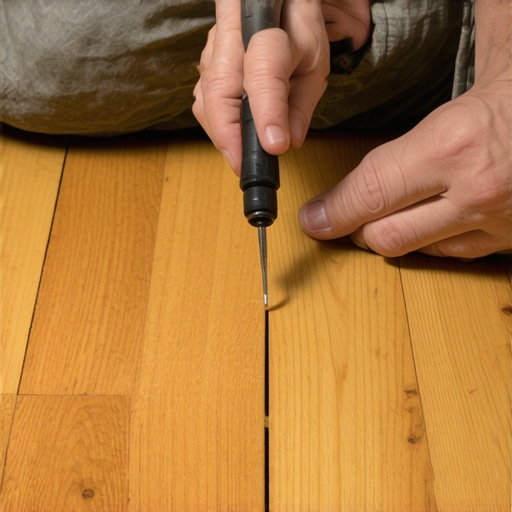
Nothing beats the frustration of stepping onto your hardwood or tile floor and hearing that unmistakable squeak echo through the room. I remember the moment vividly—guilty of that classic mistake, I thought, “Well, I guess I need to tear up the entire floor to fix this.” But here’s the lightbulb moment: you don’t always have to go that route. In fact, there are simple, effective solutions to silence those pesky squeaks without any destructive DIY disasters.
Today, I’m going to share with you how I tackled a stubborn squeaky board in my own home. Spoiler alert: it wasn’t about ripping up the tiles or pulling up the entire hardwood. Instead, I discovered some surprisingly straightforward techniques that can save both your time and your wallet. If you’ve ever faced this pesky problem—where every step sounds like a mini earthquake—then this post is for you.
Why Ignoring a Squeaky Floor Can Lead to Bigger Problems
Squeaky floors aren’t just an irritation—they can be a warning sign of underlying issues. When a board rubs against another or the subfloor shifts, it indicates movement that could worsen over time. Ignoring this noise might seem harmless initially, but as it persists, it can lead to loosened boards, weakened subfloors, and even structural damage. According to a comprehensive guide on flooring installation, unresolved squeaks can cause rapid deterioration of the flooring’s integrity, turning a simple fix into an expensive reconstruction.
But here’s the thing—many reach the point of frustration and immediately consider ripping the entire surface apart. That’s a costly and unnecessary step in most cases. Instead, understanding how to identify the root cause and apply targeted remedies can be a game-changer.
Have you found yourself sidestepping your squeaky floor, hoping it’ll quiet down on its own? Or worse, considering tearing up the entire room? Don’t worry; I’ve been there. Early on, I made the mistake of assuming only a complete overhaul would solve the problem, but I learned better. With a little patience, some strategic tools, and knowledge, you can resolve most squeaks without destructive upheaval.
In the next sections, I’ll walk you through simple, proven steps to silence your squeaky floors. And trust me, it’s more achievable than you might think.
Start by checking out some flooring fundamentals that set the stage for a successful fix. For a deeper dive into proper installation techniques that prevent future squeaks, you might want to review [this comprehensive guide on floor leveling](https://tiletrendshop.com/the-ultimate-guide-to-floor-leveling-for-a-perfect-finish). Now, let’s get into how you can identify and fix those squeaks like a pro.
Identify the Source of the Squeak
Start by locating precisely where the noise originates. Walk across the floor and listen for the loudest spots. Then, press down on suspect areas to see if the squeak intensifies. I remember once tackling a squeak near the doorway; I noticed step-by-step that the noise was coming from a specific board rubbing against the subfloor. To visualize, think of the floor as a giant Jenga tower—you need to find which piece is shifting and causing instability. To get a better handle on the root cause, I used a flashlight to inspect beneath the floor to see if any loose or protruding nails or screws could be the culprit. This step is crucial because targeted fixes work best when addressing the precise problem, rather than applying a blanket solution that may not resolve the issue.
Apply a Lubricant or Adhesive to the Friction Points
Once you’ve pinpointed the squeak, the goal is to eliminate the friction causing the noise. Use a silicone-based lubricant spray or powdered graphite in a squeeze bottle, applying it directly into the joints or between the floorboard and subfloor. Imagine the board as two pieces of sandpaper rubbing; adding lubricant creates a smooth barrier. I once used an old syringe to inject graphite into a stubborn squeak in my kitchen, and the noise disappeared instantly. For tight spots, a toothpick or a thin applicator helps deliver the lubricant precisely where needed. Remember, avoid oil-based products that can stain or weaken the wood or tiles over time. This method is quick and effective, typically resolving squeaks without any need for removal or major repairs.
Secure Loose Boards with Screws or Nails
If the squeak stems from a loose board, securing it is your best bet. Use a drill with a screwdriver bit to drive hidden screws at an angle into the floor joists beneath. For hardwood floors, screws should be positioned at the edges of the board, avoiding the surface finish. Think of it like tightening loose bolts on a chair—stabilize the structure to stop movement. I made this mistake once when I tried to fix a squeaky hallway board by pounding nails, only to exacerbate the problem by cracking the finish. Instead, I learned to countersink screws just below the surface and fill the holes later with matching filler. This ensures a firm grip without visible damage, and it provides a long-lasting solution to squeaks caused by loose flooring.
Use Underlayment or Mechanical Fixes for Persistent Squeaks
When the squeak persists across multiple boards or the subfloor seems to shift, adding a solid underlayment or shimming the subfloor might be necessary. Think of this as adding a cushion or support under a wobbly table. For tile and stone floors, applying an epoxy or latex filler into gaps can stabilize uneven areas. I once used a self-leveling compound around a bathroom tile to reduce a persistent creak, and it dramatically improved the noise level. For hardwood or laminate, thin shims can be slipped between the subfloor and joists to tighten the fit. Always ensure that these adjustments do not raise the floor unevenly or cause new issues. For complex cases, consulting detailed guides like [flooring installation fundamentals](https://tiletrendshop.com/flooring-installation-fundamentals-leveling-for-a-seamless-look) can provide valuable techniques to ensure the fix is durable. Remember, proper assessment and carefully executed fixes prevent future squeaks and preserve your flooring’s integrity.When it comes to flooring, many assume universal solutions exist, but that couldn’t be further from the truth. Popular myths, like the belief that a thicker subfloor guarantees a perfect finish, often lead DIY enthusiasts astray. In reality, factors such as subfloor composition and moisture content play more critical roles than mere thickness. For instance, even a robust plywood panel can cause uneven surfaces if its moisture level isn’t properly calibrated before installation. The common misconception is that premium materials alone ensure durability, but neglecting proper preparation—like adequate leveling—can result in persistent issues down the line.
Is There a Perfect Method for Everlasting Floor Stability?
Interestingly, the idea that one universal method suits all projects is a common mistake. Each space demands a tailored approach considering room size, foot traffic, and climate conditions. Advanced professionals understand that combining precise leveling techniques with materials appropriate for each environment ensures longevity and aesthetic appeal. For example, detailed floor leveling steps are vital for achieving a flawlessly even surface, especially when working with large-format tiles or hardwood planks. You can explore expert strategies for perfecting your surface in guides such as [this comprehensive floor leveling resource](https://tiletrendshop.com/precise-floor-leveling-techniques-to-achieve-flawless-surfaces). Furthermore, many overlook the significance of a thorough moisture barrier, especially over concrete slabs, which experts emphasize as essential in preventing future warping or cracking. Ignoring this step can lead to costly repairs and disappointing results. The key is understanding that proper material selection, meticulous preparation, and awareness of nuanced factors like humidity and subfloor-surface interaction are the true foundations for success. Ultimately, elevating your flooring game involves eschewing general rules in favor of expert insights, tailored techniques, and attention to details that most overlook. Have you ever fallen into this trap? Let me know in the comments.In the world of flooring installation and maintenance, having the right tools is as crucial as understanding the techniques. Personally, I swear by a few key pieces of equipment that ensure precision, efficiency, and longevity in my work. One staple is the **laser level**—specifically, the **Bosch GLL 55 Self-Leveling Cross-Line Laser**. This device offers incredible accuracy over large areas, helping me achieve perfectly level surfaces every time. Its green laser enhances visibility, even in brightly lit rooms, which is a game-changer when working on complex leveling tasks. I use it regularly when preparing subfloors to verify flatness before laying tiles or hardwood, ensuring long-term durability and aesthetic appeal.
For surface prep, I rely on a **multi-function rotary tool** like the **Dremel 4300**. Its versatility allows me to remove old adhesives, smooth edges, and carve out spots for shimming or injecting adhesives. The variable speed control helps me adapt to delicate or stubborn surfaces, minimizing damage and maximizing efficiency.
Another tool I depend on is a **concrete moisture meter**, such as the **InClaTools Pinless Moisture Meter**. Proper moisture testing before installation can prevent future issues like warping or delamination, especially when working over concrete slabs. I always perform a moisture check following the guidelines outlined in the [floor leveling and moisture management](https://tiletrendshop.com/the-ultimate-guide-to-floor-leveling-for-a-perfect-finish) article to ensure my substrate’s suitability.
When it comes to adhesives and leveling compounds, I prefer to use products with proven longevity, like **Custom Building Products’ LevelQuik RS** for self-leveling concrete. Its fast-setting properties and strong bond help create a stable base that resists shifting or cracking over time, ensuring a long-lasting finish. Proper mixing tools, such as a **powdered mortar mixer attachment** for my drill, help me achieve a homogeneous mix, which is critical for durability.
Looking ahead, advancements in technology will likely bring **smart leveling systems** that integrate sensors and IoT technology to detect small imperfections during installation. These innovations could drastically reduce manual error and improve precision. For now, I recommend mastering the use of existing tools, like laser levels and moisture meters, to elevate your flooring projects.
If you’re serious about maintaining long-term floor stability, I strongly advocate investing in a good laser level and moisture testing kit. These tools not only streamline your process but also safeguard against costly repairs down the line. For deeper insights into achieving flawless surfaces, visit the [precise floor leveling techniques](https://tiletrendshop.com/precise-floor-leveling-techniques-to-achieve-flawless-surfaces) guide. Don’t hesitate—try incorporating a laser level into your next project to see the difference it makes!
The Hardest Lessons About Flooring Fixes We Often Miss
One eye-opening lesson I encountered was realizing that not all squeaks require major overhaul—sometimes, patience and targeted fixes are enough. I once chased every creak assuming I needed to replace entire sections of my floor, only to find that a few strategic injections of lubricant and resecured boards solved the problem. This taught me to assess each squeak carefully before jumping into destructive measures.
Another insight was understanding that moisture plays a silent but critical role. Overlooking subfloor moisture levels led to recurring squeaks and, worse, the risk of long-term damage. Investing in a good moisture meter and ensuring proper drying prevented future issues, saving me time and money.
The third realization was the importance of choosing quality tools aligned with the specific fix. From laser levels to fine-tipped injection syringes, having the right equipment made all the difference in achieving professional results without breaking the bank.
My Essential Toolkit for Flooring Peace of Mind
- Laser Level: The Bosch GLL 55 Self-Leveling Cross-Line Laser—trustworthy accuracy that guarantees even surfaces and straight lines, essential for both leveling and precise screw placement.
- Moisture Meter: The InClaTools Pinless Moisture Meter—vital for verifying the substrate’s dryness, ensuring your fix lasts and prevents future warping or squeaking.
- Injection Tools: A fine-tipped syringe—perfect for delivering silicone-based lubricants into tight spots without mess or hassle.
- Durable Screws: Self-tapping, countersink-grade screws—solidly securing loose boards without damaging your finish or causing additional squeaks.
Having these tools at your disposal empowers you to approach squeak repairs confidently. Remember, each flooring situation is unique, and combining the right techniques with quality tools can make all the difference. For step-by-step guidance on achieving flawless surface leveling, don’t forget to visit this detailed resource.
Keep Moving Forward with Confidence
Repairing squeaky floors doesn’t have to be intimidating. With the right knowledge, tools, and a patient mindset, you can turn a seemingly daunting problem into an opportunity to deepen your craftsmanship and enhance your home’s longevity. Embrace the challenge, and soon you’ll be enjoying a quiet, beautiful floor that stands the test of time. Are you ready to tackle your flooring squeaks with newfound confidence? Share your experiences or questions below—I’d love to hear how you’re transforming your space!