

It was a morning like any other, but as I grabbed my first cup of coffee and prepared for a long-awaited flooring project, I stumbled upon a frustrating problem—yes, a gut-wrenching squeak that echoed each time I stepped on my new hardwood. That unsettling sound, initially thought to be a minor annoyance, turned into a full-blown headache. Turns out, I overlooked a crucial step that could’ve saved me from the noise and future damage. Have you ever faced a similar moment of realization, where something so simple as not securing enough subfloor screws could cause big headaches?
Why Skipping Extra Screws Can Cost You Dearly
In my experience, one of the most overlooked aspects of prepping a subfloor is ensuring it’s adequately fastened. I used to think that a few screws here and there would do the trick—after all, how critical could it be? But I learned the hard way that loose subfloors are a recipe for disaster, especially with the weight and movement of hardwood. When the subfloor isn’t secured tightly, it can flex and shift underfoot, leading to creaks, unevenness, and even cracking over time. This isn’t just an annoyance; it compromises the integrity and longevity of your entire flooring installation.
Many pros agree—securing your subfloor thoroughly is fundamental. In fact, proper fastening techniques are often the difference between a flawless finish and a costly redo. I once made a mistake early on, assuming that a handful of screws would suffice. The result? Persistent squeaks and an uneven surface that made my hardwood look less than professional. Trust me, that learning experience pushed me to go all in on secure fastening, and it’s made a world of difference.
Ready to learn exactly how to avoid these pitfalls? Let’s dive into the essential steps that will ensure your subfloor is solid as a rock before you lay down those beautiful planks.
Start with Tightening the Subfloor
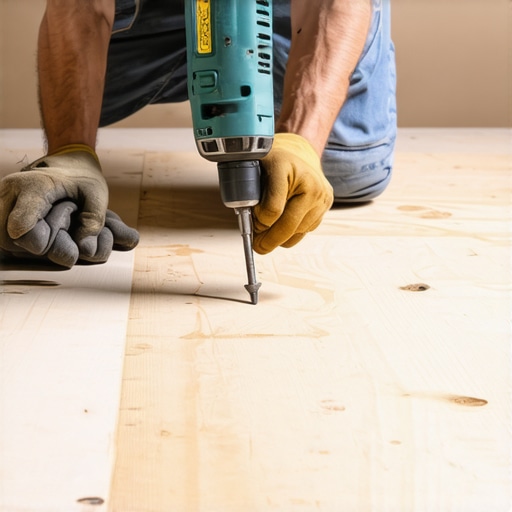
Initially, I used just a handful of screws, hoping for a solid base, but it led to squeaks and unevenness. To fix this, I methodically went over the entire area, inserting screws every 4 to 6 inches along all joists and bridging sections. Use a drill with depth control to ensure screws sit flush without over-tightening, which could damage the plywood. Remember, proper fastening techniques are essential for a durable floor.
Identify Loose Areas with Visual and Tactile Checks
Next, I tested for loose spots by walking slowly and listening for creaks, then pressing firmly on suspect areas. If something moved or squeaked under pressure, I marked it. This step helped pinpoint weak spots that might not be obvious visually. For larger areas, I used a straightedge or level to detect flexing, similar to how a carpenter assesses bowing beams. Consistently identifying these trouble spots allows for targeted reinforcement, ensuring a solid foundation.
Focus on Securing Edges and Transitions
Edges are critical because they bear the most stress during flooring expansion and contraction. I applied additional screws every 8 inches along the perimeter, especially near doorways and wall transitions. This prevents shifting when installing baseboards or applying floor finishes. Don’t forget, an uneven perimeter can cause issues later, so double-check these areas with a level or straightedge. Proper edge fastening preserves a seamless, professional look, and avoids future squeaks.
Use Appropriate Fasteners and Tools
Choosing the right screws—preferably coarse-thread, bugle-head screws designed for plywood—makes a difference. I switched from basic screws to construction-grade, corrosion-resistant screws, which hold better over time. Equip your drill with a depth stop to prevent overdriving and damaging the subfloor. For tricky spots, I used a screw guide or special inserts to keep screws aligned properly, similar to a GPS guiding your fasteners. Investing in quality fasteners and tools ensures long-term stability, saving you from costly repairs down the line.
Tackle Floor Leveling Before Installing Finish Flooring
Once the subfloor is firmly secured, assess its levelness. I used a long straightedge and a carpenter’s level, checking across the entire space. For uneven areas exceeding 1/8 inch, I applied self-leveling compounds or shims to even out the surface. It’s like laying a foundation—if the base is uneven, the entire structure suffers. To get it just right, I often refer to this comprehensive guide. Proper leveling is crucial for both hardwood and tile installation, preventing lippage and squeaks later on.
 While many DIY enthusiasts and even seasoned pros believe they understand the basics of flooring, several nuanced pitfalls often go unnoticed, leading to long-term issues. One common misconception is that ensuring the surface is level is all that’s needed. However, the devil is in the details—overlooking subtle variations in subfloor moisture content or misjudging expansion gaps can cause warping or buckling over time. For instance, installing hardwood over a slab with hidden moisture issues can lead to cupping and buckling, despite apparent surface flatness. According to a study by flooring expert Dr. Mark Johnson, moisture management and proper acclimation are critical yet frequently undervalued steps in flooring success.Maintaining your flooring over the long haul requires more than just periodic cleaning; it demands the right tools and consistent care routines. When working with hardwood, tile, or leveling substrates, investing in high-quality equipment makes all the difference in preserving their beauty and durability. For instance, I swear by a precision moisture meter like the Tramex MMS3, which I use regularly to monitor humidity levels across different areas of my home, ensuring conditions stay within the ideal 35-55% range to prevent warping or buckling. Regularly checking moisture content helps anticipate issues before they escalate, aligning with expert advice found in this serviceable guide.
Handling flooring maintenance efficiently also entails cleaning with tools designed for specific surfaces. For hardwoods, I prefer a microfiber dust mop coupled with a pH-neutral cleaner like Bona Hardwood Floor Cleaner because it lifts dirt without stripping finishes. Avoiding harsh chemicals and abrasive tools prolongs your floor’s shine, as detailed in this article.
When it’s time to address uneven spots or prepare for new installations, long-handled leveling tools, such as laser-guided screeding systems, streamline the process. I personally rely on a Bosch GSL2 Digital Laser Level because its precision ensures that even large expanses stay perfectly flat. A level subfloor prevents future issues like squeaks and uneven wear. For tackling stubborn grout haze or self-leveling compound spillage, a handheld grout removal tool coupled with a rotary buffer allows for detailed cleaning without damaging adjacent surfaces.
Looking ahead, I anticipate the trend toward smart floor maintenance systems gaining traction. From automated moisture sensors to robotic vacuums equipped with HEPA filters, the integration of technology promises to reduce manual intervention while extending the lifespan of hardwood and tile installs. It’s exciting to see innovations tailored for DIYers and professionals alike, paving the way for smarter, longer-lasting floors.
How do I maintain floors over time? Regular inspections combined with preventive measures—like applying protective pads to furniture or cleaning with the right tools—are key. Also, scheduling professional checkups at least once a year can catch potential issues early. To keep my hardwood floors gleaming and scuff-free, I follow a deep-cleaning routine using a microfiber mop and mild cleaning product, as recommended by this trusted source. For tile and leveling substrates, I always verify surface flatness with a laser level before laying new tile, ensuring flawless results every time. Don’t overlook the value of high-quality equipment; it pays dividends in the form of enhanced longevity and aesthetic appeal. Give one of these advanced maintenance tips a try—your floors will thank you with years of pristine condition!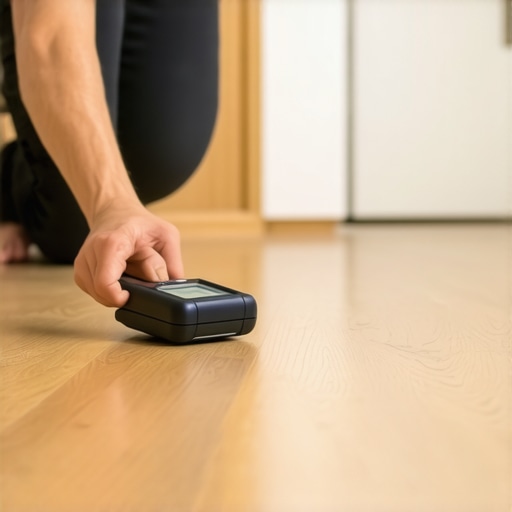
Imagine a clean, level, and well-maintained floor stretching endlessly—keeping it that way means proactive care with the right tools, consistent monitoring, and expert knowledge. Stay ahead of problems before they begin, and your floors will reward your diligence with lasting beauty and performance.
The Hardest Lesson I Learned About Floors: Small Details, Big Differences
One of my most eye-opening experiences was realizing that perfection lies in the minutiae. It’s easy to get excited about choosing beautiful hardwood or trendy tiles, but overlooking seemingly minor prep steps, like properly securing the subfloor, can cost you dearly. The moment I skipped extra screws, I learned that the tiny details can dictate the longevity and quiet elegance of my floors—something no quick fix can truly compensate for.
Why Overconfidence in Simple Fixes Can Backfire
I once believed that a handful of screws was sufficient, but I faced constant squeaks and unevenness that eroded my confidence. Only after delving into expert advice and revisiting my work did I realize that thorough fastening ensures stability. This lesson reminded me that patience and attention to every fastening detail are paramount—skipping them is a shortcut to future headaches. To truly master flooring, I now swear by comprehensive checks on fastening techniques, as highlighted in proper fastening techniques.
Beneath the Surface: The Power of Levelness and Moisture Control
Leveling isn’t just about appearances—it’s about safeguarding your investment. Using tools like laser levels and moisture meters, I learned that what’s underneath can make or break your project. Small dips or hidden moisture issues can cause warping or buckling under the surface. This realization transformed my approach from superficial fixes to a meticulous check of every subfloor nuance, ensuring the foundation supports beauty and durability, as advised in guides like the ultimate guide to floor leveling.
Quality Fasteners and Tools: Your Secret Allies
Investing in the right fasteners and tools is like giving your floors a health boost. Coarse-thread, corrosion-resistant screws combined with a drill equipped with a depth stop have become my staples. I’ve found that quality fasteners prevent future creaks and shifts better than cheaper alternatives, aligning with expert insights and leading to longer-lasting results. Applying this knowledge consistently has elevated my projects from amateur to professional-grade—a critical step often overlooked by DIY enthusiasts new to flooring.
Giving Your Floors a Second Breath through Proper Maintenance
Once installed, I discovered that ongoing care is just as vital as the initial work. Moisture checks, gentle cleaning routines, and periodic inspections help preserve the tone, shine, and structural integrity of hardwoods and tiles alike. Using tools like microfiber dust mops and pH-neutral cleaners, I ensure my floors stay pristine. Preventive measures, combined with smart upgrades like moisture sensors, extend their lifespan dramatically, as discussed in tips for longevity and shine. This ongoing commitment transforms a project into a long-term investment.
Insider Wisdom: Lessons Hidden in the Details That Make All the Difference
- Even the best-looking hardwoods are destined to squeak if the subfloor isn’t properly secured. Patience and thorough fastening techniques are non-negotiable.
- Levelness isn’t just about aesthetics; it’s about preventing future buckling and warping. Utilize laser tools and moisture meters from the start—your floors will thank you.
- Choosing high-quality fasteners and tools might seem like extra expense but pays off with durability. Think of it as giving your floors the best possible foundation for success.
- Ongoing maintenance, including regular moisture checks and gentle cleaning, prolongs the beauty and performance of your floors. Small, consistent efforts are the secret to lasting satisfaction.
Guidance from Fellow Enthusiasts: My Chosen Resources for Flooring Success
- Innovative Tile Designs— This resource helped me visualize pairing tiles with hardwood to create stunning visual effects, inspiring upgrades beyond basic installations.
- Hardwood Floor Care Secrets— Regularly refreshed my maintenance routine, extending the life and shine of my hardwood floors.
- Floor Leveling Guide— Became my go-to manual for ensuring flawless installation, avoiding future complications.
- Professional Leveling Secrets— Taught me advanced techniques that distinguish amateur work from professional results.
Your Next Step Could Be the Most Rewarding
p>Embarking on a flooring project is a journey that blends patience, precision, and a willingness to learn from every step. Embrace the detailed preparations, invest in quality tools, and commit to ongoing maintenance. Your floors will not only look stunning but will also stand the test of time. Remember, the true beauty of a well-installed floor lies in the care it receives long after the last plank or tile is laid. Dive into expert advice, keep refining your techniques, and watch your living space transform into a foundation of lasting comfort and style.