
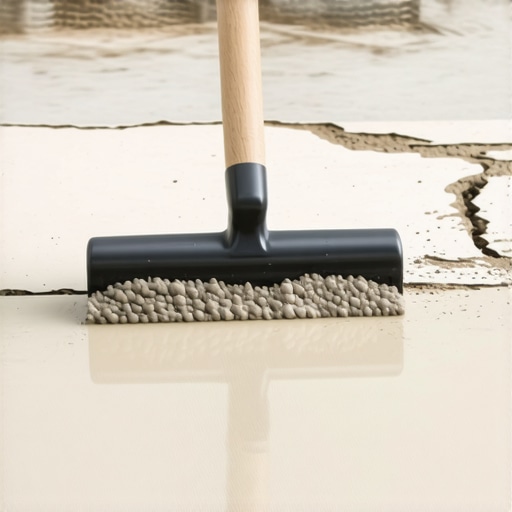
I vividly remember the moment I watched my freshly poured floor leveler crack and chip just hours after application. That sinking feeling—I had followed all the instructions, or so I thought, only to find that my perfect surface was now a frustrating mosaic of brittle patches. If you’ve ever faced similar issues during your flooring projects, you know how disheartening it can be. The culprit often boils down to a detail that’s easy to overlook: the speed of your mixing paddle.
Why Paddle Speed Makes or Breaks Your Floor Leveler
Understanding the importance of paddle speed isn’t just technical mumbo jumbo—it’s a real game-changer. When you mix your floor leveling compound too fast, you’re introducing excess air, which weakens the structure and causes it to become brittle once dried. Conversely, mixing too slowly can result in inadequate blending, leaving stubborn lumps that compromise your floor’s flatness. Striking the right balance ensures a smooth, durable finish that stands the test of time.
Doing my early DIY projects without paying attention to paddle speed was a mistake I made all too often. I remember once cranking the mixer to high speed out of impatience, only to end up with air pockets and cracks in the dried layer. It felt like throwing money and effort into a black hole. That experience was a wake-up call, prompting me to research the precise paddle speeds recommended by professionals.
According to flooring expert insights, mixing at medium to slow speeds minimizes air entrapment and ensures proper chemical bonding. It’s fascinating how a seemingly minor setting can drastically influence the outcome of your application. If you’re curious about perfecting your technique, check out [this comprehensive guide on floor leveling](https://tiletrendshop.com/the-ultimate-guide-to-floor-leveling-for-a-perfect-finish) that covers all related nuances.
In the sections ahead, we’ll troubleshoot common paddle speed issues, learn about the precise mixing techniques, and even explore how to avoid pitfalls that lead to brittle, cracked floors. So, if you’re tired of wasting time and resources fixing the fallout from incorrect paddle speeds, you’re in the right place. Have you already faced problems with brittle floor levelers? Drop your stories in the comments; I’d love to hear your experiences and help you troubleshoot. Now, let’s get our hands dirty—figuratively speaking—and master the art of perfect mixing.
Set Up Your Mixer Properly Before You Start
Begin by attaching your mixing paddle securely to your drill or mixer, ensuring it’s at the correct height according to the manufacturer’s instructions. I once hurried this step and ended up with uneven mixing, which caused inconsistencies in the floor layer. Precise setup lets you control the paddle speed accurately.
Start Slowly to Incorporate the Components
Kick off the mixing at a slow to medium speed—think of it like stirring thick pancake batter gently. This initial phase helps prevent air from being whipped into the compound, which can cause cracks. When I first did this, I was tempted to speed up immediately and ended with a frothy mess that took longer to settle.
Watch for Proper Consistency
Monitor the mixture as it combines. It should be smooth and homogenous, not runny or clumpy. If it’s too thick, slightly increase the speed; if it’s frothy or bubbly, dial back immediately. Achieving the right consistency depends on maintaining moderate paddle speed.
Maintain a Steady, Moderate Speed During Mixing
Keep the paddle at a consistent medium to slow speed—around 50-60% of the maximum setting. I once got impatient and cranked the mixer to full speed to finish quicker, but it introduced air pockets that later manifested as cracks. Steady, moderate speed results in a dense, air-free mix that bonds well.
Incorporate Additives Gently
If your mixture requires additives like bonding agents or fillers, add them gradually while the paddle runs at the same steady speed. This prevents sudden splashes or uneven blending. I learned this the hard way when adding small amounts too quickly—clumps formed, reducing adhesion quality.
Use a Timer to Avoid Overmixing
Mix for the recommended duration, typically 2-5 minutes, maintaining a consistent speed. Overmixing can incorporate excess air or cause the compounds to thicken excessively. I once kept blending beyond the advised time, which softened the mixture and worsened the final surface.
Adjust Speed When Lifting or Pouring
When pouring or spreading the mixture onto the floor, briefly increase the mixer speed to avoid dragging the material or causing it to stick to the paddle. Once spread, reduce speed to prevent agitation that introduces air bubbles. I found that quick adjustments made the work neater and more efficient.
Practice and Observe Results
The best way to master paddle speed control is through practice. Start with small batches, note the speed settings, and observe the dried surface. I kept a journal in my early projects, which helped me remember optimal speeds and techniques—leading to consistently smooth, crack-free floors.
Always remember, a well-mixed floor leveler that avoids excessive air entrapment is your foundation for a perfect finish. For detailed insights on mixing techniques, check out this guide on achieving flawless surfaces. Don’t rush the process; patience and control in paddle speed make all the difference.
Many homeowners and DIY enthusiasts believe that choosing the right tile or hardwood is enough for a successful installation, but that’s only half the story. One common myth is that as long as your subfloor is flat, the rest is straightforward. In reality, subtle issues like moisture content, subfloor composition, and even seasonal humidity fluctuations can sabotage your project. Overlooking these nuances often leads to cracks, buckling, or premature wear—problems that most people attribute to poor material quality rather than installation techniques. For instance, improper sealing of the subfloor can trap moisture, causing hardwood planks to warp over time, even in high-quality flooring. Understanding these hidden details is crucial for long-term durability, and professionals often spend extra time preparing the foundation before laying down the actual surface. Check out this guide on flooring installation tips to learn how meticulous prep work can elevate your results beyond mere material selection.Maintaining your flooring tools and understanding proper long-term upkeep are crucial to ensuring your floors stay beautiful and durable over the years. One of my top recommendations is investing in a high-quality power mixer with variable speed control, such as the Makita XFD07Z. I personally prefer this model because its precise speed adjustment allows me to mix floor leveling compounds at the optimal rate, minimizing air entrapment and ensuring a smooth finish. Using the right tool here is vital; a cheap, underpowered drill or a single-speed mixer often results in inconsistent mixes, which can compromise your entire flooring project.
Another essential piece of equipment is a laser level. While traditional bubble levels work fine for small projects, a laser level like the Bosch GLL 55 provides unparalleled accuracy for large-scale installations. I use this every time I lay tiles or hardwood planks because it helps maintain perfectly straight lines over long distances, preventing crooked or uneven floors that can diminish the overall look and longevity.
Proper cleaning tools also play a significant role in long-term maintenance. I swear by microfiber dust mops for daily cleaning; they trap dust and debris effectively without scratching the finish. For deeper cleaning, I use a pH-neutral hardwood floor cleaner combined with a machine-specific mop, which prolongs the shine and prevents buildup.
When it comes to sealers and finish maintenance, I recommend using a high-quality, breathable polyurethane designed specifically for your flooring type. Regularly reapplying a thin coat based on manufacturer recommendations keeps your floors protected against scratches, moisture, and wear. Remember, proper maintenance extends the lifespan of your investments—neglecting simple routines can lead to costly repairs down the line.
Looking ahead, I predict that smart, connected tools will become standard for flooring installation and maintenance. Devices capable of monitoring humidity levels, adhesive curing progress, and real-time moisture content could revolutionize how we approach long-term flooring care.
How do I keep my tools functioning properly over time? Regular calibration and cleaning are essential. For example, I always clean my laser level lenses with isopropyl alcohol after each project to prevent dust from impairing accuracy. Similarly, lubricating mixer gears and inspecting power cords keeps equipment running smoothly. Implementing a scheduled maintenance routine not only extends the life of your tools but also saves you money and frustration.
If you’re serious about achieving flawless, durable floors, I encourage you to try upgrading to a variable speed mixer and a precision laser level. These are investments that pay off by delivering professional results every time. For more advanced techniques and pro secrets, check out this comprehensive guide.
The Subtle Shift That Changed My Approach to Floor Leveling
One of the most eye-opening experiences I had was realizing how deeply the quality of my paddle speed influenced the longevity and beauty of my floors. I used to think that mixing was just a step in the process, but I learned that it’s a delicate dance between technique and patience. Achieving that flawless, crack-free surface isn’t about rushing — it’s about trusting in the process and paying attention to minute details.
Tools and Resources That Elevate My Craft
Over the years, I’ve curated a toolbox that’s essential for anyone serious about perfecting their flooring projects. My go-to power mixer, like the Makita XFD07Z, allows me to fine-tune the speed to prevent air entrapment while ensuring thorough blending. The Bosch GLL 55 laser level keeps me aligned with precision, which is critical for both aesthetics and structural integrity. For maintenance, microfiber dust mops and high-quality sealers like breathable polyurethanes are indispensable. These tools and resources have transformed my work, and I recommend investing in high-grade equipment to achieve professional results.
Embracing the Journey Toward Mastery
Taking the leap from novice to expert in flooring installation involves embracing a mindset of continuous learning. The moment I realized that patience, control, and attention to detail trump speed was pivotal. It’s tempting to rush, especially when working on a tight schedule, but shortcuts often lead to costly mistakes. Instead, focus on understanding each step deeply—like maintaining steady paddle speeds—and you’ll find that mastery becomes second nature. Your floors will thank you in the form of lasting beauty and durability. If you’re eager to deepen your skills, check out this comprehensive guide on professional floor leveling—it’s packed with insights that can make a real difference.