
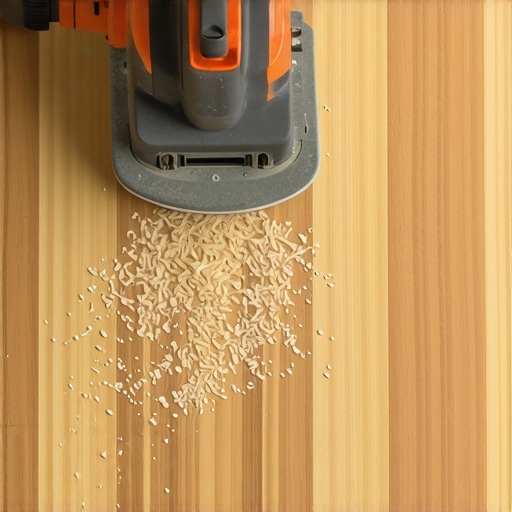
I remember the first time I tried sanding my hardwood floors. Expecting a smooth, mirror-like finish, I ended up with swirl marks that looked like someone had run a cheese grater across the surface. Frustrated doesn’t even begin to cover it. It was a lightbulb moment for me—realizing that achieving a flawless finish isn’t just about brute force or the right sandpaper, but about technique, patience, and understanding the nuances of sanding. If you’ve ever felt like your hardwood floors look more like abstract art than a polished surface, you’re not alone.
Why Smooth Sanding Matters More Than You Think
Hardwood floors are a significant investment in your home’s aesthetic and value. But if not sanded properly, even minor swirl marks can become glaring eyesores. They not only detract from the overall look but can also complicate finishing and sealing processes. The good news? With the right approach, you can sand your floors like a pro, leaving behind a flawless surface that showcases the beauty of your wood.
But here’s the catch: many DIY enthusiasts underestimate the importance of technique over equipment. Early in my journey, I made the mistake of focusing solely on the grit of the sandpaper, neglecting the importance of the sanding motion and tool handling. That mistake cost me time, effort, and a lot of unnecessary frustration. Building on that experience, I dove deep into techniques that have transformed my results—techniques I want to share with you. If you want to avoid common pitfalls and achieve professional-looking results, keep reading.
For a comprehensive understanding of the underlying principles, I recommend checking out [the ultimate guide to floor leveling](https://tiletrendshop.com/the-ultimate-guide-to-floor-leveling-for-a-perfect-finish). It offers insights that are invaluable, especially when prepping a floor for finishing.
Let’s get into the practical steps that will help you sand hardwood floors without leaving behind swirl marks—and make your space look stunning.
Start with the Right Equipment and Preparation
Use an orbital sander with adjustable speed settings. Before beginning, remove all furniture and rugs, and thoroughly clean the floor to eliminate debris that can cause uneven sanding. I once overlooked this step, and dirt particles scratched my freshly sanded surface, emphasizing the importance of a clean, dust-free environment.
Use the Correct Grit Progression
Begin with a coarse grit like 60 or 80 to remove old finish and surface imperfections. Progressively switch to finer grits—120, 150, and finally 220—to refine the surface. Skipping grits can leave scratches or swirl marks. I recall rushing through grit changes, which resulted in noticeable swirl marks that took extra effort to correct.
Maintain Consistent, Overlapping Passes
Keep the sander moving in even, overlapping passes—about one-third of the pad width—to avoid gouges and uneven spots. Think of it like painting a wall; consistent motion prevents streaks. I once hesitated in my arm movement, leading to uneven patches that marred the finish.
Master the Sanding Technique
Keep the Sander Flat
Always hold the sander flat on the floor to distribute pressure evenly. Tilting causes uneven sanding and swirl marks. During my last project, I noticed swirl marks near corners, which I later attributed to tilting the sander unnecessarily.
Adjust the Pressure and Speed
Apply gentle, even pressure—you shouldn’t push down hard. Use a slower orbital speed for finer grit polishing. I learned the hard way that excessive pressure creates deep scratches and swirl marks, while too little pressure prolongs sanding.
Pay Attention to Edges and Corners
Use a hand sander or detail sander for edges and tight corners to match the main sander’s finish. I once neglected edges, resulting in a noticeable difference that required re-sanding. Incorporate those detailed areas early, not as an afterthought.
Practice and Patience
Take your time. Rushing increases the likelihood of swirl marks. I vividly remember rushing my first sanding attempt—by the end, I had swirl marks that took hours to fix. Patience is key to achieving a smooth, flawless finish.
Follow Up with Light Sanding
After the main sanding, lightly go over the surface with a fine grit (220) to remove any remaining swirl marks or scratches. This final step ensures a polished surface ready for finishing. Remember, this polishing phase makes a visible difference in final appearance.
If you want a detailed, step-by-step breakdown tailored specifically for your project, I recommend exploring precise floor leveling techniques. Mastering these fundamental steps will set a solid foundation before applying finishes or sealants, elevating your entire hardwood flooring project.
When it comes to floor leveling and installation, many assume that following basic instructions guarantees a flawless result. However, this oversight often leads to costly mistakes, especially among experienced DIYers who believe expertise shields them from common pitfalls. Let’s dissect some of the most misunderstood aspects and reveal the nuances that separate professional results from amateur attempts.
One prevalent myth is that a perfectly flat subfloor is all you need. In reality, minor imperfections—like subtle slopes or small humps—can significantly impact the final outcome, especially with large-format tiles or high-end hardwoods. Relying solely on a visual inspection can deceive you; instead, employing precise testing methods, such as a laser level or a water level, ensures comprehensive assessment. For advanced techniques, explore the [ultimate guide to floor leveling](https://tiletrendshop.com/the-ultimate-guide-to-floor-leveling-for-a-perfect-finish), which emphasizes that understanding your subfloor’s specific condition is critical to choosing the right leveling approach.
Another mistake many make is underestimating moisture levels. High moisture content in concrete slabs or wooden substructures can cause tiles or hardwoods to crack, warp, or delaminate prematurely. An often overlooked detail is that moisture impacts not just curing but also long-term stability, which is why professional installers perform moisture tests—like calcium chloride or in-situ probe tests—before proceeding. Recognizing this nuance can save you from rework and extensive repairs.
But what about adhesive selection? It’s tempting to choose any available product for convenience, yet the wrong adhesive can lead to adhesive failure, especially in variable temperature or humidity conditions. Adhesives are formulated for specific substrates and environments; a mismatch can compromise bond strength. For advanced installers, understanding the chemical composition and compatibility is vital, and consulting manufacturer data sheets or experts can be the difference between success and failure.
### How can you ensure your floor leveling holds over time?
A common question among seasoned DIYers and pros alike. The answer lies in mastering the preparation process—ensuring substrate compatibility, proper mixing ratios, and application thickness—before even pouring or installing. An overlooked step is the importance of curing times; rushing the process, especially in humid or cold conditions, can result in uneven settling or shrinkage. For a thorough walkthrough, check out [professional secrets for perfect flooring](https://tiletrendshop.com/mastering-floor-leveling-pro-secrets-for-perfect-installations), emphasizing that patience and adherence to best practices are your best allies.
**Warns and Warnings:** A critical trap to avoid is over-relying on self-leveling compounds alone. While they are effective in correcting minor irregularities, they are not a substitute for addressing structural issues or significant slopes. Using them blindly can mask deeper problems, which may manifest later as cracking or tipping. Remember, the goal is a robust foundation. If in doubt, consult the detailed procedures documented in [advanced leveling techniques](https://tiletrendshop.com/precise-floor-leveling-techniques-to-achieve-flawless-surfaces), ensuring your base is solid before covering it up.
In summary, mastery over floor leveling and installation involves more than following a checklist. It requires a nuanced understanding of substrate behavior, environmental factors, and material science. Recognizing these hidden complexities can elevate your project from good to exceptional. Have you ever fallen into this trap? Let me know in the comments, and share your experiences or questions below.When it comes to keeping your flooring installation pristine and durable over time, investing in the right tools and adopting consistent maintenance routines are essential. Professional-grade equipment makes a significant difference, especially when addressing challenges like uneven surfaces or tile lippage. For instance, a high-precision laser level not only speeds up the leveling process but also ensures unparalleled accuracy, reducing the need for frequent touch-ups later. I personally rely on a Bosch GLL3-330C laser level because its self-leveling feature saves me from painstaking manual measurements, and its visibility in bright conditions is a game-changer.
Beyond initial installation, regular maintenance prolongs the lifespan of your floors. To keep hardwood floors shining, a combination of gentle cleaning and periodic refinishing is crucial. I recommend using a microfiber mop combined with pH-neutral cleaners—these prevent scratches and maintain the finish’s integrity. For tiles, a small, handheld steam cleaner provides effective deep cleaning without harsh chemicals that could damage grout or surface sealants.
How do I maintain flooring systems over time?
Consistency is key. Establish a routine that includes dusting daily, avoiding excess water or harsh chemicals, and addressing spills immediately. Additionally, inspecting your floors twice a year for signs of wear or damage allows you to catch issues early and perform targeted repairs—like re-sealing grout or refinishing worn areas. When managing tile, replacing damaged grout or resealing high-traffic zones can prevent larger issues from developing, keeping your investment looking fresh.
For complex issues such as persistent unevenness or lippage, professional tools like a floor leveler with a spiked roller attachment can help flatten out imperfections, ensuring seamless tiles and preventing trip hazards. I suggest checking out this guide for advanced leveling techniques that can make your routine touch-ups more effective. Incorporating high-quality tools and adhering to a maintenance schedule will save you time, money, and frustration in the long run. Remember, a well-maintained floor not only looks stunning but also enhances your home’s value and safety. Take the initiative today—try using a microfiber mop for your next cleaning session and see the difference it makes in preserving your floors’ beauty and integrity.
Lessons That Changed My Perspective on Floor Perfection
One of my most surprising revelations was realizing that precision in mixing and application holds more weight than the choice of leveling compound itself. I once rushed the mixing process, thinking a quick stir would suffice, but it resulted in uneven settling and minor dips in my floor. Since then, I’ve learned that patience during preparation prevents major headaches later. Another lightbulb moment was understanding that environmental conditions—like temperature and humidity—can dramatically influence drying times and adhesion, so I now always check the forecast before starting a leveling job. Lastly, I discovered that subtle tools, such as a high-quality gauge rake or a notch trowel suited to your tile size, can make all the difference in creating a perfectly even surface. These insights have elevated my projects from satisfactory to superb, and I hope they do the same for you.