
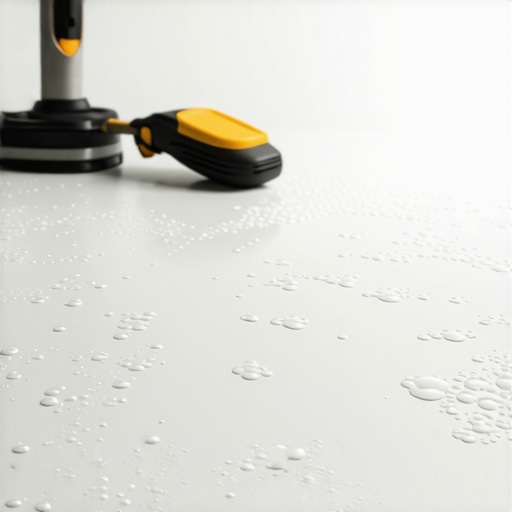
Have you ever stepped onto your freshly installed flooring only to be greeted by an unexpected bubbly surface? That sensation of unevenness, like walking on a soda bubble, is downright frustrating. I remember my own battle with this issue during a big home renovation—thinking I had done everything right, only to be met with a floor that looked more like a fizzy drink than a smooth surface. It was a lightbulb moment that made me realize just how crucial proper primer application and preparation are.
The Sticky Truth About Bubbling Floors
When I first started my DIY flooring project, I was eager and confident. But soon, I noticed a strange bubbling effect after applying the primer and laying down the new layer. It was disheartening. I learned that the culprit was often improper primer application, trapped moisture, or incompatible products. According to experts, improper surface preparation can cause primer to form bubbles as trapped air or moisture expand beneath the surface, especially in humid conditions or if the primer isn’t suited for your specific flooring type.
Thankfully, understanding the root causes gave me a clearer path forward. Today, I’m here to share that knowledge so you don’t have to go through the same hassle. We’ll tackle how to identify the main issues, select the right primer, and ensure your flooring stays smooth and bubble-free from start to finish.
Is Primer Bubbling Really That Big of a Deal?
Honestly, yes. If bubbles are left unaddressed, they can lead to peeling, uneven wear, or even future damage that might mean costly repairs down the line. To avoid this mess, it’s essential to spot the problems early and fix them properly. For a deeper dive into common pitfalls and how to avoid them, check out our guide on flooring installation mistakes to avoid.
If you’ve faced a bubbling mess or want to ensure your next project goes smoothly, stay tuned. I’ll walk you through simple yet effective strategies that I’ve personally tested and refined. Step by step, we’ll turn that fizzy frustration into a flawless finish, so your floors can truly shine.
Prep the Surface meticulously
Start by clearing the area completely. Remove all debris, dust, and loose material using a vacuum and a damp cloth. For concrete or wooden subfloors, ensure the surface is dry and free of moisture. I once ignored the importance of drying my basement slab thoroughly, which caused primer bubbles to form later; a lesson learned the hard way. Think of the subfloor as a canvas—crisp and clean before any paint application.
Select the Right Primer and Material Compatibility
Choose a primer compatible with your flooring type—whether it’s hardwood, tile, or concrete. Read manufacturer instructions carefully. During my DIY project, I mistakenly used a primer designed for drywall on my concrete slab, resulting in bubbling. This mistake highlighted how critical product compatibility is. For example, epoxy primers work well under tiles but may cause issues beneath wood flooring if not suited properly. For more insights, visit our tile and hardwood pairing guide.
Master the Primer Application Technique
Apply a thin, even coat using a high-quality roller or brush. Avoid over-application, which can trap air and cause bubbles. I remember applying a thick layer with a cheap roller, which led to air pockets forming under the primer—making my subsequent flooring installation bumpy. Think of applying primer like spreading butter on toast—spread evenly for smoothness. Wait the recommended drying time before proceeding, usually at least 24 hours, or as specified. This patience prevents moisture entrapment—an often-overlooked cause of bubbling.
Control Environmental Factors During Installation
Maintain low humidity and consistent temperature in your workspace. Use dehumidifiers if necessary, especially in humid climates. During my first attempt, I didn’t account for humidity, which made the primer react unpredictably. Ventilate the area well and avoid working in direct sunlight or during rain, as fluctuations can cause moisture expansion underneath the primer, leading to bubbles. For more detailed tips on levelness and surface prep, check out our floor leveling techniques.
Allow Complete Drying Before Flooring Installation
Never rush the drying process. Verify dryness by lightly pressing the surface; it should feel firm and dry. I once hurried my project to save time and noticed small bubbles appearing after installation—an indication of residual moisture. Proper drying creates a strong, bondable surface, preventing future bubbling or peeling. Remember, patience here saves a lot of trouble down the line. For professional secrets on achieving flawless floors, visit pro-level flooring tips.
Inspect and Address Any Bubbles Immediately
If bubbles appear during drying, prick them with a needle and smooth the area with a roller. I had a small bubble form, and I used a pin to deflate it, then rolled over it carefully. Doing this early prevents larger problems later. Once fully dry, if bubbles persist, you may need to sand lightly and reapply a thin primer coat, ensuring a stable, bubble-free base. Proper preparation and patience are your best allies for a perfect finish.
Many homeowners believe that laying hardwood floors or tiles is straightforward—simply follow the instructions, and you’ll get a flawless finish. However, this oversimplification often leads to costly mistakes and frustration. One of the biggest misconceptions is that proper leveling is just about using self-leveling compounds, but in reality, understanding the substrate’s nuances, moisture levels, and long-term stability is crucial for lasting results. For example, trusting a quick fix without checking for underlying issues like subfloor movement or moisture infiltration can cause subtle shifts that ruin the appearance over time. Experts emphasize the importance of pre-installation testing, such as moisture measurements, to avoid pitfalls that aren’t immediately visible. Avoid the trap of assuming that an even surface is enough; precision in measuring and preparing the subfloor enhances the adhesion and durability of your flooring. Curious about how to identify subtle irregularities and correct them before installation? Review our detailed guide on floor leveling techniques for a perfect finish.
Another common myth is that all flooring adhesives and primers are interchangeable. In my experience, using incompatible products can cause bubbling, peeling, or even structural damage. The key is to know your specific materials and manufacturer recommendations—skipping this step may seem harmless but can lead to hidden issues that surface years later. Advanced installers conduct compatibility tests and environmental assessments to prevent these costly mistakes. Have you ever fallen into this trap? Let me know in the comments!
Let’s talk about the nuances of tile installation that often go unnoticed. Many believe that the grouting process is just about filling gaps, but the real mastery involves joint size, grout type, and curing conditions. For instance, using standard cementitious grout in a high-moisture area without sealing can result in staining and cracking. Proper curing time and environmental control during installation directly influence the longevity of the tile surface, yet this step is frequently rushed or overlooked. If you’re aiming for a professional-level finish, understanding these details is essential. Find out how to avoid common pitfalls with our tile installation tips that save time and money.
To truly master flooring installations, it’s vital to grasp that the smallest detail can make the difference between a mediocre job and a masterpiece. Regular inspections during the process, understanding material compatibilities, and precise surface preparation are your allies in achieving flawless results. Remember, patience and knowledge trump shortcuts. So, are you ready to challenge the myths and unveil the hidden nuances of your next project? Dive deeper into professional secrets and elevate your DIY game with our comprehensive resources.
Maintaining Your Floors for the Long Haul
To keep your hardwood and tile floors looking pristine and performing reliably over the years, investing in the right tools and adopting consistent maintenance routines is essential. I personally rely on a combination of specialized equipment and smart techniques that not only prolong the lifespan of your flooring but also make repairs and touch-ups more manageable. Regular upkeep doesn’t have to be daunting; with a few key tools at your disposal, you can ensure your floors remain stunning and functional through the seasons.
Essential Equipment for Flooring Care
First, a high-quality microfiber dust mop is indispensable. Unlike standard brooms, microfiber traps dust and pet hair without scratching delicate surfaces, which is crucial for hardwood and glazed tiles. I use a microfiber swivel head mop, which allows me to reach into corners and around furniture easily. For deep cleaning, a steam mop with adjustable steam control works wonders on tile, but I avoid using it excessively on hardwoods to prevent moisture damage. Always opt for models with variable steam settings and a detachable, washable pad for hygiene and cost-effectiveness.
Second, a soft-bristled brush or a nylon scrub pad is perfect for grout lines. Over time, grout can accumulate grime, negatively impacting your tiled surface’s appearance. I recommend a dedicated grout cleaning brush with ergonomic grip, paired with a gentle cleaning solution—like a mix of baking soda and vinegar—to rejuvenate the grout and prevent staining. For stubborn stains, a small handheld pneumatic detail sander fitted with fine padding can help in leveling out surface inconsistencies, especially on worn hardwood areas. Proper tools make routine cleaning more effective and prevent issues from developing into costly repairs.
Software and Scheduling for Optimal Care
Beyond physical tools, leveraging digital tools like flooring maintenance apps can keep track of cleaning schedules, product usage, and upcoming repairs. I personally bookmark reliable guides and official resource pages to stay updated on best practices and emerging trends. For example, regularly reviewing articles like hardwood floor care secrets helps me adjust my routine as my floors age. Consistent scheduling using apps or calendar reminders ensures you don’t skip essential steps like applying protective finishes or inspecting for minor damages.
How do I keep floors looking their best over time?
Protective mats at entry points and furniture pads are small investments that pay off by preventing scratches and gouges. Additionally, controlling indoor humidity with a dehumidifier during humid months or a humidifier in dry seasons maintains the ideal moisture balance—crucial for preventing warping or gaps. Regularly applying a thin layer of high-quality finish or polish enhances durability and shine, especially after cleaning. A recommended approach is using a product tailored for your specific flooring type—whether it’s a water-based polyurethane for hardwoods or a penetrating tile sealer—and following manufacturer instructions meticulously.
Looking ahead, I believe smart cleaning devices equipped with AI sensors will revolutionize floor maintenance by automatically detecting worn spots or areas needing deep cleaning, reducing manual effort. Embracing such innovations could be the next step in proactive floor care.
Try This Advanced Tip for Better Maintenance
If you want to elevate your floor upkeep, consider using a microfiber mop paired with a pH-neutral cleaning solution designed specifically for your flooring material. This combo ensures gentle yet effective cleaning without stripping protective coatings, extending the intervals between refinishing sessions. For detailed product recommendations and expert guidance, visit our flooring maintenance tips. Implementing this habit will keep your floors shining and resilient for years to come, making your investment truly worthwhile.
Don’t forget—regular inspections, timely touch-ups, and proper cleaning tools are the backbone of successful long-term flooring performance. Keep your floors alive and beautiful by staying proactive with your maintenance routines!
What I Wish I Knew Before Laying My Floors
One of the most valuable lessons I learned was that patience during surface preparation is non-negotiable. Rushing through subfloor cleaning or ignoring moisture testing led to bubbles that took days to fix, costing me time and money. Now, I always double-check moisture levels and take the time to perfect each step—it’s worth it.
Another insight was the importance of product compatibility. Using a primer designed for drywall on a concrete slab seemed harmless at first, but it caused bubbling issues. Reading manufacturer instructions and selecting the precise primer for my surface made a huge difference, reinforcing that expertise in materials is a game-changer.
Interestingly, environmental control during installation cannot be underestimated. During a humid season, I neglected to monitor humidity, which resulted in moisture expansion under the primer. Ventilation and climate regulation have since become integral parts of my process, ensuring a smooth, bubble-free finish.
Lastly, I discovered the significance of inspecting every inch as you go. Small bubbles or imperfections can escalate if left unaddressed. Puncturing bubbles early and smoothing the surface saved me from major repairs later, illustrating that attention to detail is the true secret to professional results.
Tools and Resources That Changed My Approach
For anyone serious about flawless flooring, I highly recommend investing in a high-quality microfiber dust mop. It keeps dust and debris off delicate surfaces and reduces scratches—trust me, it’s a small upgrade with big rewards. Additionally, a grout cleaning brush became my best friend for maintaining tiled surfaces, keeping grout lines pristine and preventing staining.
If you’re looking to deepen your knowledge, the book Transform Your Space with Expert Hardwood Floor & Tile Combinations offers insights into innovative design pairing, inspiring new ideas beyond installation basics. Also, the articles on common installation mistakes and step-by-step installation provide step-wise guidance that complements practical experience.
Your Floor Journey Starts Today
Remember, every project is a chance to learn and refine your skills. Embrace the challenge with confidence, knowing that meticulous preparation, the right tools, and patience are your best allies. Whether you’re enhancing your home or embarking on a new room, the effort you invest now will pay dividends in beauty and durability for years to come. So, are you ready to take the first step toward flooring mastery? Your dream space is just an informed decision away.
Have you ever encountered a surprising issue during your flooring project? Share your experiences or questions below—I’d love to hear how you’re making your space perfect!