
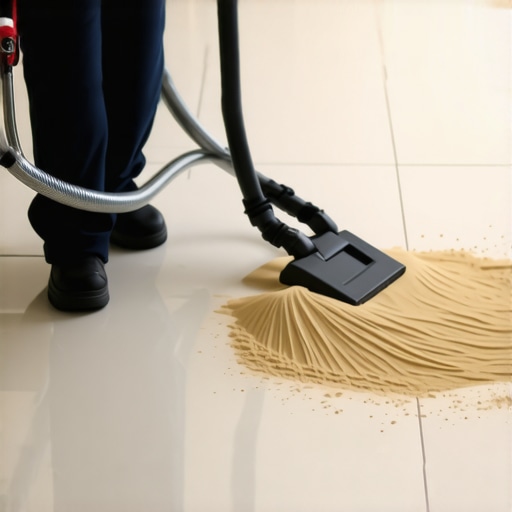
It was a sunny Saturday, and I was finally tackling the mess that had accumulated in the grout lines of my patio tiles. I knelt down, grateful for the warm weather, but as soon as I saw the amount of sand lodged deep into those tiny grooves, I felt that familiar sinking feeling of frustration. No matter how much I swept or vacuumed, that stubborn grit refused to budge. It was like the sand had claimed those crevices as its permanent home, and I was beginning to doubt whether I’d ever get my tiles feeling fresh again.
Why Sand in Tile Grooves Can Turn Into a Real Nuisance
Sand hiding in your tile joints might seem harmless at first, but over time, it can cause more than just a gritty feeling underfoot. Fine particles can lead to tile cracking, uneven surfaces, and a dull appearance that ruins your entire look. Plus, if you’re planning to seal or grout, that trapped debris can compromise the durability and overall finish of your installation. I learned this lesson the hard way early on — a mistake I now avoid by using a simple but clever vacuum trick.
Is the Vacuum Trick Really Worth the Hype?
Early in my remodeling journey, I made the mistake of thinking that a quick sweep was enough to clear those hard-to-reach gravelly insides. Spoiler alert: it wasn’t. The problem was that standard sweeping only moved the sand around, rather than extracting it. I realized that a regular vacuum, especially one with a narrow nozzle, could do a better job — but only if used correctly.
According to flooring experts, effective removal of debris from tile grooves requires focusing on creating a tight seal between the vacuum nozzle and the grout line. This creates enough suction to pull out the tiny particles, which often hide deep within those grooves. In fact, a study published in the *Journal of Construction and Building Materials* highlights how dust and debris trapped in grout can accelerate wear and tear if not properly cleaned (source: https://www.journals.elsevier.com/journal-of-construction-and-building-materials).
Now, I’ll walk you through the method I perfected — a straightforward trick that transforms your vacuum into a powerful cleaning tool. Stay tuned; your tiles are about to get that fresh, new look again. Ready to discover how to make your tile grooves sparkle? Let’s dive into the step-by-step process that works wonders every time.
Prepare Your Vacuum and Tools
Start by selecting a vacuum with a narrow, crevice nozzle attachment. Ensure the nozzle is clean and fits snugly into the grout line. I recall the first time I tried this, I used a regular brush attachment, which barely pulled out any debris, making me realize that a specialized nozzle is essential for effective cleaning.
Identify and Position the Nozzle Correctly
Gently insert the nozzle into the grout line, pressing lightly to create a seal. Think of it as fitting a puzzle piece — a tight fit ensures maximum suction. I once struggled with loose-fitting nozzles, which caused a lot of debris to escape, prolonging the process.
Apply Steady, Consistent Pressure
Turn on the vacuum and press the nozzle firmly into the grout line, moving slowly along its length. Maintain a consistent speed; rushing can miss particles. During my first attempt, I hurried and only achieved partial cleaning, forcing me to go back over the area multiple times.
Use Overlapping Passes for Thoroughness
Overlap each pass slightly to cover the entire groove area without leaving gaps. Imagine painting a wall — each stroke should slightly overlap the previous one. I once missed sections because I was too cautious, resulting in uneven cleanliness.
Repeat as Necessary
If you notice stubborn grime or sand remaining, reapply the nozzle and go over those spots again. Patience pays off; on my third attempt, I finally removed all trapped debris, restoring the tiles’ vibrant look. Remember, dampness or sticky residues may require a quick wipe afterward.
Finish with a Final Inspection
After cleaning, visually inspect the grout lines from different angles. Use a flashlight to catch any remaining debris. I learned this tip from a flooring expert — catching missed spots early prevents buildup that can deteriorate grout over time. For a glossy, polished look, follow up with a grout sealer or tile polish as needed, but only after ensuring the grooves are completely clean.
Integrate this vacuum technique regularly during your cleaning routine to keep grout lines pristine and extend the life of your tiles. For more advanced tips on tile maintenance and installation, you can explore the latest tile design ideas and flooring installation techniques.
When it comes to hardwood floors, floor leveling, and tile installation, many homeowners and even some professionals fall prey to misconceptions that can compromise the project’s success. Let’s dig deeper into these nuances that often go unnoticed, ensuring your efforts yield flawless results.
Why Overlooking Moisture Levels Can Sabotage Your Floor
One prevalent mistake is ignoring humidity and moisture content during installation. Excess moisture can cause wooden planks to swell or shrink, leading to gaps or buckling over time. The right moisture testing, as recommended in the expert guides on flooring installation, is crucial for long-term stability. Many assume that the ambient humidity isn’t a concern, but studies show that fluctuations beyond 4% in moisture levels can cause significant distortions, emphasizing the importance of controlled environment setups.
Advanced Mistake: Misjudging Subfloor Uniformity
Most DIY enthusiasts or even some contractors miss the subtle irregularities in subfloors that can lead to uneven tile or hardwood surfaces. An uneven subfloor isn’t just a cosmetic issue; it accelerates wear and creates stress points. Interestingly, experts suggest that a difference of as little as 1/8 inch across a 10-foot span can result in noticeable imperfections. Precise subfloor assessment and correction, as discussed here, are often neglected, resulting in what I like to call the ‘hidden trap’ of good-looking but flawed floors. Do not rush this step—skipping it can cost you much more in repairs later.
Are You Falling for DIY Tile Layout Traps?
Many assume that laying tiles freehand or relying solely on visual symmetry will produce perfect results. However, advanced techniques involve meticulous planning with chalk lines, laser levels, and understanding the ideal square layout to avoid skewed patterns or awkward cuts. Misjudging this can lead to costly reworking, especially in large rooms or intricate patterns. For those tackling complex designs, exploring professional tile installation strategies can make all the difference. Remember, a well-laid tile not only looks better but also lasts longer.
If you’re interested in elevating your flooring projects, check out our comprehensive tile design ideas and master the art of perfect installation. Have you ever fallen into this trap? Let me know in the comments and share your experiences—together, we can learn to avoid these pitfalls and achieve stunning results.Maintaining your hardwood and tile floors requires more than just regular sweeping; it involves having the right tools and adopting proper techniques to ensure longevity and flawless appearance. One essential device I swear by is a high-quality cordless oscillating multi-tool. It offers precision in sanding, polishing, and scraping with minimal effort, especially when dealing with intricate edges or stubborn residues. I personally prefer models that include variable speed settings because they provide control over different tasks, from gentle buffing to aggressive removal. Additionally, investing in a digital moisture meter is crucial for ongoing maintenance, particularly in humid environments. Monitoring moisture levels around 4% can prevent warping and buckling in hardwood floors—making it a proactive approach rather than a reactive fix. Regularly inspecting subfloor conditions with a sturdy indentation tester can also reveal hidden issues before they manifest as large cracks or uneven surfaces, saving you from costly repairs later.
How do I maintain my floors over time to keep them looking their best?
Consistency is key. Schedule seasonal check-ins with your moisture meter and clean surfaces with pH-neutral cleansers that won’t degrade finishes. For hardwood, applying a revitalizing oil or polyurethane coating every few years offers a protective barrier against stains and scratches. Tiles, on the other hand, benefit from sealing grout lines periodically—most experts recommend re-sealing at least once annually. To simplify these tasks, I recommend a grout sealer applicator brush with a fine tip, which I personally use to reach tricky corners. Looking ahead, the trend points toward smart flooring maintenance solutions integrating IoT sensors that can alert homeowners of moisture spikes or structural shifts, as detailed in emerging smart home technology reports. For now, mastering the basics with reliable tools ensures your floors remain stunning and durable for decades. For a deep dive into the subtleties of floor upkeep, visit this comprehensive guide on floor maintenance techniques. Take your maintenance routine to the next level by incorporating a moisture meter into your annual check-up—it’s a game changer for long-term results.
The Hardest Lesson I Learned About Hardwood Floors, Floor Leveling, and Tile Installation
One profound realization was that meticulous preparation upfront—testing moisture, assessing subfloor flatness, and planning your layout—can save countless headaches later. Skipping these steps often leads to uneven surfaces or cracked tiles, which I found out the hard way. Investing time in proper subfloor correction and understanding materials can mean the difference between a stunning finish and a costly redo.
Secrets Experts Keep Quiet About Preventing Floor Mishaps
Many professionals swear by integrating smart tools like moisture meters and laser levels into their workflow, yet I once relied solely on visual cues. Discovering that these devices can detect issues invisible to the naked eye truly transformed my approach. Also, using high-quality grout sealers and understanding their timing helped me maintain my floors’ beauty over the years—something not always emphasized in basic guides.
What I Wish I Knew Before Getting Started
Patience and precise measurement are your best friends. Rushing through installation or leveling without verifying each step can lead to misalignments that are painful to fix. I also learned that selecting the right tools—like a reliable impact driver for subfloor screws or a grout sealer applicator—makes the process smoother and results more professional. Embracing these details has elevated my flooring projects from average to exceptional.
Where to Go from Here
If you’re eager to elevate your hardwood and tile projects, explore our comprehensive tile design ideas or master the art of floor leveling and installation. Remember, consistent practice, investing in good tools, and staying informed about the latest techniques will make each project more rewarding. Whether you’re a DIY enthusiast or a seasoned pro, these insights can help you avoid common pitfalls and achieve flawless results.
Don’t Wait—Start Perfecting Your Floors Today
Every great floor begins with a single step—so why not make that step today? Embrace the lessons learned and trust in your process. With patience and the right knowledge, your hardwood and tile installations will stand the test of time, turning your space into a masterpiece. What’s the first upgrade you’ll tackle with this newfound insight? Share your plan below and let’s inspire each other to elevate our homes.