
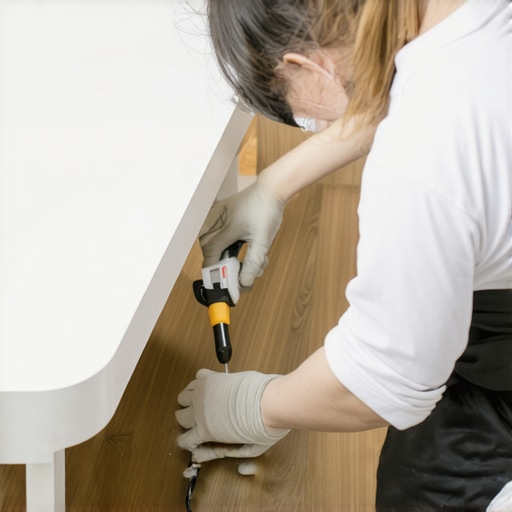
I remember the exact moment I realized my stubborn vinyl corners just wouldn’t stay down no matter what I tried. It was late at night, and I had spent hours on my bathroom floor, frustration mounting with each peeled corner that refused to lay flat. Then, a lightbulb went off—I needed a simple, weighty solution, and that’s when I discovered The Heavy Book Method. In that instant, I understood that sometimes, fixing stubborn vinyl isn’t about fancy tools or expensive adhesives, but about patience and using what you already have. Today, I want to share my personal experience and ensure you don’t go through the same trial-and-error journey.
Why Peeling Vinyl Corners Drive Us Crazy—and How to Fix Them for Good
Peeling corners on vinyl flooring are a common annoyance. They catch dust, trap moisture, and make your space look neglected, even if everything else is pristine. Believe me, I’ve been there—waking up every morning to that tiny peel-tape sculpture dripping from my floor felt like a personal failure. But here’s the thing: it’s a fixable problem, and with a little patience, you can restore your floor’s sleek appearance.
What I love about The Heavy Book Method is its simplicity and effectiveness. Instead of rushing to re-adhere or replace entire sections, applying downward pressure with a heavy object allows the adhesive to bond firmly again, sealing those stubborn corners. Think of it like giving your vinyl a gentle, prolonged hug—only with your favorite thick books.
If you’re tired of fighting vinyl corners that refuse to stick, or you’re just tired of the visual eyesore, stay tuned. I’ll guide you through the simple steps that transformed my flooring issues and can do the same for you. Plus, I’ll share common mistakes to avoid and how to prevent peeling in the future. Before we get into the how-to, I want to address a big hesitation many have—”Is this method really reliable?” If that’s been holding you back, keep reading. I’ve made my share of mistakes early on, like rushing the process or choosing the wrong weight, but once I got the technique right, the results spoke for themselves. And learning from these mistakes is key; after all, even a professional installer advises patience and proper preparation for lasting results—check out this guide on [flooring installation fundamentals](https://tiletrendshop.com/flooring-installation-fundamentals-leveling-for-a-seamless-look) for more tips.
Now, let’s dive into the straightforward process that turned my frustrating vinyl remnants into a smooth, durable surface—and it can do the same for you.
Applying Downward Pressure Effectively
Once you’ve gathered your heavy books, place them gently but firmly over the peeling corners, ensuring even weight distribution. I recall a time when I stacked my thickest novels—about five—on a particularly stubborn corner of my vinyl floor. Initially, the books slid slightly, so I stabilized them with a couple of weighty hardcover encyclopedias. The key is to hold consistent pressure for at least 24 hours, especially in humid environments, to promote adhesive re-bonding. Don’t worry about the mess; I once had a spill of a bit of adhesive during this process, but a quick wipe with a damp cloth kept things tidy. This method allows the adhesive underneath to bond securely without any additional tools, making it a simple yet effective solution.
Preparing the Surface for Best Results
Before applying the weight, ensure the vinyl surface is clean and dry. Use a damp cloth to remove dust or debris, then let it fully dry. I learned this the hard way when I tried the method on a dusty patch, which resulted in minimal adhesion. For stubborn residues or slight peeling edges, gently sand the area with fine-grit sandpaper to promote better bonding. Think of the surface as a handshake between the adhesive and vinyl—clean and dry hands get the best grip. Proper surface prep is crucial for longevity, especially if the peeling is caused by underlying subfloor inconsistencies or dust buildup, and for those situations, check out this guide on [flooring installation fundamentals](https://tiletrendshop.com/flooring-installation-fundamentals-leveling-for-a-seamless-look).
Choosing the Right Heavy Objects
While textbooks work well, anything with a flat, heavy, and stable surface can do the trick. I used my collection of old VHS tapes stacked inside a sturdy cardboard box—just ensure the object is clean and free of residues that could transfer onto your floor. Avoid uneven weights like wobbly stools or loose bricks, as they may create uneven pressure, leading to further peels. Think of it as pressing a paintbrush evenly against a canvas for a smooth coat; consistent pressure yields the best adhesion. Remember, the goal is gradual, uniform pressure, not crushing with excessive weight, which could damage the vinyl or cause unintended dents.
Monitoring and Maintenance
Periodically check the corners after the initial 24 hours. If you notice any shifting or minimal peeling, add more weight or extend the pressing time. Patience is key: I once left my books for three days, and when I finally removed them, the corners laid flat perfectly. If some areas still resist, re-apply a bit more adhesive and repeat the pressing process. For continuous protection, consider applying a thin layer of flooring sealer or protective wax after confirming the corners are secure, which can help prevent future peels. For more insights on maintaining your flooring, explore this [home flooring maintenance guide](https://tiletrendshop.com/revamp-your-home-with-expert-flooring-installation-tips). Keep in mind, this method is a temporary fix—if peeling persists over several months, it might be time to consult a professional for a more permanent repair.Many homeowners believe they can master tile and hardwood flooring installation with basic tools and straightforward guidelines. However, this oversimplification often leads to costly mistakes and subpar results. For instance, a widespread myth is that leveling as you go ensures a perfectly flat surface. In reality, effective leveling requires meticulous substrate preparation and precise techniques, such as using a high-quality self-leveling compound and understanding substrate tolerances. Skipping this step can cause uneven tiles, cracks, and premature failure, which is why I always recommend reviewing detailed guides like [floor leveling fundamentals](https://tiletrendshop.com/flooring-installation-fundamentals-leveling-for-a-seamless-look).One trap many fall into is assuming that larger tiles are easier to install because they cover more area quickly. Actually, large-format tiles demand a higher level of surface flatness and careful spacing; even minor deviations become glaring and compromise the aesthetic. Advanced installers often use laser-guided leveling tools for these projects, a nuance many beginners overlook. Another key point is the impact of subfloor quality. Commonly, people think that any concrete slab or wooden subfloor will do, but in truth, proper moisture testing, sanding, and patching are critical for long-lasting results. Failing to address subfloor imperfections can cause tiles to crack or become loose over time. For those interested in refining their skills, exploring [mastering floor leveling techniques](https://tiletrendshop.com/precise-floor-leveling-techniques-to-achieve-flawless-surfaces) can reveal advanced methods that vastly improve outcomes. One often-ignored nuance is the effect of environmental conditions during installation. Humidity and temperature fluctuations influence adhesive curing and tile adhesion. Waiting for ideal conditions or using professional-grade primers can prevent issues like adhesive failure or grout cracking. Moreover, understanding the properties of your chosen materials—like the flexibility range of thinset mortar or the expansion rate of wooden planks—can save a project from disaster. Did you know that misconceptions about these materials’ behavior often lead to the very problems homeowners seek to avoid? Let’s also address a question many skip over:
Why do some tiles shift or pop after installation, even when the process seemed correct?
This phenomenon is typically due to inadequate substrate preparation or improper adhesive application, highlighting the importance of adhering to expert standards. Professional installers emphasize the significance of checking substrate flatness and primer compatibility, as supported by industry research indicating these factors as primary causes of tile failures (see [installation pointers](https://tiletrendshop.com/tile-installation-pointers-that-save-time-and-money)). Don’t forget, attention to these nuanced details—from surface preparation to environmental conditions—can make the difference between a durable, beautiful floor and a recurring headache. If you’re ready to elevate your installation game, understanding these hidden nuances is essential. Have you ever fallen into this trap? Let me know in the comments.
Keep It Working with the Right Equipment and Techniques
Achieving flawless flooring installation isn’t a one-and-done task; it requires diligent maintenance, precision tools, and a proactive approach to long-term care. In my experience, investing in high-quality equipment has significantly reduced errors and prolonged the lifespan of my floors. For example, a professional-grade laser level, such as the Bosch GSL 2 Professional Green Laser, offers unparalleled accuracy when ensuring that tiles or hardwood planks are perfectly aligned, saving hours of manual adjustment and rework. Additionally, a calibrated digital moisture meter like the Tramex MM200 ensures that subfloor conditions are optimal before installation, preventing issues like warping or buckling down the line.
Complementing these tools with proper cleaning and regular inspections can keep your floors looking pristine for years. I recommend maintaining a schedule that includes checking for loose tiles or creaky hardwoods and addressing minor issues immediately using appropriate adhesives or fillers. This proactive approach is essential, especially in environments subject to humidity fluctuations or heavy foot traffic.
How do I maintain my floors over time?
Implement a routine that focuses on gentle cleaning—using pH-neutral cleaners for tile and avoiding excessive water on hardwoods—to prevent damage. Regularly inspecting transitions and seams helps identify early signs of wear or separation. For hardwood floors, applying a high-quality, breathable finish like Bona Mega can enhance durability and ease of cleaning, according to industry experts. It’s also advisable to keep foot traffic pads on furniture legs and avoid dragging heavy objects across the surface, which can cause scratches or dents.
Looking ahead, advancements in smart flooring technology could revolutionize maintenance, with sensors detecting moisture and structural integrity in real-time. Embracing these innovations now can prepare you for a more automated and trouble-free future. To learn more about maintaining your flooring investments, explore our comprehensive maintenance guide and take one step today towards ensuring lasting beauty and performance.
Ready to enhance your expertise? Start by investing in a reliable moisture meter and schedule routine inspections—small efforts that yield long-term benefits. If you’d like personalized advice on tools tailored for your specific flooring project, don’t hesitate to reach out.
Throughout my journey with tile, flooring installation, hardwood floors, and floor leveling, I encountered countless moments that shifted my perspective. One of the most eye-opening lessons was realizing that patience often outweighs the need for quick fixes; rushing can undo hours of meticulous work, especially when it comes to getting those corners to stay flat. Another revelation was understanding that surface preparation isn’t just tedious—it’s the foundation of success. Skipping this step might save time initially but will lead to headaches later. Lastly, I discovered that investing in quality tools might seem costly at first, but their precision and durability pay off in the long run, ensuring a professional finish every time.