
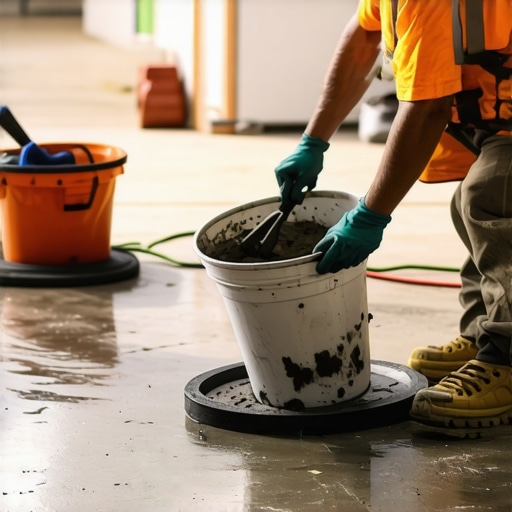
I remember the exact moment I realized my new tile project was going awry—standing in my living room, peering down at a floor that looked more like a rollercoaster than a smooth surface. No matter how carefully I laid out the tiles, I couldn’t get rid of that annoying lurch. That lightbulb moment? It hit me that I’d overlooked a simple but powerful principle: the Five-Gallon Bucket Rule for Even Floor Leveling. Since then, my approach to flooring has transformed, saving me time, money, and frustration.
Why Floor Leveling Can Make or Break Your Home Upgrade
Whether you’re planning to lay new tile, hardwood, or vinyl, a perfectly leveled surface is non-negotiable. I’ve learned this lesson the hard way—skipping proper leveling results in cracked tiles, squeaky floors, and that persistent uneven feeling. That’s why I want to share a method I’ve perfected over years: the Five-Gallon Bucket Rule. It’s a game-changer for DIY enthusiasts and seasoned pros alike. Achieving a flawless, even floor isn’t just about aesthetics; it’s about structural integrity and safety. You wouldn’t want to build a sandcastle on a wobbly base, right? Well, floors are no different.
But before we get into the nitty-gritty, I’ll admit I made my fair share of mistakes early on—like over-relying on quick-setting products or ignoring the importance of substrate preparation. Trust me, neglecting these details can turn your project into a costly nightmare. For an eye-opening overview of common pitfalls, be sure to check out this helpful guide.
Ask yourself: Have I faced trouble achieving a truly flat surface without expensive equipment or professional help? If so, you’re not alone. That’s exactly what prompted me to seek a better way—and that’s when I stumbled upon the Five-Gallon Bucket Rule. Now, I’ll walk you through how this simple technique can revolutionize your floor prep, ensuring your installation not only looks great but lasts for years.
Prepare Your Surface Like a Pro
Start by thoroughly cleaning your subfloor, removing dust, debris, and any uneven spots. I once forgot this step, and my tiles cracked within months. To visualize, think of leveling as smoothing out a warped piece of wood before installing new veneer—if it’s rough, everything else will be affected. Use a long straightedge or a level to identify high and low spots. Mark these areas clearly with chalk.
Gather Your Basic Tools and Materials
In addition to your standard flooring tools, assemble five 5-gallon buckets, a concrete mixer or drill with a mixing paddle, and the self-leveling compound recommended for your project. Using five buckets allows you to prepare multiple batches of leveling material simultaneously, saving time. I learned this when I was rushing to finish and realized I ran out of time waiting for the first batch to set — having prepared in advance kept my project on schedule.
Mix the Self-Leveling Compound Correctly
Follow the manufacturer’s instructions precisely. Pour the recommended water into a bucket, then gradually add the leveling compound while mixing thoroughly. Think of it like making pancake batter—consistency should be smooth, not thick or runny. I once added too much water, and the mixture separated, causing uneven curing. To prevent this, mix in small batches ahead of time, using another bucket, so you always have a ready supply for topping up or corrections.
Pour and Level Using the Bucket Technique
Pour the mixture directly from a bucket onto the low spots. To emulate the Five-Gallon Bucket Rule, fill the area with enough material to slightly overfill the uneven zone, then use a trowel or a straightedge to spread it out evenly. Moving quickly is essential; I once delayed, and the compound started setting, leaving ridges. Work in small sections, pouring from buckets held at waist level to minimize spillage, and use a long float or squeegee to smooth everything out, working toward your high points to achieve flushness.
Ensure Proper Curing and Final Checks
Let the compound cure as per the instructions—usually at least 24 hours. Avoid walking on the freshly leveled surface during this time. After curing, verify the levelness with a straightedge or laser level. In a recent project, I found a slight dip despite careful pouring; I used additional mix and feathered the edges to blend seamlessly, which prevented future tile cracking.
Remember, the key to perfect floors is patience and precision at each step. This method, inspired by my own troubleshooting and refined through experience, ensures a reliable base, making your subsequent flooring installation smoother and more durable. For more tips on achieving flawless floor leveling before tile laying, visit this comprehensive guide.
When it comes to tile, hardwood, and flooring installation, many DIY enthusiasts and even some professionals fall prey to misconceptions that can sabotage their projects. One pervasive myth is that a perfectly level subfloor is always necessary before installing tile. While a high level of flatness is ideal, minor deviations—up to 3/16 inch over 10 feet—are often acceptable without risking cracks or uneven flooring, according to industry standards. This nuance is crucial to avoid unnecessary demolition or over-preparation, which can inflate costs and extend timelines.
Does a perfectly flat substrate guarantee success, or are there other factors at play?
In reality, proper surface preparation, including patching low spots and securing loose areas, plays a more significant role than absolute leveling. Overlooking substrate stability in favor of perfection often leads to trap doors for cracks and adhesive failures. Expert sources, like the Ceramic Tile Education Foundation, emphasize that understanding your specific material’s tolerance for unevenness can save you from costly mistakes.
Another common misconception centers around hardwood flooring’s acclimation process. Many assume that just bringing wood indoors for a day or two suffices. However, wood reacts to humidity changes over weeks, not days. Failing to properly acclimate hardwood can result in warping, gaps, or buckling after installation. The importance of this nuanced step is often underestimated, leading to avoidable repair work. For comprehensive guidance, reviewing expert hardwood-finish strategies is invaluable.
When installing tile or hardwood, many believe that the more adhesive used, the better the bond. In truth, over-application can cause uneven adhesion, leading to hollow spots or tile lippage. Precision in applying mortar or thinset is a nuanced skill that separates amateur from pro. Using the right trowel not only ensures adequate coverage but also prevents excess, which can squeeze out and weaken the bond over time. For advanced techniques, see time- and money-saving tips.
What do seasoned installers understand about the hidden challenges of flooring projects?
They recognize that environmental conditions, like humidity and temperature, subtly influence curing times and materials’ behavior. Ignoring these factors is a recipe for failure, leading to issues like grout cracking or wood cupping even after meticulous installation. Incorporating a moisture barrier or acclimation period tailored to your environment can spell the difference between a lasting floor and costly remedial work. Studies from the National Wood Flooring Association reinforce this, highlighting the significance of climate control during installation. Remember, mastering the nuances in flooring isn’t just about following steps—it’s about understanding the science behind materials and methods. For detailed insights on avoiding fundamental mistakes, check out common pitfalls and how to prevent them.
Have you ever fallen into this trap? Let me know in the comments.
Keeping your flooring projects in tip-top shape requires more than just careful installation; it demands ongoing maintenance and the right set of tools to ensure durability and beauty over time. My personal approach involves investing in precise, professional-grade equipment and adopting routines that extend the life of your floors, whether they are tile, hardwood, or vinyl.
Invest in a Quality Laser Level for Accurate Alignment
For every flooring project I tackle, I rely heavily on a high-precision laser level. Unlike bubble levels or tape measures, laser levels provide consistent, long-range accuracy, especially vital in large rooms or when matching multiple tiles or planks. This tool minimizes errors, reduces material waste, and ensures straight lines—saving you hours of costly rework. As highlighted in this resource, precision in leveling is non-negotiable for a professional finish.
Use a Moisture Meter to Protect Hardwood Floors
One of the most overlooked aspects of hardwood maintenance is controlling moisture levels. I recommend using a digital moisture meter regularly to monitor the ambient humidity and the moisture content within your wood. This practice helps prevent expansion, contraction, and eventual cracking or cupping. As the expert advice suggests, proactive moisture management is essential for long-term hardwood health.
Routine Cleaning with Sublime Precision
Daily maintenance should include gentle, dust-free cleaning with tools designed specifically for your flooring type. I swear by microfiber mops and conditioned soft-bristled brushes for hardwoods, and damp, not wet, mops for tile. Using inappropriate tools can damage surface finishes or leave behind residue that dulls the appearance. Regularly clean tools and replace worn pads to avoid scratching or staining. This consistent care maintains the shine and structural integrity of your floors well into the future.
Future-Proof Your Floors with Protective Coatings
Looking ahead, I believe flooring maintenance will increasingly integrate smart coatings with protective properties that repair minor scratches and resist stains over time. Applying high-quality finishes like advanced polyurethane or ceramic coatings can significantly cut down on maintenance efforts. For hardwood, this guide recommends periodic topcoats to maintain luster and prevent wear.
How do I maintain my floors over the years?
Establishing a routine inspection schedule is crucial. Check for signs of damage or unevenness and address small issues before they escalate. Keep abrasive debris, like grit or sand, away from your surface with entry mats, and avoid aggressive cleaning agents that can strip finishes. Deep cleaning and reapplication of protective coatings as needed will preserve your floors for decades. Incorporate a moisture meter check during seasonal changes, especially if you live in humid or dry climates. Remember, a well-maintained floor is a long-term investment that pays off in beauty and safety.
For an in-depth look at professional maintenance routines, visit this resource. Try implementing a monthly moisture check or upgrading your cleaning tools with microfiber technology—small steps that make a big difference over time.
The Unspoken Truths That Changed My Flooring Journey
One of the most valuable lessons I learned was that patience truly is a virtue when it comes to floor leveling. Rushing the process, whether by skipping proper curing times or neglecting substrate prep, often led to costly mistakes down the line. Additionally, mastering the art of mixing self-leveling compounds—getting the right consistency—made a world of difference in achieving smooth, durable surfaces. I also discovered that investing in quality tools, like a precise laser level, could save hours of rework and frustration. Lastly, understanding environmental factors such as humidity and temperature isn’t just for pros; it’s essential for everyone aiming for a lasting finish.
My Secret Arsenal for Perfect Floors
If you’re serious about flooring, I recommend these tools and resources that have transformed my projects. First, a high-quality laser level from this trusted brand ensures straight lines and perfect alignment every time. Second, a reliable digital moisture meter from this guide helps monitor humidity levels, preventing hardwood warping. Third, for learning more advanced techniques, I highly suggest this comprehensive resource which covers everything from surface prep to finishing touches. Additionally, investing in quality underlayment and epoxy primers can give your floor an extra layer of durability and protection.
Your Floors Are Waiting for Your Next Move
Embarking on a flooring project can feel daunting, but with the right knowledge and tools, you’re already halfway there. Remember, the key to success lies in respecting each step—don’t rush the curing, and pay attention to environmental conditions. Whether you’re tackling tile, hardwood, or vinyl, embracing these lessons will turn your space into a beautiful, lasting haven. So, why not start your next flooring adventure today? Share your experiences or questions below—let’s build beautiful floors together!