
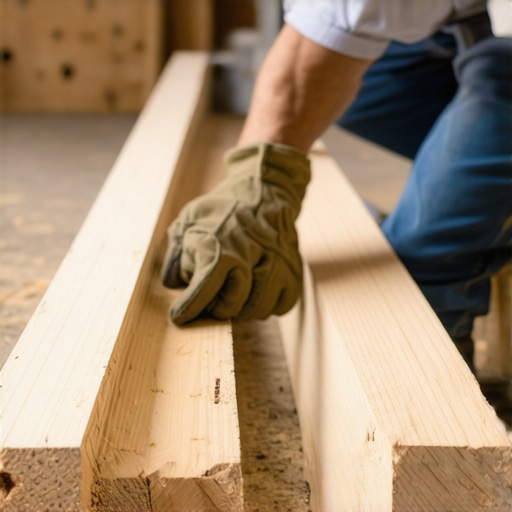
It was a gut-wrenching moment when I stepped into a client’s home and felt the uneven bounce of their floor—a clear sign of bouncy joists. That unexpected sag had me questioning my skills, especially after years of careful planning. But amid the frustration, I had a revelation that changed everything: the plywood shim trick. This simple yet effective method transformed my approach and saved countless projects from disaster.
The Honest Truth About Bouncy Joists and Why You Should Care
Bouncy floors are more than just a nuisance—they can cause long-term damage, make tile installation a nightmare, and diminish the value of your home. When joists aren’t perfectly aligned, it’s like trying to walk on a trampoline instead of solid ground. Early in my career, I made a critical mistake: underestimated the importance of properly leveling the joists before installing flooring. That oversight led to cracking tiles and stubborn squeaks, costing time and money.
But here’s the good news: with the right techniques, you can tackle bouncy joists head-on. The plywood shim trick is one such method that’s become my go-to. It’s a game-changer for creating a stable, level subfloor, especially when dealing with uneven joists. If you’ve faced similar problems—wobbly floors or uneven tile surfaces—you’re in the right place. I’ll guide you through the process so you can avoid costly mishaps and achieve a flawless finish.
Is the Plywood Shim Trick Actually Worth the Hype?
I get it—adding shims sounds simple, maybe even too simple to make a real difference. Early on, I worried I was just wasting time on a quick fix that wouldn’t last. Trust me, I once ignored this step and paid the price with uneven tiles and unhappy clients. Now, I swear by it, especially when combined with proper leveling techniques covered in [the ultimate guide to floor leveling](https://tiletrendshop.com/the-ultimate-guide-to-floor-leveling-for-a-perfect-finish). The key is understanding how to implement it correctly for lasting results.
If you’ve been hesitant to try this method, just ask yourself: How many times have I re-done a project because the floor was uneven? The plywood shim trick won’t fix every problem, but it can drastically reduce those issues when used properly. Let’s dive into the details so you can start turning bouncy floors into rock-solid foundations.
Prepare Your Workspace and Assess the Floor
Before diving into shim placement, clear the area and examine the subfloor for visible uneven spots and loose boards. Use a laser level or straightedge to identify high and low areas. Document these imperfections to plan your shim positioning effectively, much like a chess game where each move sets up a perfect endgame.
Measure and Mark the Problem Areas
Accurately measure the height differences across the floor using a digital level or a straight edge with a planer. Mark these areas with a chalk line or painter’s tape to visualize where shims are needed most. This step ensures you’re targeting the right spots and not wasting effort on minor discrepancies.
Cut and Prepare Plywood Shims
Cut plywood sheets into strips that fit snugly between the joists and the subfloor—preferably 2 to 4 inches wide. Sand the edges to prevent splinters and assess the thickness with a caliper. Typically, shims range from 1/8 to 1/2 inch, but tailor them to your specific needs. Think of these shims as the game’s pawns carefully repositioned to support the entire structure.
Install the Shims Strategically
Begin at the highest point in the room, placing shims under joists or uneven areas to elevate them to the desired height. Use a pneumatic nailer or screws to secure the plywood to the subfloor or joists, ensuring it doesn’t shift during the tile installation. If a joint dips, slide a shim underneath and fasten securely, transforming a wobbly surface into a stable platform—much like mechanics adjusting car suspensions for a smooth ride.
Check Levelness and Adjust
After installing shims, recheck the floor with a level or laser to confirm flatness. Walk over the surface, and look for any residual movement or squeaks. Add or remove shims as necessary; this process resembles tuning a musical instrument until every note sounds harmonious. For complex areas, use a self-leveling compound over the shims for an ultra-smooth finish.
Proceed to Flooring Installation
With a level and stable surface, follow the recommended practices outlined in this guide for final laying and finishing. Remember, precision now prevents costly issues later, especially with tile or hardwood floors where unevenness becomes glaringly obvious. This method saves time and money, transforming a problematic subfloor into a foundation that guarantees a stunning final result.
Many homeowners and even some professionals believe that floor leveling or tile installation is a straightforward process of laying materials and calling it a day, but the truth is far more nuanced. A common myth is that any uneven surface can simply be corrected with a self-leveling compound or a quick shim, but in my experience, this often leads to more problems down the line. Proper understanding of the subtle interaction between subfloor conditions and tile materials is crucial for long-lasting results. For instance, the misconception that large-format tiles are less affected by slight unevenness can be costly, because even minor imperfections become glaring with bigger tiles, leading to cracking or lippage. To truly master this craft, one must recognize that floor leveling isn’t just about smoothing out high and low spots—it’s about understanding the mechanical bond, moisture levels, and the importance of preparation, as outlined in expert guides such as this article.
A sneaky trap many fall into involves over-relying on adhesive alone to compensate for subfloor flaws without addressing the root causes. This shortcut might seem tempting but forms a fragile foundation prone to issues like de-bonding or tile cracking over time. Another aspect often overlooked is the importance of expansion joints—many think they’re just for aesthetics, yet they are vital in preventing stress fractures caused by temperature changes and substrate movement.
One question that advanced readers might ask is: How do moisture membranes interact with imperfect subfloors? In fact, research shows that the adhesion and longevity of waterproof membranes greatly depend on the substrate’s condition. A poorly prepared surface can compromise the membrane, leading to mold or water damage underneath the tile. For in-depth insights on avoiding these mistakes, you might find this guide invaluable.
Remember, achieving a perfectly flat and durable floor isn’t just about the initial installation; it’s about foreseeing potential pitfalls and understanding the complex interactions at play. Incorporating these advanced nuances into your process can save you time, money, and frustration, and ensure your tiles will stand the test of time. Have you ever fallen into this trap? Let me know in the comments.
Investing in the Right Equipment
Reliable tools are the backbone of quality flooring work. I personally swear by a high-grade laser level like the Bosch GLL 3-300 for its precision in ensuring perfect flatness across large areas. Unlike traditional bubble levels, laser levels project an accurate plane over expansive spaces, saving time and reducing human error. Additionally, a vibrating cement mixer ensures consistent mortar mixing, which is crucial for strong adhesion—trust me, mixing your thinset manually just won’t cut it for big projects. For subfloor preparation, a rotary hammer with chipping capabilities speeds up removal of old adhesive and concrete, providing a clean surface that adheres well and prevents future issues.
Utilizing Software for Precision Planning
Beyond hand tools, software like Custom Floor Plan Pro or even AutoCAD is invaluable for detailed layout planning. I use them to draft exact tile and plank placements, factoring in cuts and grout lines, which minimizes waste and surprises during installation. Advanced apps also allow for virtual visualization, helping clients appreciate the final look beforehand. This foresight streamlines workflow and shortens project timelines, which policies like these tips recommend for cost-effective results.
Maintaining Your Tools to Ensure Longevity
Regular maintenance extends the life of your equipment. Clearing debris from saw blades, lubricating motor parts, and checking calibration ensure optimal performance. Synthetic lubricants are preferable—they don’t attract dust and grime like oils do. I also advocate for storing tools in climate-controlled environments; fluctuations in humidity can warp or rust components, leading to inaccuracies. Sharpening blades periodically prevents chipped cuts, especially with delicate tiles like porcelain, which can shatter if the blade is dull. Remember, well-maintained tools produce cleaner cuts, reducing grout and tile waste, ultimately saving money and time—aligning with the long-term focus of durable installations.
How Do I Keep My Flooring Techniques in Top Shape Over Time?
Consistent review of your methods and ongoing training are key. Attend workshops or watch expert tutorials—these provide advanced insights. Regularly inspecting completed projects helps identify potential issues before they escalate. I recommend setting up a maintenance schedule for tools, including cleaning after each use and periodic calibration checks. Staying current with emerging technologies like self-leveling underlayments or innovative tile adhesives can dramatically improve results. Predictively, as materials and techniques evolve, integrating smart tools and predictive maintenance will become standard, ensuring your work remains competitive and efficient.
What steps will you take today to level up your tool game and maintenance routines?
Try implementing one advanced tip—perhaps investing in a laser level or establishing a tool maintenance schedule. Small upgrades now can lead to significant improvements in project quality and longevity. Remember, your selection and care of tools directly impact the durability of your installations. For ongoing support and expert advice, don’t hesitate to reach out. Keeping your equipment in prime condition is the secret to delivering professional, long-lasting results that clients will love, and that stand the test of time.
Lessons from the Trenches: Overcoming Unexpected Floor Challenges
One of my most surprising lessons came when I underestimated how much unevenness could impact the final look of a tiled floor. I once skipped detailed measurements, thinking a quick shim would suffice, only to end up with cracked tiles and unhappy clients. Now, I understand that meticulous assessment and patience in the preparatory stages are crucial—what seems minor can be major in the installation process. Embracing this mindset has saved me time and resources and deepened my respect for every step involved in proper floor leveling.
The Right Tools That Changed My Approach to Flooring
Investing in high-quality laser levels like the Bosch GLL 3-300 and a reliable vibrating cement mixer transformed my workflow. These tools provide precision and consistency that manual methods simply can’t match. Trusting in well-calibrated equipment minimizes errors and ensures a level surface, which is the foundation for flawless tile installation. If you’re serious about elevating your craftsmanship, aligning your toolkit with your ambitions is a game-changer—check out these expert guidelines for more insights.
Believing in a Holistic Approach to Floor Leveling
I’ve learned that achieving perfect flatness isn’t just about shims and measurements; it’s about understanding the entire environment—moisture levels, subfloor materials, and long-term stability. Rushing to patch up uneven spots without addressing underlying issues often results in problems down the line. Incorporating moisture barriers and seeking knowledge from resources like this comprehensive guide ensures a durable and beautiful finish. Remember, craftsmanship involves both technical skill and a thoughtful approach.