
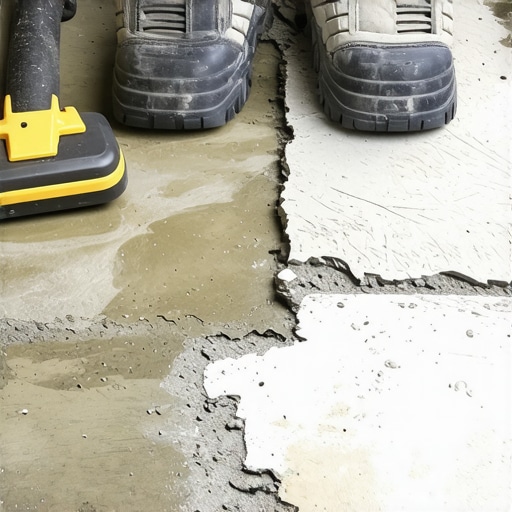
I vividly remember a time when I was eager to lay down a beautiful hardwood floor over an old concrete slab. I mixed my self-leveling compound, poured it out, and waited with anticipation. But hours later, I stood in dismay as large sections of the floor started to crack and peel away—what I thought was a straightforward process turned into a frustrating mess. That moment was a lightbulb blinking on in my mind: I had overlooked an essential step—creating a mechanical bond between the self-leveler and the old concrete.
The Hidden Power of Mechanical Bonding in Floor Preparation
Self-leveling compounds are designed to produce a smooth, even surface, but their effectiveness hinges on one critical factor: ensuring they adhere properly to the substrate. When working with old concrete, the surface often exhibits a rough or powdery texture that can dramatically reduce bonding strength. Without a proper mechanical bond, even the best self-leveler can fail, leading to cracks, delamination, or worse—progressively uneven floors. The good news is, this is a common pitfall I faced early on, and understanding it has saved me from costly redo’s and future headaches.
Have you ever experienced your self-leveler popping off or cracking after a short period? If so, you’re not alone—and the culprit might be missing that crucial mechanical bond. According to experts, ensuring a strong connection between the bonding layer and the substrate is essential for long-lasting results (see the [floor leveling fundamentals](https://tiletrendshop.com/flooring-installation-fundamentals-leveling-for-a-seamless-look)). In my experience, skipping this step is like building a house on a shaky foundation—no matter how sturdy the materials, instability will lead to failure.
So, what exactly does creating a mechanical bond entail? It involves roughening, scarifying, or otherwise modifying the concrete surface to enhance the grip of the self-leveler. I’ll walk you through proven techniques that turn your old, stubborn concrete into a reliable base, paving the way for flawless tile, hardwood, or laminate installations.
Ready to dive into the practical solutions that will make your floor projects successful? Let’s get started!
Start by thoroughly cleaning the old concrete slab using a shop vacuum and a stiff broom to remove dust and debris. Use a pressure washer if possible to eliminate stubborn dirt and oils that can impede bonding. Once dry, inspect for loose or powdery areas; these must be addressed before proceeding. A thorough cleaning ensures the surface is receptive to mechanical bonding methods, similar to priming a surface before painting for better adhesion.
Use a concrete grinder or scarifier to roughen the surface, creating a textured profile that acts like tiny anchors for the self-leveling compound. I recall times when I used a diamond cup wheel to etch the surface, which significantly improved adhesion—this process is akin to scratching a sticker to make it stick better. Aim for a surface that has a matte finish without smooth patches, ensuring the self-leveler can grip firmly.
After roughening, vacuum the dust and debris completely. Follow up with a damp cloth or mop with water, then let the surface dry completely. Any lingering dust acts like a non-adhesive barrier, similar to trying to glue paper over a smooth, dusty surface—failure is almost guaranteed. For best results, refer to the detailed steps at flooring installation fundamentals.
In cases where the concrete is especially slick or non-porous, apply a bonding primer compatible with your self-leveling compound. Think of this as giving the self-leveler a better grip, much like applying glue to rough paper for stronger sticking. Follow the manufacturer’s instructions precisely, and allow proper drying time before pouring the leveling compound.
Consider additional mechanical preparation if the surface remains compromised. Techniques include shot blasting or light scoring with a chipping hammer. These methods introduce micro-roughness and create a mechanical lock, akin to the ridges on a screw thread, which helps the compound adhere more securely. This extra step can prevent issues like popping or cracking down the line, especially over older, degraded substrates.
Always test small areas to verify bonding success before a full pour. If you notice bond failure, revisit cleaning and roughening steps, or consider alternative surface treatments. Remember, a solid mechanical bond is the foundation of a durable, level floor—skipping or rushing this phase invites future problems and costs. For comprehensive guidance, check out primer mistakes to avoid and master your preparation process.Many homeowners and even seasoned contractors believe they understand the basics of flooring installation, but beneath the surface lie nuances that can make or break a project. One common myth is that a perfectly leveled subfloor guarantees a successful finish. While leveling is crucial, the importance of surface preparation and understanding substrate behavior is often underestimated. For instance, concrete slabs can have micro-roughness or moisture issues that, if ignored, lead to adhesion problems, cracks, or warped floors down the line—issues that are rarely resolved with superficial leveling alone. As experts highlight, verifying moisture levels and micro-roughness before proceeding can save significant time and money, helping you avoid costly repairs later. Check out our [comprehensive guide to floor leveling](https://tiletrendshop.com/the-ultimate-guide-to-floor-leveling-for-a-perfect-finish) to master these critical steps.
Another misconception revolves around hardwood floors. Many assume that all hardwood species perform equally in varying climates and environments. The truth is, specific wood types respond differently to humidity changes, which can cause gaps, cupping, or buckling if not carefully considered. Engineered hardwood, for example, often offers more stability in areas with fluctuating humidity, but only if installed correctly. An advanced mistake I see is neglecting acclimation. Allowing wood to acclimate to the environment for a sufficient period ensures dimensional stability. For targeted advice, explore our [expert tips on hardwood installation and maintenance](https://tiletrendshop.com/transform-your-space-with-expert-hardwood-floor-tile-combinations), which delve into species selection and acclimation best practices.
Tile installation is not immune to misconceptions either. Many believe that using the thinnest layer of thinset yields the most efficient installation. However, insufficient adhesive coverage can result in bond failure, especially over uneven substrates. The key lies in the proper trowel notch size and thorough application—factors that impact adhesion strength significantly. Advanced installers measure and verify adhesive coverage meticulously, understanding that each tile’s backside must be fully supported. For more insights, see our [step-by-step tile installation guide](https://tiletrendshop.com/installing-tiles-like-a-pro-step-by-step-strategies-for-2025).
Curious about how these nuances apply to your project? Remember that knowledge about substrate behavior, material response, and application techniques is what separates amateurs from true professionals. A common mistake is overlooking these crucial details, leading to crack, delamination, or uneven surfaces. As experts warn, failing to consider moisture, substrate micro-variations, or material compatibility can turn a straightforward installation into a nightmare. So take the time to evaluate your environment carefully and match your materials and techniques accordingly.
What about advanced questions? For example, how does substrate thermal expansion influence tile or hardwood performance over time? This consideration is especially relevant in projects involving radiant heating or extreme temperature variations. According to industry research, understanding the thermal properties of your materials can prevent buckling or cracking caused by expansion or contraction. In my experience, integrating proper expansion joints and using compatible adhesives allows your flooring to move naturally without damage. For more insights into complex installation considerations, consult our [mastering floor-leveling and substrate prep](https://tiletrendshop.com/mastering-floor-leveling-pro-secrets-for-perfect-installations) resource.
In conclusion, mastering flooring installation extends beyond the basics. Recognizing and addressing the hidden nuances—such as substrate behavior, material responses, and advanced preparation techniques—ensures durability and aesthetic perfection. These details often differentiate a professional outcome from a novice mishap. Have you ever fallen into this trap? Let me know in the comments, and stay tuned for more expert advice to elevate your home projects.
Keep It Working: Essential Tools and Maintenance Techniques
Ensuring your flooring remains pristine and durable over time starts with the right tools and disciplined maintenance routines. During installation, I rely heavily on precision equipment like laser levels and high-quality trowels. For example, a laser level, such as the DEWALT DW088K, provides unparalleled accuracy when checking for flatness and alignment, significantly reducing error margins in large-scale projects. Personally, I prefer a screed and leveling system that combines a vibratory density gauge with a steel screed, which helps achieve a perfectly flat surface—crucial for long-term success as shared in our comprehensive leveling guide.
Post-installation maintenance involves tools that keep the floor in top shape. For hardwood floors, I recommend investing in a high-quality buffer like the Hummel 7250, which gently restores shine without damaging the finish. Regular cleaning with microfiber mops and pH-neutral cleaners preserves the sealant and prevents dirt buildup that wears down the surface. For tiles, a grout haze removal tool ensures that the surface looks freshly laid for years, as detailed at our cleaning tips.
How do I maintain my floors over time?
Long-term upkeep hinges on routine inspections and selecting appropriate maintenance products. For hardwood floors, I recommend periodic refinishing—using fine-grit sanders and applying a topcoat that matches your original finish. Compact, electric handheld sanders like the Festool RTS 400 allow precise, minimal-impact refinishing that extends the lifespan. Additionally, placing protective pads under furniture minimizes surface scratches. For tile, sealing grout lines at recommended intervals prevents staining and cracking, following best practices outlined in our maintenance overview.
Looking ahead, evolving technologies such as IoT-enabled sensors might soon monitor subfloor moisture levels or detect early signs of wear, proactively alerting homeowners and contractors. Staying updated with these innovations promises to keep your flooring investments secure and durable. For example, integrating moisture sensors during installation can prevent issues caused by humidity fluctuations, as emphasized in industry whitepapers.
If you’re serious about extending your flooring’s life and maintaining its beauty, I urge you to implement regular inspection routines and invest in quality maintenance tools. One advanced tip I recommend trying is using an ultra-fine microfiber buffing pad combined with a polish designed for your flooring type—this can revitalize a dull appearance and add an extra layer of protection. Experimenting with this technique can result in a stunning, long-lasting finish that rivals professional refinishing. For complete guidance on polishing hardwood floors, visit our detailed polishing tips.
Insider Wisdom You Won’t Find in Manuals
One of the biggest lessons I learned was that surface preparation is the secret ingredient to long-lasting floors. Skipping the mechanical bonding steps felt like building a house on quicksand—no matter how high-quality my materials, failure was inevitable. I realized that investing time in roughening and cleaning the concrete surface saved me countless headaches down the line.
Another insight was understanding the quirks of different substrates. A concrete slab isn’t just a solid base; it’s a complex ecosystem with moisture, micro-roughness, and hidden cracks. Ignoring these factors led to early delamination. Now, I always test moisture levels and micro-roughness, knowing these details make or break the project’s success.
Finally, patience pays off. Applying bonding agents correctly, curing compounds thoroughly, and allowing materials to acclimate might seem tedious, but they create a bond so resilient that floors stand the test of time. Rushing these steps is a shortcut to future repairs—something I learned painfully early on.
Resources That Elevate My Flooring Game
For quality tools, I trust the precision of laser levels like the DEWALT DW088K. It’s a game-changer for establishing perfectly flat surfaces in large areas. When it comes to surface preparation, the Shoot-Ready Shot Blaster dramatically increases bonding strength by micro-roughening the concrete—this has been invaluable in my toughest projects.
Books like “The Ultimate Guide to Floor Leveling” give me in-depth strategies that go beyond basic tutorials. They help me troubleshoot issues before they escalate. And for ongoing education, industry forums and webinars—like those from Tile Trend—keep me updated on new techniques and products.
Dare to Transform Your Space
Remember, every great floor starts with solid prep and keen attention to detail. Your next project can be a masterpiece if you embrace continuous learning and patience. Whether you’re mastering the optimal roughening method or choosing the right bonding agent, your dedication will shine through in the final result. So, go ahead—tackle that floor with confidence, knowing you’ve got the best knowledge at your fingertips.
Have you ever faced unexpected challenges during surface preparation? Share your story below—I’d love to hear how you turned setbacks into success!