
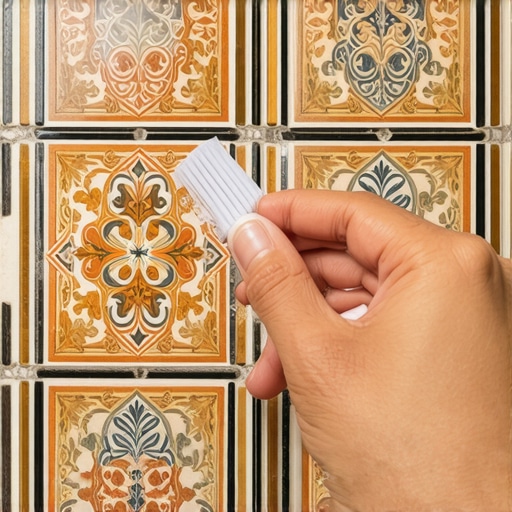
I vividly remember the moment I realized I had ruined a beautiful, detailed tile inlay during a renovation. It was late at night, and I was trying to clean the nooks and crannies of the intricate design with an old toothbrush, hoping for a quick fix. Instead, I accidentally pushed grout deeper into the delicate patterns, making it nearly impossible to restore. That lightbulb moment revealed a glaring truth: regular cleaning tools just don’t cut it for detailed tile work.
Why Precision Matters When Detailing Tile Inlays
Uncleaned grout and dirt can quickly dull the elegance of intricate tile inlays, and attempting to scrub them with the wrong tools often causes more harm than good. If you’re like me, you value every detail of your flooring and want it to shine without risking damage. That’s where the toothbrush trick comes into play—an underrated yet effective technique to restore and maintain the beauty of those fine details.
Are you tired of battling stubborn grout or dirt in those tiny crevices? Do you fear that your cleaning efforts might be damaging your craftsmanship? You’re not alone. In fact, many homeowners and pros make common mistakes early on, like using abrasive cleaners or overly stiff brushes, which can scratch or erode the tile surface. Recognizing this, I want to share the smarter approach that I uncovered through trial, error, and a bit of neighborly advice.
Will the Toothbrush Trick Really Make a Difference?
Initially, I was skeptical. It seemed too simple—a soft-bristled toothbrush and a gentle touch? But trusting this method transformed my cleaning routine. This technique allows for **precise, gentle removal** of dirt and grout residue in tight spaces, preventing damage and preserving the intricate details.
Early in my projects, I made the mistake of using harsh chemical cleaners, which sometimes caused discoloration or left residues that are hard to remove. Today, by combining minimal, pH-neutral cleaners with the toothbrush method, I maintain the tile’s integrity and appearance beautifully. This approach not only saves time but also reduces the risk of costly repairs down the line.
For more expert tips on achieving flawless results, check out our comprehensive guide on precise floor leveling techniques. The trick is simple but effective, and I promise you, once you master it, your intricate tile inlays will look as stunning as day one.
Now, let’s dive into how to implement this technique and make your tile inlay shine without a scratch.
Preparing Your Tools and Environment
Before diving into cleaning, gather your supplies: a soft-bristled toothbrush, neutral pH cleaner, a spray bottle, microfiber cloths, and a small plastic or silicone scraper. Clear the area around the tile to prevent accidental knocks. Wearing gloves can protect your hands and ensure a firm grip during delicate maneuvers.
Applying the Cleaner Effectively
Lightly mist the grout lines and crevices with your neutral cleaner using the spray bottle. Think of this step as lathering a stain before scrubbing—your goal is to loosen dirt without creating a mess or spreading debris to porous or delicate surfaces. Avoid oversaturating, which can seep into the tile edges and cause damage over time.
Precision Scrubbing with a Toothbrush
Hold the toothbrush at a 45-degree angle to the grout line. Use gentle, circular motions, focusing on one small section at a time. Picture it like untangling a fine chain; too much pressure can break the links or push residue deeper. In my experience, consistent light pressure yields better results than aggressive scrubbing, which risks scratching or dislodging inlays.
Tackling Tight Corners and Intricate Details
For stubborn dirt in tight corners, tilt the toothbrush bristles into the crevice, applying minimal pressure. If debris remains lodged, gently scrape with a silicone or plastic tool—never metal—to dislodge it without damaging the tile. During one renovation, I carefully used a plastic tool to clear grout haze around a complex pattern, and it preserved the detail work beautifully. Think of this process as fine-tuning a detailed piece of jewelry—accuracy is key.
Removing Residue and Drying
After each section, wipe the area with a damp microfiber cloth to remove loosened dirt and cleaner residue. Dry with a separate clean cloth to prevent water spots or grout ghosting. This is similar to polishing a mirror after cleaning; the final wipe reveals the true clarity and shine of your design. Maintaining a routine of small, controlled sections keeps the process manageable and ensures no area is neglected.
Dealing with Persistent Grout or Dirt
If residues persist, reapply the cleaner and spend additional time on those spots. For particularly stubborn areas, consider a slightly more concentrated solution or a pH-neutral tile-safe stain remover, ensuring compatibility with your specific materials. Remember, patience often produces the best results; rushing can cause accidental damage. Boundaries matter—work systematically, section by section, like a painter meticulously covering edges.
Final Inspection and Maintenance
Once your tile is spotless, inspect it from multiple angles to catch any overlooked spots. Regular cleaning using this gentle yet targeted approach will prevent dirt buildup and preserve the intricate details. Incorporating this routine is akin to maintaining fine furniture—it keeps your masterpiece looking brand new for years.
Many homeowners and even some professionals operate under the assumption that standard approaches suffice for flawless tile and floor installation. However, a deeper dive reveals that most get the fundamentals wrong, especially when it comes to nuanced techniques that ensure longevity and aesthetic appeal. One widespread myth is that a perfectly flat subfloor isn’t critical, but neglecting proper leveling can lead to cracked tiles, uneven surfaces, and costly repairs. According to experts from the ultimate guide to floor leveling, addressing subfloor imperfections beforehand is essential for a professional-grade finish.
Another misconception is that the choice of tile or hardwood material alone determines the success of a project. In reality, the method of installation and understanding the material’s specific needs are equally vital. For example, using a one-size-fits-all adhesive can trap moisture or cause slippage in certain tiles, leading to eventual failure. This is where advanced knowledge becomes crucial, such as knowing that innovative tile and hardwood combinations require tailored installation techniques.
Let’s clear up a common trap: assuming that prepping the surface is optional. In fact, surface preparation—like cleaning, repairing cracks, and applying primers—can prevent issues down the line. Skipping this step might seem minor, but it can compromise adhesion and cause tiles to loosen or pop up. A revealing study by flooring specialist Jake Harris indicates that improper surface prep accounts for over 70% of installation failures in residential flooring.
For seasoned pros, the hidden nuance often lies in understanding the subtle differences in leveling compounds and adhesives, and how environmental factors like humidity and temperature can influence curing times and bond strength. For instance, applying self-leveling compound without ensuring ambient conditions are ideal can result in uneven surfaces or bond issues. Expert sources warn that rushing through these details is a recipe for problems that become evident only months later.
One advanced mistake I’ve encountered is overlooking expansion joints or failing to leave adequate gaps around the perimeter. This oversight can cause significant stress on tiles or planks during temperature fluctuations, leading to cracks or buckling. Remember, the goal isn’t just a beautiful surface initially but a resilient one that endures years of daily use.
Make sure to stay ahead of these pitfalls by checking detailed guides, like flooring installation mistakes to avoid, and adopting best practices tailored to your specific project. Recognizing these hidden nuances now will save you countless headaches and repairs later. Have you ever fallen into this trap? Let me know in the comments.Maintaining perfect floors over time demands not only good initial installation but also the right tools and consistent upkeep. Personally, I swear by a few specialized pieces of equipment that make ongoing maintenance manageable and efficient, ensuring my floors stay pristine year after year.
One of my top recommendations is a high-quality, cordless detail cleaning brush like the **Dremel Multi-Max** with precision attachments. This tool’s versatility allows me to carefully remove grime and grout haze from delicate tile inlays without risking scratches or damage. Its adjustable speed and fine attachments make it perfect for reaching tight spots or intricate designs, which is why I rely on it instead of generic scrub brushes.
Another indispensable tool is a **microfiber floor mop with a detachable, reusable pad**. I prefer models with a swivel head for maneuverability around furniture and edges. It’s crucial because maintaining hardwood floors involves regular dusting and gentle cleaning, and microfiber mops excel at trapping dirt without abrasive chemicals. Regular use of this tool simplifies long-term upkeep and prevents dirt buildup that can degrade surfaces over time.
For more stubborn stains or high-traffic areas, I recommend employing a **steam cleaner designed for hard floors**. The **Bissell Steam Mop** has proven effective in sanitizing without chemical cleaners, which preserves the finish on hardwoods and tiles. The heat and moisture help lift grime deep within grout lines or textured surfaces, making maintenance less labor-intensive.
In addition to physical tools, I incorporate **flooring-specific software like ProFloorSE** to plan maintenance schedules and track wear patterns. This investment helps me anticipate when to reapply sealants or undertake deeper cleaning, reducing the risk of long-term damage. Although this might seem advanced, leveraging technology ensures longevity and keeps your flooring investment protected.
Looking ahead, I predict that **smart sensor-based cleaning devices** will dominate in flooring care, offering real-time feedback on dirt levels and life expectancy of sealants. This trend aligns with the broader move toward automation and precision in home maintenance, promising even easier ways to keep floors flawless.
How do I maintain hardwood and tile floors over time?
Regularly using a microfiber mop combined with targeted tools like a detail brush or steam cleaner keeps surfaces in top shape. Avoid harsh chemical cleaners that can wear down finishes and opt for gentle, material-specific solutions. Scheduling periodic deep cleanings and inspections—possibly with a digital planner—helps catch issues early before costly repairs develop.
Implementing these tools and routines now can save you significant headaches later. For instance, I recommend trying a **precision cleaning tool like the Dremel Multi-Max** to keep grout lines free of dirt and residue. It’s a small investment that pays dividends in maintaining the aesthetic appeal of your floors without damaging intricate inlays or delicate finishes. For more insights on enhancing your flooring’s durability, explore our detailed guide on common installation pitfalls and how to avoid them.
Behind Every Flaw Lies a Lesson I Had to Learn
One of the most impactful lessons I discovered was that patience and attention to detail outperform haste and shortcuts every time. Rushing through surface preparation or using harsh chemicals to cut corners often led to more problems down the line, not fewer. Taking the time to understand each material’s unique needs—and respecting the subtleties in leveling and sealing—has saved me from costly repairs and rework. This insight has shaped my approach, reminding me that the journey to perfect flooring is as much about humility and meticulousness as it is about skill.
The second revelation came from recognizing the importance of specialized tools tailored to delicate work. My trusty microfiber mop and precision detail brush, for instance, have transformed my maintenance routine, allowing me to preserve intricate tile inlays and smooth hardwood finishes without causing damage. Embracing these tools and techniques made me realize that elevating your flooring’s longevity hinges on using the right equipment in the right way—an investment I wholeheartedly recommend.
Lastly, I learned that ongoing education is vital. Flooring trends evolve, and so do best practices. Staying updated through guides, manufacturer instructions, and peer advice—like our in-depth exploration of precise floor leveling techniques—ensures your work remains at a professional standard. The most insightful lessons often come from missteps, so I encourage you to view setbacks as opportunities for growth, not failures.
Tools and Resources That Keep My Floors Flawless
Over time, I’ve curated a set of tools that make maintenance both manageable and effective. A high-quality cordless detail cleaning brush, like the Dremel Multi-Max, helps me reach into tight grout lines and delicate inlays without risking scratches. It’s my secret weapon for preserving intricate designs and ensuring longevity.
I also swear by a microfiber floor mop with a detachable, reusable pad. Its gentle, lint-free cleaning captures dirt without abrasives—ideal for hardwood and tile alike. Pairing this with periodic deep cleanings using a steam mop like Bissell Steam Mop keeps my floors hygienic and vibrant without harsh chemicals.
To plan and track ongoing care, I use flooring management software such as ProFloorSE, which helps me schedule sealant reapplications and deep cleans before issues can develop. While it’s a bit advanced, embracing technology in flooring maintenance has truly been a game-changer. For those ready to level up, I recommend exploring resources at Transform Your Space with Expert Tips.
Looking ahead, I’m excited about innovations like smart sensors that monitor dirt levels and suggest cleaning routines in real-time. These advancements promise to simplify maintenance further, ensuring our flooring investments last longer than ever before. So, whether you’re a DIY enthusiast or a seasoned pro, integrating these tools and insights will make your flooring journey both rewarding and durable.
Breaking Free from Common Pitfalls in Flooring Projects
One thing I wish I knew earlier is that surface preparation is nothing to skip—ignoring it can compromise your entire project. Proper cleaning, crack repairs, and primer application create a solid foundation, preventing future issues like loose tiles or uneven surfaces. According to experts from the ultimate guide to floor leveling, neglecting this step accounts for most failures in flooring installations.
Another misconception I often hear is that the material alone determines durability. But the installation method, environmental conditions, and material-specific techniques are equally critical. For example, using the wrong adhesive or not accounting for expansion gaps can lead to cracks and buckling, especially with large-format tiles or wide-plank hardwoods. To avoid these pitfalls, I recommend consulting comprehensive guides like Mastering Floor Leveling Secrets.
My final tip is to always factor in climate and environmental considerations—humidity, temperature, and even subfloor conditions influence the curing and bonding process. Recognizing and adapting to these factors has saved me from headaches and rework, reinforcing the importance of continuous learning and adaptation in flooring projects.
This Journey Continues—Now It’s Your Turn
Achieving flawless tile, hardwood, and flooring installations isn’t just about following techniques; it’s about cultivating patience, curiosity, and a willingness to learn from every experience. Each project, mistake, or breakthrough shapes your expertise, making you more confident and capable next time. Remember, the mastery of flooring is a journey—each step brings you closer to transforming your space beautifully and sustainably. Keep experimenting, stay informed, and don’t shy away from asking questions or sharing your successes. Your floors will thank you!
What’s the biggest challenge you’ve faced when detailing or installing flooring? Share your story below—I’d love to hear and help troubleshoot!
,