
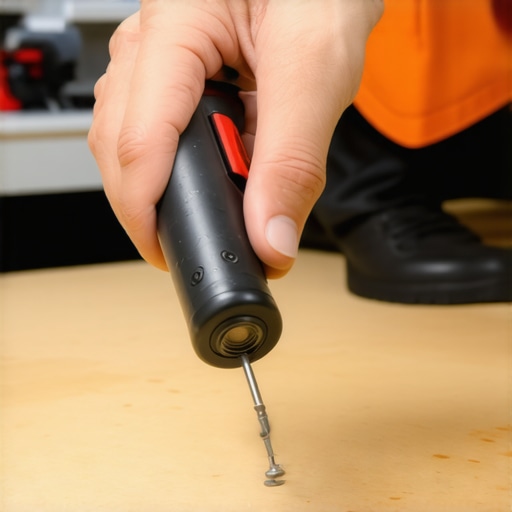
I remember the first time I installed new hardwood floors in my living room. Everything seemed smooth sailing—until I stepped back and noticed a rhythmic, almost imperceptible squeak underfoot. That’s when I realized I had missed a tiny, embedded screw lurking beneath the surface. Frustrating, right? That moment of disbelief made me wish I had a better way to locate those sneaky, hidden fasteners before they cause havoc.
Why Finding Hidden Subfloor Screws Matters in Flooring Projects
Believe it or not, overlooking concealed screws can lead to uneven flooring, squeaks, or even damage over time. These small fasteners hold the subfloor securely, but when hidden, they pose a sneaky challenge. A slip-up here isn’t just about a minor annoyance—if a screw is missed, it can compromise the integrity of your entire floor. That’s why I became a big advocate of the magnet trick, a simple yet effective method to uncover those hidden screws.
Is the Magnet Trick Really Worth the Hype?
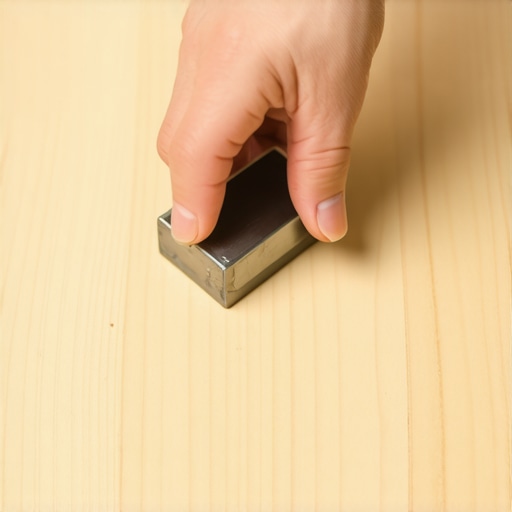
Early on, I underestimated the power of a good magnet. I made the mistake of trying to feel around with my hand—fingers aren’t precise enough, and you quickly get tired. Once I started using a strong neodymium magnet, everything changed. The magnet would ‘catch’ on the screw heads, giving me precise locations without guesswork. But I’ve seen questions crop up: *Does this method truly work consistently?* The answer is yes—if you understand how to use it properly. Trust me, it’s a game-changer, especially for those tricky, hidden fasteners underneath your subfloor.
Moreover, employing this trick can save you hours of frustration and prevent costly mistakes. It’s something I swear by now, and I recommend it to anyone tackling floor installation or repair projects. Interestingly, research indicates that magnetic detection is a common technique among professionals—so you’re in good company.
Are you tired of discovering screws only after you’ve drilled or screwed through them? Have you faced your own battles with hidden fasteners that seemed to vanish into the dark? If yes, then stick around. We’re about to dive into the step-by-step process of mastering the magnet trick, ensuring your next flooring job is smooth and squeak-free. For deeper insights into professional flooring tips, check out fundamental flooring installation techniques.
Set Up the Magnet Correctly
Start with a strong neodymium magnet, similar to the kind used for refrigerator magnets but with more power. Secure it to a stick or a string—think of it as attaching a fishing line to your magnet—to extend your reach and improve control. I once used a broom handle, taping the magnet to the end, which gave me a broad surface to scan over the subfloor. This method is much like using a metal detector—sweeping systematically to catch every hidden screw.
Target the Testing Zone
Identify high-traffic areas or places where squeaks are common. Lay the magnet close to the surface and sweep slowly, maintaining consistent pressure. Imagine you’re trying to find a lost coin on a textured table—methodical and gentle movements are key. During my first attempt, I moved the magnet in a grid pattern across the room, which helped me avoid missing spots. I learned that slowly scanning back and forth increases the chance of spotting the screw head underneath.
Detect and Mark Hidden Screws
When the magnet passes over a screw head, you’ll feel a tug, a slight pull, or even see the magnet jump slightly. Use a pencil or a piece of chalk to circle the spot immediately—think of it as marking a treasure on a map. I once marked dozens of spots, then followed up with a screwdriver to double-check. This simple step prevented me from drilling into unnoticed fasteners and saved me hours of frustration later. Remember, consistency is vital—don’t rush your sweep; patience reveals secrets.
Refine Your Technique for Better Precision
Adjust your swing to be more deliberate and slow with each pass. If you frequently miss screws, try changing the magnet’s angle or increasing the pressure slightly. A good analogy is tuning a radio: small adjustments can make a big difference in clarity. During a project, I experimented with moving the magnet a few inches at a time and found that my success rate increased considerably. Practice makes perfect—giving yourself time to get used to this method will pay off in flawless installations.
Combine with Other Detection Methods
The magnet trick isn’t foolproof; some screws may be deeply embedded or rusted, making detection harder. Supplement the process by tapping the surface with a hammer or a tool handle—listening for hollow sounds can also indicate locations of fasteners beneath. I once combined the magnet sweep with gentle tapping, which uncovered screws missed by the magnet alone. Think of it as using multiple senses to solve a mystery.
Document and Proceed with Care
After marking all visible and suspected fasteners, double-check each point with a screwdriver or magnet at different angles. Once you’re sure, proceed with your flooring installation, confident that no hidden screw will cause squeaks or unevenness. This attention to detail minimizes surprises later and leads to a professional-looking finish, much like following a recipe precisely to get that perfect dish.
If you want to enhance your skills further, consider reviewing professional flooring tips or exploring more about optimal tile and hardwood installation techniques. Mastering this simple yet effective detection method makes your projects smoother, more efficient, and more satisfying.
 Many homeowners believe that installing hardwood floors is straightforward, but in reality, there’s a lot more nuance than most realize. A prevalent myth is that the perfect floor finish is solely about choosing the right wood species. In truth, the subtle details—like proper acclimation and precise leveling—make all the difference, as emphasized in expert guides on floor leveling. Operating under the assumption that all subfloors are inherently flat can lead to costly mistakes, especially if you neglect to check for hidden dips or embedded debris. This oversight often results in uneven surfaces, which compromise both aesthetics and durability.
Another common error involves rushing the installation process, believing that a shorter drying time will speed things up without consequences. However, insufficient curing of adhesives or finishes can cause tiles to crack or hardwood planks to warp over time, revealing the importance of patience and following manufacturer guidelines for optimal results.
For those venturing into tile and hardwood combinations, many overlook the necessity of selecting compatible products. Mixing incompatible materials, like certain adhesives and substrates, may seem harmless but can cause long-term damage and discoloration, undermining the aesthetic intentions. To master seamless installations, I recommend reviewing expert installation tips.
Advanced enthusiasts often ask, “How do I ensure my floor remains perfectly level despite subfloor irregularities?” A sophisticated approach involves using self-leveling compounds combined with thorough surface prep, which minimizes the risk of future unevenness. According to flooring specialists, neglecting to properly prepare the subfloor can lead to surface telegraphing, where imperfections show through the finish, particularly in large-format tiles and wide plank hardwoods.
Overall, one of the most overlooked nuances is understanding the environmental factors affecting floor stability. Humidity fluctuations can cause wood to expand or contract, a problem that becomes critical in climates with significant seasonal changes. By implementing proper acclimation practices and climate controls, you can prevent issues like cupping and gaps. If you want to dive deeper into maintaining your floors, check out hardwood refinishing secrets.
Have you ever fallen into this trap? Let me know in the comments. Mastering these subtle details will elevate your flooring projects from good to professional quality, ensuring lasting beauty and performance.
Maintaining your hardwood floors and tile installations isn’t just about periodic cleaning; it involves using the right tools and adopting proven methods to ensure long-lasting beauty and functionality. Over the years, I’ve discovered that having specialized equipment on hand can make all the difference in preventing issues like squeaks, uneven surfaces, or grout deterioration. In this section, I’ll share my go-to tools and maintenance strategies that I personally rely on for professional-quality results.
Invest in a Quality Floor Leveling System
One of the most critical aspects of long-term flooring success is ensuring your subfloor remains perfectly level. Even minor dips or humps can lead to uneven wear and unsightly imperfections. I recommend using a high-quality self-leveling compound, but pairing it with an automatic mixing pump makes application much more consistent and less messy. For example, I personally use the LevelMaster Pro, which allows me to precisely control the flow rate and mix consistency, resulting in a flawless finish. Regularly checking your level with a laser level, such as the DeWalt DW088K, helps maintain accuracy over time and prevents issues before they arise.
Power Tools That Make a Difference
For hardwood maintenance, I swear by my orbital sander with adjustable grit options. It’s essential for smoothing out scratches or preparing the surface for refinishing. When dealing with grout lines or detailed tile work, I use a rotary tool equipped with fine brushes—this keeps grout clean and prevents buildup that can cause cracking. Investing in a good impact driver, like the Makita XDT16, has also helped me secure subfloor screws more efficiently, reducing the risk of backing out or creating uneven surfaces over time.
Specialized Cleaning Equipment for Longevity
To keep floors shining, I rely on a microfiber buffer paired with a gentle floor-polishing pad. This combination helps restore luster without damaging the surface. For TILE, I use a wet/dry vacuum with a HEPA filter to remove dust and debris effectively after every project. Clean equipment isn’t just about appearance—it’s about preventing abrasive particles from scratching or staining your floors.
Predicting and Preparing for Wear and Tear
Looking ahead, I believe the trend is moving toward smart maintenance tools. For example, moisture sensors embedded in floor mats can alert homeowners of humidity issues that might lead to warping or cupping. Regular inspection tools, such as the Digital Grout Analyzer, can help identify weak spots before cracks develop, ensuring you catch problems early—and that takes us to the question:
How do I maintain hardwood floors and tile over time to avoid costly repairs?
The key is consistent, preventative care. Regularly check for signs of moisture issues, clean with pH-balanced solutions, and apply protective sealers as recommended by experts. I also suggest setting up a maintenance schedule that includes the use of proprietary cleaning products designed specifically for hardwood or tile surfaces, like those discussed in hardwood floor care tips. Implementing a system with a combination of high-quality tools and proactive inspections can significantly extend the lifespan of your flooring investment. Try one of these strategies today—like upgrading your orbital sander to a variable-speed model—and experience the difference it can make in your maintenance routine.
The Hardest Lesson I Learned About Hardwood Floors, Floor Leveling, Flooring Installation, and Tile
One profound realization I had was the importance of meticulous prep work before laying down new floors. Rushing through surface assessments led me to overlook subtle dips and hidden debris, which later caused uneven tiles and squeaky planks. Now, I always dedicate time to thorough surface inspections, understanding that a smooth foundation makes all the difference.
My Secret Weapon for Perfect Flooring Results
I discovered that combining professional-grade tools with a mindset geared towards patience transforms DIY projects. For instance, investing in a laser level and self-leveling compounds has saved me from costly corrections. Trust me, these tools are worth every penny and can elevate your flooring game to professional standards, as I detail in my favorite leveling guide.
Revelation: Small Details, Big Impact
I learned that environmental factors like humidity and temperature are often underestimated but critically influence hardwood stability. Proper acclimation and climate control prevented warping and gaps, ensuring longevity. Recognizing these nuances has empowered me to take proactive steps, which I explore in depth through refinishing secrets.
From Frustration to Confidence
Every mistake turned into a teaching moment that enhanced my craftsmanship. Embracing imperfections during the learning process fostered resilience and curiosity, motivating me to explore innovative solutions. My journey shows that patience and continuous learning are key, and you can find more motivation in my story by visiting design inspiration.