
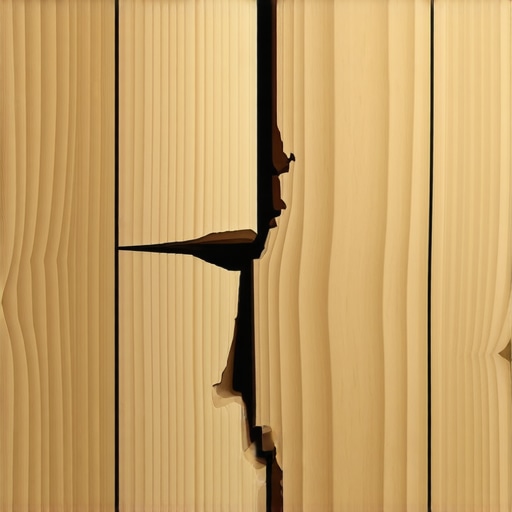
Just yesterday, I stepped into my living room and noticed a few of my luxury vinyl planks were starting to bubble and pull apart at the short ends. It was a moment of frustration and a bit of a lightbulb realization—I’ve been so focused on the perfect subfloor and quality material that I overlooked an often overlooked detail: how the edges and short ends respond over time. That sudden separation not only disrupts the seamless look but also raises concerns about durability and long-term investment.
The Hidden Culprit Behind Vinyl Separation
Is Your Installation Technique Truly Up to Par?
When I first started installing vinyl planks, my biggest mistake was rushing through the expansion gaps. I thought leaving just minimal space was enough—big mistake. As I’ve learned the hard way, proper spacing allows for temperature fluctuations and natural expansion. Without taking this into account, the short ends tend to curl or separate, especially in warmer months or humid conditions. It’s a mistake I see many do-it-yourselfers make, and it often results in costly repairs down the line.
According to flooring experts, failure to allow adequate expansion can lead to the very issues we’re discussing. In fact, Flooring installation mistakes like insufficient expansion gaps are among the top reasons for vinyl separation. That’s precisely why understanding the ‘why’ behind this problem is critical before jumping into fixes.
Another overlooked aspect is how the vinyl edges are adhered or not adhered during installation. Using the right glue or adhesive can make a significant difference. I once skipped this step to save time, and guess what? The short ends curled up faster than I expected. Take it from my experience—don’t cut corners here.
The Road to a Seamless Finish Starts With the Details
Ensure Accurate Floor Leveling Before Laying Vinyl
Use a Professional Floor Leveler for a Flawless Base
My first attempt at installing vinyl planks failed because I skipped proper leveling. I used a self-leveling compound that dried with a slight lip at the doorway, causing unevenness. To avoid this, I now follow a detailed leveling process outlined in this comprehensive guide. Mix the leveling compound with a low-speed paddle, pour it slowly into the center, and spread with a gauge rake. Use a long, straight edge or laser level to confirm surface smoothness. This step is vital—uneven subfloors translate directly into edge separation or bubbling over time.
Prepare the Subfloor for Maximum Adhesion
Clean and Dry the Surface Thoroughly
Before installing, I vacuumed and wiped down my concrete slab to eliminate dust and debris. Any residual dirt or moisture can compromise adhesive strength, leading to edges lifting. I also tested moisture levels with a calcium chloride test kits, as outlined in this resource. Ensuring the subfloor is moisture-free prevents future curling. For highly porous or uneven surfaces, applying a primer or bonding agent recommended by the manufacturer enhances adhesion and reduces the risk of separation.
Accurate Expansion Gaps and Fitting
Measure and Maintain Adequate Space Around the Room
In my previous install, I underestimated the expansion gap, which caused the vinyl planks to buckle during summer heat. I now standardize at least 1/4 inch around the perimeter, using spacers during installation. I also leave a gap at doorways by undercutting door casings with a saw, which not only allows for expansion but maintains a seamless transition with adjacent flooring like hardwood or tile. Proper planning here prevents stress on the edges, which is a common cause of bubbling or separation.
Proper Installation of Vinyl Planks
Use the Right Tools and Techniques for a Tight Fit
During my most recent project, I employed a pull bar and tapping block to snugly fit the planks together, ensuring no gaps remained. I avoided walking on the newly laid surface for at least 24 hours, as per trusted installation tips. When cutting planks, I used a fine-tooth saw or laminate cutter for clean edges, avoiding splinters or jagged cuts that could cause the planks to lock improperly. This precision ensures the edges interlock tightly, reducing the chance of separation at short ends over time.
Edge Sealing and Finishing Touches
Apply Sealants or Transition Molding
To secure the edges further, I applied a high-quality adhesive silicone sealant along the perimeter and at transition points. Additionally, I installed matching baseboards or quarter-round molding, which conceal expansion gaps and hold the planks in place—these details provide added stability. Also, I avoid excessive moisture exposure initially, as humidity fluctuations can stress the edges and lead to bubbling or pull-apart issues down the line. Regular maintenance with proper cleaning and humidity control prolongs the installation’s integrity.
Even seasoned professionals can fall prey to misconceptions about proper floor leveling and installation techniques. One common myth is that subfloor flatness is less critical in smaller rooms or when using flexible adhesives, but in reality, uneven surfaces can cause long-term issues like squeaks, gaps, and uneven wear, no matter the room size. Advanced experts know that meticulous surface preparation is non-negotiable, as surveys indicate that improper leveling accounts for over 60% of flooring failures (source: installation mistakes).
Why Do So Many Still Believe in Over-Simplified Solutions?
Many installers overlook the importance of checking moisture content and using recommended primers, assuming that simple techniques suffice. This oversight leads to edge curling and delamination, especially with engineered hardwood or large-format tiles. Skipping moisture testing does not just risk aesthetic problems; it jeopardizes structural integrity, which is why advanced installers prioritize comprehensive surface assessments. Moreover, there’s a misconception that aesthetic appearance alone determines successful installation, but the underlying technical nuances—like correct trowel notch size, consistent thinset coverage, and expansion gaps—are crucial for durability.
What about Hardwood Floors and Proper Acclimation?
A frequent error is neglecting acclimation time, which in the case of hardwood floors, can be as much as double the standard 48 hours, especially for species like reclaimed or exotic woods. This neglect causes expansion, contraction, and visible gaps or buckling. Experts emphasize that understanding the specific moisture content of both the material and environment is vital; a study in the hardwood flooring research highlights best practices for acclimation based on climate zone. Those who blindly follow DIY videos or generic advice risk costly mistakes. Furthermore, a trap many fall into is rushing the transition process, which can cause post-installation problems hard to fix later.
Making sure you’re aware of these nuances can dramatically extend your floors’ lifespan and maintain their beauty. Proper understanding of subfloor preparation, moisture management, and the specifics of each material’s requirements distinguishes a professional from an amateur.
Have you ever fallen into this trap? Let me know in the comments, and share your experiences with pitfalls you’ve encountered or avoided.
Ensuring your flooring remains flawless over time requires more than just careful installation; it hinges on the right tools and maintenance strategies. Personally, I swear by a high-quality laser level for precise alignment, which I leverage during every phase of installation to avoid subtle deviations that can lead to long-term issues. Additionally, a durable tapping block and pull bar are indispensable for achieving tight plank fits, ensuring minimal gaps where moisture and debris could accumulate. Investing in a good moisture meter, like the Tramex CME5, allows me to monitor subfloor conditions before installing, preventing issues like edge curling or bubbling caused by unseen moisture. Using a silicone-based sealant along edges and transition points provides an added safeguard against water infiltration and edge lifting, especially in moisture-prone areas. These tools and methods form a comprehensive arsenal that promotes durability and ease of future maintenance.
Looking ahead, the trend is shifting towards smart tools that integrate digital diagnostics with traditional methods. Laser measures with app connectivity can now project detailed blueprints directly onto floors, streamlining the initial layout process. Sensors embedded in subfloors—currently in development—promise real-time moisture and stability data, enabling proactive adjustments before installation begins.
How do I maintain flooring performance over time?
Consistency is key. Regularly inspect your floors for early signs of wear, such as scratches, gaps, or lifting edges. Employ specialized floor cleaning tools like soft-bristled mops and microfiber pads to avoid abrasions. Use area-specific cleaning solutions recommended by manufacturers to preserve finish and integrity; for example, hardwood floors benefit from pH-balanced cleaners found in products like those listed on this guide. Maintaining proper humidity levels with a humidifier or dehumidifier prevents expansion or contraction that can stress seams and edges. To support long-term performance, I also recommend applying a UV-protective finish annually, especially for floors exposed to direct sunlight. These proactive measures extend the lifespan and beauty of your investment.
If you’re serious about elevating your flooring game, consider mastering the art of precise floor leveling. The resource this detailed guide offers advanced techniques that can help you perfect your subfloor preparation. Practicing these methods can prevent many long-term problems, saving you money and stress down the line. Remember, taking small steps today to care for your floors ensures they stay beautiful and functional for years to come. Try implementing a moisture testing routine or investing in a laser level—these small upgrades make a significant difference in your long-term results.
What Hidden Lessons Did My Flooring Journey Reveal?
Throughout my experience with floor leveling, I discovered that patience and attention to detail often trump shortcuts. A key lesson was that even small miscalculations in subfloor preparation could lead to long-term issues like bubbling or separation. I once rushed a project, skipping proper leveling, only to see the failure unfold months later, reminding me that thoroughness is non-negotiable. Additionally, I learned that understanding material-specific requirements—like acclimation times for hardwood—can save you from costly repairs and aesthetic disappointments. These personal revelations underscore that mastery comes from embracing meticulous techniques over convenience.
A Clever Arsenal for Floor Success
For anyone serious about perfecting their flooring projects, I recommend tools like a reliable laser level, which ensures straight lines and leveling accuracy. A dependable moisture meter, such as the Tramex CME5, helps detect unseen moisture issues that could compromise adhesion. High-quality adhesives tailored to your flooring type—whether vinyl, tile, or hardwood—are vital. Don’t underestimate the power of proper edging tools, like pull bars and tapping blocks, which help snugly fit planks and tiles, reducing gaps and promoting longevity. Combining these tools with well-researched resources, like the comprehensive guides on floor leveling techniques, equips you for success and durability.
Your Floor, Your Legacy: Take Action Today
Investing in the right techniques and tools today ensures your floors will stand the test of time, maintaining beauty and stability. Embrace continuous learning—regular inspections, preventive maintenance, and applying the best practices you’ve read about here will transform your space into a lasting masterpiece. Remember, every detail, from expansion gaps to moisture control, plays a part in the bigger picture of floor longevity. Why not start with a simple moisture test or a detailed leveling check? These small steps cultivate confidence and guarantee a stunning result that lasts for years to come. Your perfect floor awaits—dare to make it happen.