
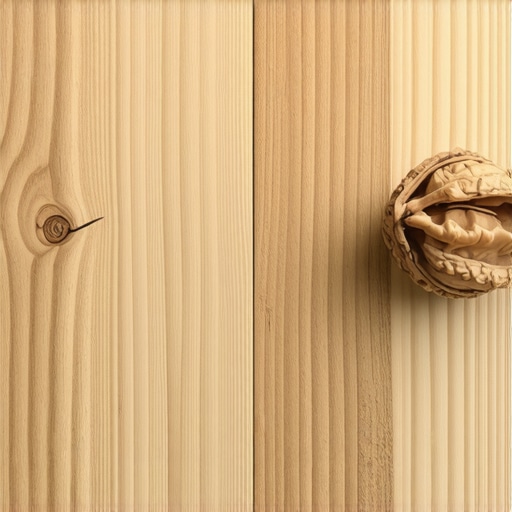
It happened on a quiet Saturday afternoon. I was walking barefoot across my living room when I felt that unmistakable gritty sensation underfoot, followed by a sharp little sting. There it was—a tiny, stubborn scratch on my beautiful, hand-scraped hardwood floor. Frustration bubbled up because I knew how much effort I’d put into maintaining that flawless finish, only to have a minute accident ruin the look in an instant. Sound familiar?
Why a Walnut Shell Might Be Your Best Friend for Hardwood Repairs
Sometimes, the smallest habits save us big bucks, and that’s exactly what I discovered when I first tried using a walnut shell to hide scratches on my hardwood floors. It sounds like an old wives’ tale, but believe me, it works remarkably well for minor surface dents and scratches. The oils from the walnut’s nut meat can darken and blend with the surrounding wood, making those imperfections almost disappear. I was skeptical at first—who isn’t?—but after some trial and error, I found it to be a quick, natural fix that keeps my floors looking pristine without the hassle of sanding or refinishing. Plus, it’s a technique that requires no chemicals or special tools, just a walnut and a gentle hand.
Will This Trick Save Major Damage?
Here’s the thing—if you’re dealing with deep gouges, this method isn’t your saving grace. It’s best suited for superficial scratches and minor blemishes. Early on, I made the mistake of thinking that every scratch could be fixed with this trick, only to realize some damage requires professional attention. But for small scratches, it offers an immediate, budget-friendly solution that I swear by. Want to make your hardwood look as good as new in minutes? Let’s dive into how to do just that.
Preparing Your Workspace for Repair
Start by clearing the area around the scratch to ensure you have free access and minimal dust. Vacuum or sweep to remove debris, then wipe the floor with a damp cloth to eliminate any remaining grit. This clean slate prevents dirt from settling into the repair zone, which is crucial for a seamless finish. I once overlooked this step, and the dirt clung to the oil from the walnut, making the repair more noticeable.
Selecting and Preparing Your Walnut
Choose a fresh, unshelled walnut, ideally one with mature, darkened shell. Crack it open gently using a nutcracker or pliers—avoid crushing the nut inside. Remove the shell fragments to expose the nutmeat. Rub the walnut gently over the scratch, applying light pressure. The natural oils and dark pigmentation in the shell blend with the existing finish, disguising minor blemishes. I’ve found that warming the walnut slightly enhances the oil transfer, so I often let it sit in my palm for a few seconds before application.
Application Technique for Best Results
Hold the walnut in your fingertips and firmly rub it along the scratch in a circular motion for about 10-15 seconds. Focus on the damaged area, ensuring the oils penetrate the scratches and blend the color. If the scratch is deep, repeat the process after a few minutes. The key is patience—rushing can leave uneven spots. I once hurried, and the repair looked patchy until I gently repeated the process, which cleared up the inconsistency.
Enhancing the Blend with Buffing
After rubbing the walnut, buff the area with a soft, clean cloth to spread the oils evenly. Use a light, circular motion to polish the surface, helping the oils seep in and smooth out the repair. This step locks in the color and adds a subtle shine. In my experience, a microfiber cloth works perfectly, giving the area a natural luster that mimics the original finish. Be cautious not to overbuff, which can remove excess oil and cause uneven patches.
Sealing and Protecting the Repaired Area
If you’re aiming for longer-lasting results, especially in high-traffic zones, applying a small amount of hardwood floor finish or polycrylic can seal the repair. Use a fine brush or cloth to dab a thin layer over the blended area. Allow it to dry completely before walking on the floor. I once skipped this step and noticed the repair fading faster; sealing provides an extra layer of protection, keeping your floors looking flawless for longer.
Additional Tips for Success
Consistency is vital—apply the walnut repeatedly over several sessions if necessary for deeper scratches. Always test the technique on a hidden area first to ensure color match. Remember, patience and gentle pressure yield the best results. If the scratch remains stubborn, consider blending with a matching furniture wax or a wood touch-up pen for a flawless finish. For comprehensive insights on maintaining and restoring hardwood, explore this hardwood floor care guide.
Many homeowners and even professionals hold onto beliefs about hardwood floors, tile, and installation techniques that can lead to costly mistakes. Let’s uncover some of the most prevalent myths and explore the nuances that can elevate your flooring projects beyond beginner level.
Why More Adhesive Is Not Always Better
One widespread misconception is that using excessive adhesive guarantees a stronger bond. In reality, over-application can cause uneven surfaces, trapping air and moisture, which may lead to future buckling or delamination. Experts recommend following manufacturer guidelines and understanding the specific needs of your subfloor and tiles. For detailed insights into proper application, refer to this flooring installation guide. Properly choosing and applying the right amount of adhesive ensures durability without compromising the floor’s integrity.
The Hidden Trap in Ignoring Subfloor Conditions
Many overlook the importance of subfloor preparation, mistakenly believing that a level subfloor isn’t critical. This oversight can cause telegraphing of imperfections through the surface, crack formation, or uneven wear. Waiting until visible issues emerge is a costly mistake. Advanced installers always assess and prepare the subfloor meticulously, employing techniques like mechanical grinding or self-leveling compounds. Learn how to achieve flawless leveling before installing your flooring. Remember, a perfectly leveled base is the foundation of a stunning, long-lasting floor.
What Makes a DIY Tile or Hardwood Job Fail So Often?
Many assume that DIY projects can replicate professional results with minimal training. The reality is, flooring installations involve subtle details—like precise spacing, proper acclimation, and controlled curing—that deeply impact the final appearance and function. Rushing or cutting corners can lead to gaps, lippage, or tiles that loosen over time. For advanced strategies that can improve your DIY results, check out professional tile installation tips.
Make Your Floors Last with Correct Material Choices
Another misconception is that all flooring materials perform equally under the same conditions. In truth, choosing the right type—whether hardwood, engineered wood, laminate, or tile—depends on factors like humidity, traffic, and subfloor compatibility. For example, engineered wood offers superior stability in moisture-prone areas, but many underestimate its limitations. For expert guidance on selecting perfect materials, explore tile and hardwood pairing tips. Making informed choices now prevents costly replacements later.
Understanding these nuances helps you avoid common pitfalls and achieve flooring with professional finish quality. Have you ever fallen into this trap? Let me know in the comments, or reach out with your questions—together, we can Master your flooring project for lasting beauty.
Investing in Quality Tools for Long-Term Flooring Excellence
Having the right equipment can make all the difference in installing and maintaining beautiful, durable floors. I personally rely on a high-quality digital moisture meter, such as the Tramex CM-100, to monitor subfloor moisture levels before installation. This ensures optimal adhesion and prevents future issues like buckling or warping. Additionally, a calibrated laser level, like the Bosch GCL 25, allows me to achieve perfectly level surfaces, which is crucial for both hardwoods and tiles. Precise leveling prevents lippage in tiles and uneven gaps in wood flooring, significantly extending the life of your project. When selecting tools, opt for professional-grade equipment, as costlier tools tend to offer higher accuracy and durability, saving money over time.
Maintaining Floors to Keep Them Looking Flawless
Regular maintenance is essential for preserving the beauty and integrity of your flooring. I recommend establishing a routine that includes gentle sweeping to remove debris and using microfiber mops with neutral pH cleaners to avoid damaging finishes. For hardwood floors, applying a quality polish like Bona Hard-Surface Floor Polish periodically helps maintain the protective topcoat and enhances shine. In high-traffic areas, consider installing protective pads on furniture legs and area rugs to prevent scratches. Moreover, understanding the importance of proper humidity levels is significant; using a humidifier or dehumidifier maintains consistent conditions, reducing wood expansion or contraction. Consistent upkeep can dramatically extend the lifespan of your floors, making them look new for years.
Future Trends in Floor Maintenance and Installation
The industry is leaning toward smart flooring systems integrated with IoT sensors to monitor environmental conditions and alert homeowners to potential issues before damage occurs. Additionally, advancements in self-leveling compounds and adhesive formulations promise easier and more reliable installations. Embracing these technologies now can streamline future projects and minimize errors. To learn about achieving professional-grade leveling, check out our comprehensive leveling guide.
How do I maintain my floors over time?
Developing a consistent cleaning and inspection routine helps catch minor issues early. Regularly assess for signs of wear or damage, and address scratches or chips promptly using appropriate repair kits. For hardwoods, reapplying sealants or finishes every few years can restore luster and provide an additional protective layer. For tiles, resealing grout lines every 2-3 years prevents staining and degradation. Keeping humidity levels stable with devices like the Honeywell HE360A humidifier can prevent many seasonal problems. By investing in these maintenance habits, you’ll ensure your floors remain stunning and functional long after installation.
If you’re serious about professional results, I highly recommend mastering advanced leveling techniques, such as those detailed in expert-approved methods. Implementing even one of these tips can dramatically improve your installation’s durability. Why not try adjusting your leveling approach with a laser level or self-leveling compound this weekend? It’s a game-changer for seamless, long-lasting results.
3 Hard-Won Lessons That Changed My Flooring Journey
One of the most eye-opening lessons I learned was the importance of meticulous subfloor preparation—skipping this step can turn a beautiful install into a headache with cracks and unevenness. Another revelation was that universal solutions rarely work; each wood or tile type demands tailored products and techniques, which is why I now dive deep into material specifics before starting. The toughest insight, though, was realizing that patience outweighs perfectionism—rushing a leveling or sealing process often leads to longer-term issues, so I embrace taking my time for the best results. These lessons serve as a reminder that mastery in flooring stems from attention to detail and continuous learning.
Tools and Knowledge That Elevated My Projects
For anyone serious about flawless hardwood, tile, or leveling work, investing in a quality laser level like the Bosch GCL 25 is non-negotiable—precision makes a world of difference. I also rely heavily on the comprehensive leveling guide to troubleshoot common challenges and refine my techniques. When choosing materials, I turn to books such as “Flooring Installation Secrets” which provide detailed insights that save time and money in the long run. For tools, a good-quality self-leveler and moisture meter are worth every penny—they’re my secret weapons for consistency and durability in every project.
Your Next Step in Flooring Success Starts Today
Remember, transforming your space with hardwood or tile isn’t just about technique; it’s about cultivating confidence in your craft. With the right mindset, tools, and resources, you can elevate your DIY or professional projects to a whole new level. Don’t let fear of errors hold you back—every mistake is a lesson in disguise. Now is the perfect moment to begin your next flooring adventure, knowing that each step brings you closer to perfection. Interested in exploring more expert tips? Check out our detailed guides and join a community dedicated to flooring excellence. Your beautiful, durable floors are waiting—go make them happen!