
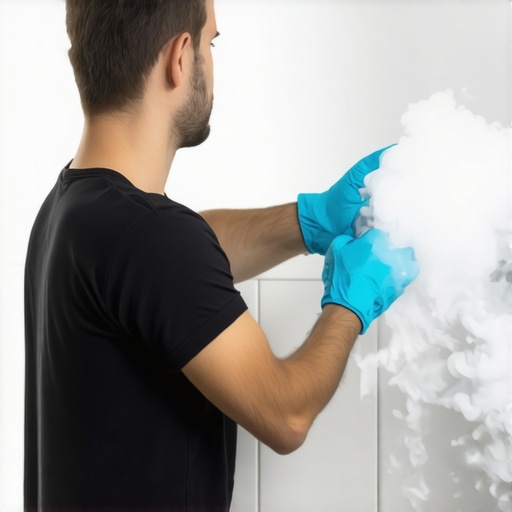
Ever had that moment when you peel back a stubborn tile only to realize it’s been glued so tight that it feels like trying to lift the roof off your house? I remember the first time I tackled an old peel-and-stick tile floor, eager to refresh my space, only to be met with a wall of resistance and a sticky mess that refused to budge. It was frustrating. I knew there had to be a better way—I just didn’t know it yet.
The Hidden Power of Dry Ice for Tile Removal
Then, a lightbulb went off during a chance conversation with a flooring pro—what if I used dry ice to loosen those tenacious tiles? The idea sounded unusual, even a little risky, but my curiosity was piqued. After some research and a few daring experiments, I discovered that dry ice can be a game-changer for removing old peel-and-stick tiles. It works by cooling and shrinking the adhesive, making it easier to lift the tiles without damaging the underlying surface. Believe it or not, this method is not just a gimmick; it’s backed by professionals who appreciate its efficiency and safety—when done correctly.
Am I Falling for a Gimmick? Debunking the Skepticism
I’ll admit, early on I made the mistake of rushing in without understanding the proper techniques. I underestimated the importance of wearing gloves and eye protection, which nearly led to a frostbite scare—not exactly a neighborly experience! But once I learned the nuances of handling dry ice safely, I found that it’s not only effective but also relatively straightforward. If you’re worried about whether this tactic is just hype, know that many DIY enthusiasts and contractors alike swear by it for its minimal mess and preservation of flooring surfaces. Curious about how to do it correctly? Check out this step-by-step guide to tile removal.
So, if you’ve been facing the frustration of stubborn old tiles that just won’t come up—without risking damage to your subfloor—I promise that the dry-ice method might be your new best friend. Stay tuned, because next, I’ll walk you through the exact process I used to master this technique and salvage my flooring project.
,
Prepare Your Workspace and Safety Gear
Before diving into the dry ice process, ensure your workspace is well-ventilated. Wear heavy-duty gloves, safety goggles, and a long-sleeve shirt to protect against frostbite and cold burns. Clear the area of any obstructions and cover nearby surfaces with cardboard or plastic to shield from condensation or accidental mishandling. In my previous project, I laid down a thick tarp and kept a water spray nearby—this kept the frostbite risk minimal and made cleanup easier.
Apply Dry Ice Correctly for Optimal Results
Break the dry ice into manageable chunks using a hammer—picture it as cracking open a giant candy. Once ready, carefully place the dry ice directly onto the tile’s adhesive edge, ensuring contact points are snug for maximum cold transfer. Let it sit for about 15-20 minutes; during this time, the adhesive cools and contracts, loosening its grip. In my case, I used a small shovel to press the ice into tight corners, which improved contact—resulting in a cleaner lift.
Use Heat to Accelerate Loosening
After the cooling phase, gently tap the tile edges with a rubber mallet or a putty knife to encourage lifting. If a tile resists, apply more dry ice and wait a few extra minutes before repeating the process. Think of it as a slow freeze that makes the glue brittle without risking damage to the substrate. I once had a stubborn corner; reapplying the ice and gently prying with a flatbar broke the tile free without any damage.
Lift and Remove the Tiles Carefully
Once the adhesive is sufficiently cold and contracted, start at a corner with a putty knife or a pry bar. Work slowly and methodically, applying gentle leverage rather than force. Imagine peeling a sticker—slow and steady wins the race. In my experience, using a wide, flat pry bar distributes pressure evenly and prevents cracking the tile or damaging the subfloor. If necessary, reapply dry ice to stubborn spots. Regularly inspect the underside of the tile; it should come away with minimal residue.
Clean Up Residue and Prepare for Next Steps
After tile removal, clear leftover adhesive with a plastic scraper while the area is still cold; this brittle glue is easier to remove. For stubborn residuals, warm water or a commercial adhesive remover can help, but be cautious not to damage the substrate. Once cleaned, inspect the subfloor for damage or unevenness. If needed, level the surface to ensure a smooth foundation for new flooring—check out this comprehensive guide to floor leveling.
When it comes to achieving a flawless floor, many homeowners and even some professionals fall prey to myths that can sabotage their projects. A widespread misconception is that a surface just appears level to the naked eye, so you don’t need to double-check with precise measurements. However, subtle unevenness—less than a quarter inch—can cause significant issues later, such as cracked tiles or squeaky hardwoods. Using a high-quality laser level or a manual straightedge during initial assessments can save time and money in the long run.
Another prevalent mistake is underestimating the critical importance of proper subfloor preparation before installing new flooring, especially when working with materials like hardwood or tile. Many assume that resurfacing the visible surface suffices, but if the subfloor isn’t perfectly flat and stable, the entire floor’s integrity is compromised. This oversight often leads to creaking, buckling, or tile cracks, which could have been avoided by thorough leveling and moisture barrier application. For detailed techniques, check out this guide on flooring installation pitfalls.
Most seem to believe that self-leveling compounds are foolproof for correcting uneven surfaces. The reality is, these products demand meticulous mixing, application, and curing conditions. Overlooking the manufacturer’s instructions or rushing the process can result in an inconsistent, weak surface. A particularly tricky nuance is that some compounds suffer from air entrapment, leading to a rough finish that defeats the purpose of leveling. Expert insight from industry professionals emphasizes that mastering these nuances is essential—so don’t rush this step. Learn more about advanced leveling secrets here.
What’s the risk of ignoring subtle subfloor imperfections when installing durable materials?
Skipping careful assessment can cause uneven wear and premature failure of your flooring, costing more down the line. Studies from the Flooring Contractors Association confirm that neglecting small imperfections during preparation often results in costly repairs or replacements. It’s clear that attention to detail before laying the first tile or planking can dramatically impact the longevity and look of your floor. Remember, the devil is in the details—don’t settle for a less-than-perfect surface.
Have you ever fallen into this trap? Let me know in the comments.
Keep Your Floors in Prime Condition: Essential Tools for Maintenance
Maintaining the integrity of your hardwood, tile, or other flooring types over time requires more than just routine cleaning. I personally swear by using a high-quality microfiber mop like the O-Cedar Dual-Action Microfiber Spray Mop, which gently lifts dirt without scratching delicate surfaces. For deep cleaning, a steam cleaner such as the Bissell SteamShot Handheld Steam Cleaner proves invaluable for sanitizing grout lines and removing stubborn grime, especially in tiled areas. These tools help extend your floor’s lifespan and keep it looking vibrant.
Investing in a moisture meter is another smart move—the Tramex Moisture Encounter is my go-to device for regularly checking subfloor moisture levels before re-coating or applying new finishes. This proactive measure prevents issues like warping or peeling, saving you significant repair costs in the future. When it comes to hardwood floors, using a dedicated floor polish like Bona Hardwood Floor Polish can restore shine and provide a protective layer that resists wear and tear, maintaining your investment beautifully.
Embracing Technology: Software and Methods for Floor Monitoring
For larger projects, software solutions such as PlanSwift enable precise measurement calculations, helping you manage ongoing maintenance schedules effectively. These programs assist in tracking areas requiring refinishing or repairs, ensuring no part of your flooring is neglected. Additionally, laser measurement tools like the Bosch GLL 55 enable you to detect uneven surfaces or shifts over time, allowing for timely smoothing or level adjustments. Integrating these tools into your routine ensures the long-term beauty and functionality of your floors.
Furthermore, considering preventative measures like installing vapor barriers during initial installation can drastically reduce moisture-related issues. For instance, a moisture mitigation membrane set up beneath your flooring acts as a safeguard against unexpected humidity fluctuations, which are common in basements and ground-level installations. Regular inspection using infrared cameras can spot early signs of moisture intrusion, facilitating timely intervention before damage occurs.
What’s the best way to keep your floors looking spectacular year after year?
Consistent maintenance paired with the right tools is key. Applying a periodic buffing with a floor buffer machine, such as the Salsbury Floor Buffer, can help maintain an even, polished surface and prolong the life of your finish. Additionally, re-sealing grout lines every few years with a high-quality sealant like Laticrete SpectraLOCK ensures they resist stains and moisture ingress. Don’t forget to follow manufacturer-specific recommendations found in guides like this detailed flooring care guide to avoid common pitfalls and safeguard your investment.
Stepping up your maintenance regimen with these targeted tools and techniques will yield impressive long-term results, making future repairs or renovations much simpler. Inspired? Try integrating a moisture meter into your routine; it’s a small step that can prevent major headaches later on. Ready to explore more advanced strategies? Check out the comprehensive pro secrets for flawless floor upkeep.
The Hardest Lesson I Learned About Floor Leveling and Tile Removal
One of my biggest realizations was that rushing the preparation phase often leads to setbacks. I once skipped detailed subfloor inspection, only to face uneven tiles and cracks later. Patience and thorough assessments have saved me from multiple headaches, reinforcing that precision upfront pays dividends. This insight emphasizes the importance of investing time into pre-installation checks, which can be explored further in this comprehensive guide to flooring mistakes.
Three Myths About Floor Leveling That Had Me Doubting Myself
- Leveling is Only for New Floors: False. Proper leveling is essential whether you’re installing new flooring or restoring an old space, preventing premature wear and unevenness.
- Self-Leveling Compounds Are Foolproof: Not entirely. They require proper mixing and application; rushing or misusing can cause weak spots, as I painfully discovered.
- A Little Unevenness Is Acceptable: Think again. Even minor imperfections can lead to significant issues in the longevity and aesthetics of your floor, making precise leveling a must.
Lessons from the Pros You Might Not Hear Often
Professionals stress that the devil is truly in the details. Small steps like using a laser level or infrared camera can make a dramatic difference. Moreover, understanding the subtle interactions between moisture, substrate preparation, and materials is crucial. For further insights, check out this expert resource on flawless floor leveling, which demystifies complex processes in simple terms.
Resources That Shaped My Approach
- Floor Leveling Guide: The ‘Ultimate Guide to Floor Leveling’ provided step-by-step strategies that transformed my DIY process from guesswork to mastery, emphasizing patience and precision.
- Professional Tools: A laser level and moisture meter became my best friends—trustworthy instruments that ensured accuracy and prevented costly mistakes.
- Community Insights: Online forums and tutorials offered real-world advice and troubleshooting tips, making complex challenges approachable and manageable.
You Have the Power to Transform Your Space
Taking on flooring projects can feel intimidating, but with the right knowledge and tools, you can achieve stunning results. Remember, every successful project starts with patience, meticulous planning, and a willingness to learn from experience. Now is your chance to elevate your space—dive into the details, embrace the process, and enjoy the transformation. Curious to see what’s possible? Start exploring more advanced techniques and tools, like mastering floor-leveling secrets, available in our comprehensive resource.