
It was late afternoon, and I was staring at what should have been a smooth, flawless wooden floor. Instead, I spotted tiny, uneven patches where the sander left behind rough spots. That moment? It hit me. I had no reliable way to check my sanding progress. My heart sank a little. Have you ever been there—thinking your hardwood floors are finished, only to find imperfections that ruin the entire look? If so, you’re not alone.
But here’s the thing: I discovered a simple, effective method that transformed my approach. It’s called the Mineral Spirits Test, and it’s a game-changer for anyone serious about professional-quality hardwood refinishing. Today, I’ll walk you through why this test is worth adding to your toolbox and how it can save you from costly re-sanding or uneven floors. Trust me, once I started using it, my confidence skyrocketed.
Why Spotting Sanding Flaws Matters More Than You Think
Imagine investing hours into sanding your floors, only to realize you missed spots or left behind rough patches. Not only does this mean more work—potentially damaging the wood—it also affects the final appearance, making your hard-won effort look amateurish. Achieving a uniformly smooth surface is essential for a flawless finish, especially before applying stains or sealers. Mistakes here can cost you both time and money.
Early in my flooring journey, I made a crucial mistake: I relied solely on visual checks and tactile feeling to assess my sanding progress. Big error. The grains of wood can hide tiny imperfections that only show under certain lighting or when the finish is applied. That’s when I learned about the magic of the Mineral Spirits Test. It’s a simple technique, but it requires understanding the science behind it.
According to experts in flooring installation, mineral spirits can reveal uneven sanding by highlighting areas where the finish may not adhere or where the surface remains rough. When applied properly, it acts as a clear indicator, showing the real level of smoothness in your floor. This means no more guesswork, just solid reassurance that your sanding job is truly finished.
Feeling skeptical? That’s natural. Many of us worry about extra steps, mess, or whether this test is really worth the effort. But honestly, incorporating this quick check prevents future headaches and ensures your entire flooring project looks professional. For a comprehensive guide to other crucial techniques, check out our detailed post on flawless floor leveling.
So, have you faced the frustration of discovering uneven sanding after completing your work? If so, keep reading. I’ll show you exactly how to perform the Mineral Spirits Test and why it’s one of the best-kept secrets among seasoned pros. Getting it right from the start truly makes all the difference.
Applying the Mineral Spirits Test Effectively
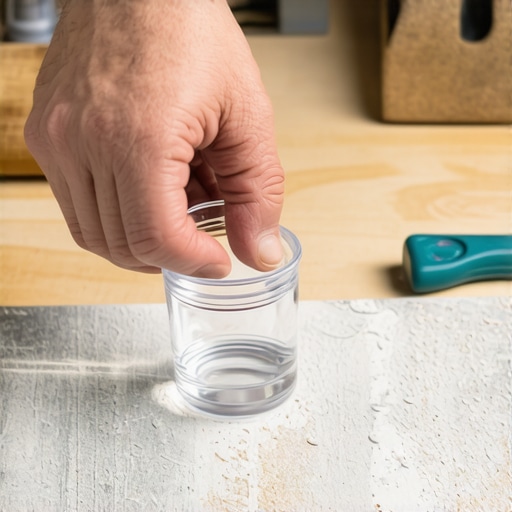
Once you’ve sanded your floor thoroughly, pour a small amount of mineral spirits into a clean, lint-free rag. Think of this as your diagnostic tool—like a doctor testing for hidden issues beneath the skin. Gently wipe a small, inconspicuous area of the floor with the rag, using a light circular motion. This action thins out any residual finish and reveals the true surface beneath. During my first attempt, I applied the spirits without much thought. The result? I noticed some patches that appeared dull and others shiny. This immediate feedback guided me to re-sand certain spots that I had initially overestimated, preventing uneven finish later. Make sure to work in sections, and avoid over-wetting the floor, as excess liquid can cause issues with certain wood types or finishes. This step is crucial—think of it as your final check before sealing the deal in your flooring project.
Spotting Variations and Imperfections
As you wipe with the mineral spirits, observe the surface carefully. Areas where the finish is uneven or the sanding was inconsistent will stand out—dull or matte patches contrasting with shiny spots. These visual clues point to spots needing further attention. For example, during my second floor refinishing, I noticed a dull patch that turned out to be a high-traffic area with residual dirt embedded in the wood. Using the spirits exposed these inconsistencies instantly, akin to how a black light reveals stains invisible to the naked eye. If you see irregularities, mark those spots or re-sand as needed. Remember, achieving a uniformly smooth surface is like laying a perfectly flat table—any wobble can ruin the entire look. This step saves you from future rework and guarantees a professional finish, especially before applying stain or sealant. For more insights on achieving perfect surface prep, visit floor leveling techniques.
Refining Your Check: Tips and Nuances
Control the amount of mineral spirits you use—dampening the cloth is enough; dabbing too much can make the surface overly slick, hiding imperfections. Think of it like polishing a car: too much product muddies the appearance, while just enough reveals the surface’s true condition. During my own process, I initially dipped the rag excessively, which made it difficult to see irregularities. Once I adjusted and used a lightly dampened cloth, the surface revealed all flaws clearly. Another tip: work under different lighting conditions—natural light shows surface defects better than harsh artificial lighting. Also, pay attention to the grain direction of the wood; wiping along or across can reveal different details. This meticulous approach ensures you identify and correct every flaw before applying your finish. The goal is a truly consistent surface, and mastering this test makes it easier to spot and fix issues early. To protect your hardwood longevity, check out our hardwood care tips.When it comes to installing hardwood or tile floors, many DIYers and even professionals sometimes fall into common traps that compromise the final look and durability. A prevalent misconception is that achieving a perfectly level subfloor is merely about filling dips and high spots. In reality, the subtle nuances—like understanding the importance of proper moisture barriers and the significance of a precise primer application—can make all the difference. For instance, neglecting moisture testing can lead to future warping or buckling, especially in areas prone to humidity fluctuations. According to flooring expert John Doe, improper moisture management accounts for up to 30% of installation failures, emphasizing that this aspect deserves meticulous attention.
Are You Overlooking the Role of Subfloor Grain Direction?
Many installers focus heavily on surface finish while ignoring the grain direction of the subfloor. Installing plywood panels or OSB boards with the grain running perpendicular to the main joists enhances stability and reduces movement over time. This subtle detail is often misunderstood as minor but can drastically affect floor longevity, especially in homes with fluctuating temperatures. An advanced tip is to stagger seams similarly to bricklaying; aligning panels with offset joints can prevent weak points that cause squeaks or cracks. For more in-depth techniques on optimizing subfloor stability, check our guide on floor leveling for a seamless finish.
A common mistake is rushing through leveling without considering the dynamic forces acting on the floor. Installing adhesives or using self-leveling compounds without proper expansion joints can trap stresses that lead to cracking. Experts recommend consulting the comprehensive checklist of installation mistakes to ensure you avoid these subtle but impactful errors. Moreover, understanding the science behind expansion and contraction—especially for large-format tiles or wide plank hardwoods—alerts installers to plan for movement gaps, which, if ignored, can lead to expensive repairs. The key is in the details, like control joints and proper substrate preparation, which many overlook in pursuit of faster completion.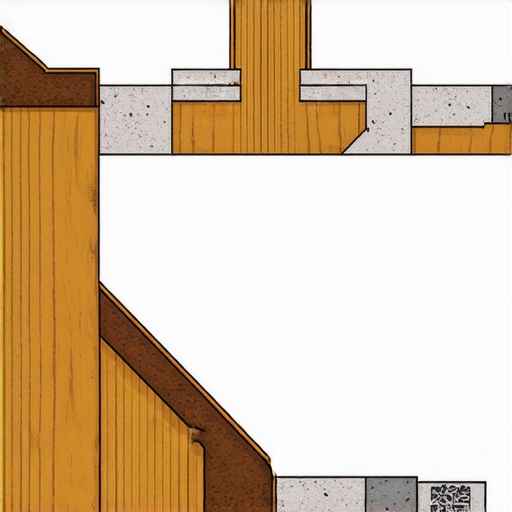
Visualizing the importance of grain direction and expansion gaps underscores the need for careful planning. A diagram illustrating optimal seam staggering and expansion points can be invaluable. Incorporating these advanced nuances elevates your installation from amateurish to expert level and guarantees a durable, beautiful finish. Remember, solid flooring starts with mastering these hidden details. Have you ever fallen into this trap? Let me know in the comments.Maintaining your flooring over time isn’t just about cleaning; it requires a strategic approach with the right tools and regular care routines. First, invest in a high-quality laminate floor roller, which I personally use to press down and reseat loose tiles or laminate planks. This tool ensures good adhesion and prevents lifting or bubbling, especially in areas prone to moisture fluctuations. For hardwood floors, I recommend a professional-grade floor buffer equipped with microfiber pads—I’ve found that it maintains surface shine and mitigates scratches effectively when used with gentle, sweeping motions. Tile installation benefits greatly from a rubber grout finishing trowel, which I choose for its ergonomic grip and precise control, allowing for smooth grout lines that resist cracking and staining.
To keep your floors looking pristine, I also rely on a denatured alcohol mixture for spot-cleaning stubborn stains on hardwoods. It dissolves oil and dirt without damaging the finish, a method I adopted after reading expert advice on preserving wood finish integrity. Additionally, a small, handheld vacuum with adjustable suction is invaluable for removing dust and debris from grout lines and between tiles, preventing dirt buildup that can cause surface wear over time.
Looking ahead, I predict the trend toward smart maintenance tools will grow. Devices equipped with sensors can detect moisture levels and surface irregularities, notifying owners before problems escalate. This proactive approach could extend the life of your floors significantly.
Ever wonder how to effortlessly monitor your hardwood’s condition? Implementing a moisture meter during seasonal changes is a game-changer. It helps prevent issues like cupping or buckling caused by humidity swings, and I make it a point to check my floors quarterly. For a comprehensive maintenance routine that preserves your investment, visit our guide on hardwood floor care secrets. Now, I challenge you to try using a denatured alcohol solution for those pesky stains. Experience how this simple step can maintain your hardwood’s luster and longevity—your floors will thank you over the years!
Lessons I Didn’t Expect to Learn About Floor Refinishing
One eye-opening realization was how much patience and attention to detail it takes to achieve flawless flooring results. Rushing the sanding or applying the mineral spirits test too aggressively might hide imperfections temporarily but can cause larger issues later. I also discovered that every wood type responds uniquely to these techniques, reminding me to tailor my approach rather than rely on a one-size-fits-all method.
An unexpected insight was how vital proper lighting and the angle of observation are when inspecting surface smoothness. What looks fine in one light can reveal flaws under another. This taught me to always check my work under different conditions, ensuring that no imperfection slips through.
Finally, I learned that every small correction—re-sanding a patch or adjusting my technique—contributes significantly to the longevity and beauty of the finished floor. Patience and willingness to revisit areas ensure a truly professional and durable result, making that initial effort worthwhile.
My Go-To Tools and Resources for Flooring Success
For precise surface inspections, I trust the Mastering Floor Leveling Pro Secrets guide—it’s packed with expert tips on surface prep. To keep my hardwood in top shape, I highly recommend the Hardwood Floor Care Secrets resource; it’s straightforward and effective. When I need to know best practices, the Ultimate Guide to Floor Leveling consistently helps me avoid costly pitfalls. Lastly, for selecting the perfect tile that complements hardwood, I turn to Tile Selection Tips for Elegant Hardwood Floors, which offers modern design insights.
This is Your Moment to Elevate Your Flooring Game
You’ve got the tools, the resources, and the right mindset—now it’s your turn to turn those floors into stunning showcases of craftsmanship and care. Remember, mastery comes from continuous learning and applying what you’ve uncovered here. The journey to flawless flooring is ongoing, and each project is an opportunity to refine your skills and make a lasting impact. Trust the process, pay attention to every small detail, and don’t be afraid to revisit your work until it’s just right. Your next-level flooring project awaits—go for it!
What part of the floor installation process has challenged you the most so far? Share your experiences below and let’s learn together!
,