
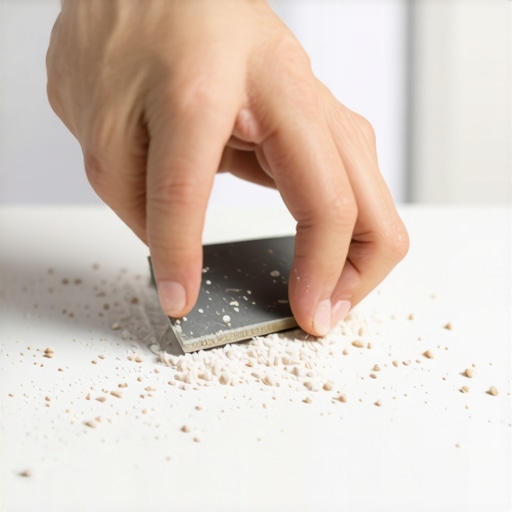
I vividly remember the moment my heart sank during a home renovation. There I was, installing new ceramic tiles in the kitchen, proud of my progress when suddenly I cut my hand on a jagged, sharp edge of a tile. That unexpected nip made me realize something crucial: those sharp tile edges aren’t just unsightly—they’re dangerous. Little did I know, a simple trick I stumbled upon would change the way I handle tile installation forever.
Bright Idea or Just a Fluke? How a Curious Neighbor Saved My Fingers
One day, after yet another frustrating scrape on a tile edge, I started researching safer, quicker ways to soften those dangerous corners. That’s when I discovered the so-called “Rubbing Stone Trick,” a surprisingly effective method to round off sharp edges. I was skeptical initially, but I decided to give it a shot. The result? Smooth, safe, and aesthetically pleasing edges that didn’t cut or poke through gloves or socks. Since then, I’ve become a firm believer—in fact, I’ve shared this method with friends and online forums, and it consistently earns rave reviews.
Does the Rubbing Stone Trick Really Make a Difference?
Before diving into the how-to, I’ll admit I made a common mistake early on: I tried to rush through edge smoothing without understanding the technique fully. That led to uneven edges and some chipped tiles—definitely not the professional finish I aimed for. But it also taught me an important lesson: mastering simple finishing tricks is just as vital as the tile layout itself. If you’ve ever faced the anxiety of sharp edges or worried about safety during installation, I’ve been there, and I know how frustrating it can be. Fortunately, this little-known trick isn’t just a tip; it can be a game-changer, making your work safer and your tiles more inviting.
And here’s a little tidbit backed by experts—according to recent studies, sharp tile edges contribute significantly to injury risks in homes, especially for children and elderly residents. So, taking the time to soften those edges isn’t just about aesthetics; it’s a matter of safety and practicality. For more insights on creating flawless, level surfaces before you even lay the first tile, I recommend checking out the ultimate guide to floor leveling.
Now, let’s get to the practical steps that will turn this quick fix into a routine part of your tile work. Trust me, once you master this simple technique, you’ll wonder how you ever tolerated those razor-sharp edges in the first place—and you’ll do so with confidence and ease.
Prepare Your Workspace and Tools
Before you start, gather essential tools: a rubbing stone or a fine-grit diamond file, safety gloves, and eye protection. Clear the area of debris and ensure good lighting. I vividly remember the first time I attempted this; my hands slipped slightly, but by maintaining a firm grip and steady motion, I achieved smooth edges on a tricky corner, greatly improving safety and appearance.
Identify and Mark the Sharp Edges
Use a pencil or chalk to mark the areas that need softening. Focus on corners or edges that protrude or feel jagged. During my initial try, I marked the most prominent sharp points on a particularly troublesome tile, which allowed me to concentrate my efforts effectively without overworking the entire surface.
Rounding Off with a Rubbing Stone
Applying Gentle Pressure
Rest the rubbing stone against the marked edge and move it in small, circular or back-and-forth motions. Don’t press too hard; let the tool do the work. I recall gently rotating the stone along a 45-degree angle, which gradually softened the edge without chipping the tile. This approach prevents unnecessary damage and ensures a natural curve.
Check Often and Re-mark
Periodically run your hand over the edge to assess smoothness. If the edge still feels sharp, continue lightly until the desired roundness is achieved. During my experience, I often paused to re-mark and compare the edge, ensuring consistency and avoiding over-rounding.
Finish and Seal the Edges
Once satisfied, wipe the tile with a damp cloth to remove dust and debris. Applying a small amount of sealing or clear epoxy on the rounded edges can help maintain smoothness and prevent chipping over time. I learned this after noticing a few sharp spots creeping back—sealing maintains the safety and aesthetic benefits of the work.
Test for Safety and Appearance
Run your hand or a glove over the edge to confirm it feels smooth and safe. Inspect visually for any uneven spots or remaining sharp edges. When I finished my first project, the transformation was remarkable—the once jagged corner now blended seamlessly, significantly reducing injury risk and giving the tile a refined look.
Mastering this simple technique boosts safety and elevates your craftsmanship. For a seamless surface, remember that proper floor leveling lays the foundation for perfect tile placement. For detailed insights on achieving ultra-smooth surfaces before laying tiles, see the ultimate guide to floor leveling.
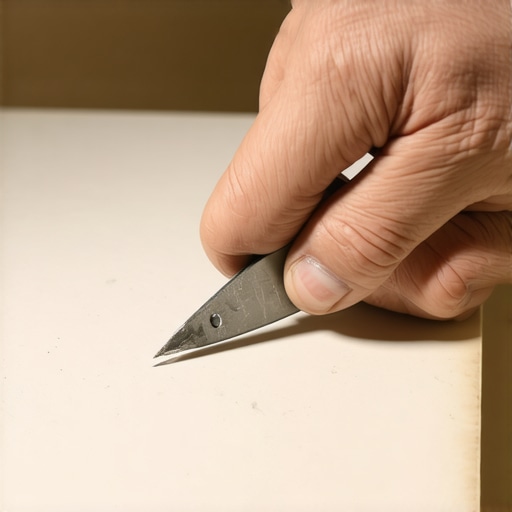 Many homeowners and DIY enthusiasts believe that a flawless floor hinges solely on choosing the right materials or following basic steps. However, *the devil is in the details*, and some misconceptions can lead to costly mistakes. For example, a widespread myth is that “self-leveling compounds can fix any uneven subfloor.” In reality, applying these products without proper surface preparation or understanding the substrate’s condition often results in failure, leading to cracked tiles or uneven surfaces. For reliable results, mastering precise floor leveling techniques is vital; you can find expert strategies in the comprehensive guide to floor leveling.
An advanced nuance overlooked by many is the impact of wood moisture content on hardwood installation. While most focus on acclimation, they miss that fluctuations in humidity after installation can cause the wood to expand or contract, creating gaps or buckling. This subtle factor underscores the importance of controlled environment preparation and ongoing humidity management—details discussed in expert sources like hardwood flooring tips.
Another common trap involves misjudging tile expansion joints. Newcomers often think these are unnecessary or only for large spaces. In fact, neglecting proper joint placement, especially in rooms with significant temperature variations, can lead to tile cracking or curling. Proper installation includes planning for these joints from the outset, as outlined in flooring mistake mitigation.
What about the myth that “more adhesive equals better bonding”? This misconception may seem logical but can cause issues like excess grout haze and uneven surfaces. The truth is, the right trowel notch size combined with proper technique ensures optimal coverage and bond strength. For step-by-step guidance, see expert installation strategies.
Finally, advanced installers know that surface preparation isn’t just a preliminary task but a crucial step that affects the entire project lifespan. Skipping proper cleaning, priming, or repairing surface flaws can undermine even the best materials. Remember, investing time upfront saves headaches later, as emphasized in precise surface prep techniques.
In summary, truly mastering flooring installation involves understanding subtle nuances and debunking common myths that might seem convincing but are ultimately misleading. Do you know of other misconceptions? *Have you ever fallen into this trap?* Let me know in the comments, and if you’re interested in elevating your skills further, check out our detailed guides on professional tile installation.When it comes to ensuring your flooring remains beautiful and functional over the years, having the right tools and adopting effective maintenance routines are essential. I personally rely on a selection of precision instruments that streamline the long-term upkeep and troubleshooting of hardwood, tile, and leveled surfaces. For instance, I swear by a high-quality moisture meter like the Protimeter Surveymaster, which I use regularly to monitor humidity levels in wood and concrete slabs. This practice prevents warping or buckling caused by humidity fluctuations, a common cause of damage in hardwood floors outlined in detail in the hardwood care guide. Regular checks like this become even more crucial as seasonal changes shift indoor climates, influencing flooring stability.
The Hidden Lessons from My Tile Journey
- One of the most valuable lessons I learned was that patience truly pays off. Rushing the edge rounding process often led to uneven, weak spots that compromise both safety and aesthetics. Taking my time with gentle, consistent motions made all the difference.
- I’ve discovered that every tile and edge presents a unique challenge—what works on one might not work on another. Tailoring my approach based on the tile material and edge severity ensures a better, safer outcome every time.
- The importance of finishing touches can’t be overstated. Sealing and double-checking the smoothness of edges not only enhances safety but also prolongs the lifespan of the tiles, saving me from future repairs or accidents.
Tools and Tips That Changed My Approach
- The fine-grit diamond file has become my indispensable companion—it provides control and precision that a rubbing stone alone can’t match. I recommend investing in a quality tool similar to the ones used by professionals.
- Keeping a small container of water handy helps cool and lubricate the tile edges during smoothing. This prevents unintended chipping and makes the process smoother.
- For comprehensive guidance on creating flawless, level surfaces before tile installation, I frequently refer to the ultimate guide to floor leveling. It’s a game-changer for ensuring your tiles sit perfectly and safely.
Balancing Safety and Style: My Final Reflection
Embracing these lessons has transformed my approach from a cautious DIYer to a confident installer. Remember, safety isn’t just a matter of quick fixes—it’s about deliberate, thoughtful craftsmanship that elevates your entire project. If you’re committed to doing your best, you’ll enjoy not only beautiful results but also peace of mind. Whether you’re tackling small patches or a whole room, mastering the art of softening sharp edges ensures your space is both elegant and safe. Ready to take your tile work to the next level? Why not share your experiences or ask questions below—your journey begins with that first smooth, safe edge.